Sorry, it’s been a minute since my last closet update. Surprise, surprise I’m running behind. If you’ve missed my plans to DIY the heck out of my walk-through hall closet (a closet that connects my hallway to my bathroom) then check out the intro and the first update. But if you know exactly what’s going on design-wise then I will tell you I have made my life much harder. “But Jess, how did you do that?” Well, I decided that I wanted the look and texture of roman clay. What is roman clay? It’s an eco-friendly plaster that you apply to smooth interior walls with a putty knife. That’s right, no brushes allowed! “Jess, have you ever applied roman clay to a wall before??” The answer to that is no…until this past weekend. But before we get into my “roman test run,” I wanted to remind y’all that I have decided to also create my own design of Morse Code to honor my late mother with her name and a sweet message she wrote me in a card years ago. I know it sounds weird and my very ugly drawing below doesn’t make it sound cool, but I promise if you keep reading I might be able to change your mind.

Right, roman clay. Last week, I went to Portola Paints & Glazes in Burbank to check out their options since they are known for their limewash paint and roman clay. I went in thinking I had a plan and then immediately realized I wasn’t even sure about the colors I wanted to sample. So with the help of an extremely kind and patient employee who listened to me talk nonsense about my “circle design” (thanks, Dustin!), I chose 10 color swatches to take home with me because I was kinda overwhelmed and sample pots are $10 each. See below.

Every color they have is beautiful but these were the ones I gravitated toward the most for this project. I brought them home and pretty immediately knew I want to go cool-toned. Wish I could have just made that decision on the first trip. SMH.

But actually, when I went back to get the samples, another wildly generous employee (I can’t remember his name!) showed me exactly how to stencil and create my pattern. He even let me film him demonstrating it! I was so grateful because, like I said, I’ve never worked with a product like this and was more or less winging it. Cool cool, Jess. FYI this post is in no way sponsored by Portola. I was just blown away by their customer service and think everyone should know:)
Above are the colors I chose to play with. Please don’t be bummed! I know that the color palettes from my last post were much more vibrant but working with more than two clay colors on this project is too much for my skill level and honestly, not what I want aesthetically. I promise to now bring some more color with the curtain:)
HOT TIP: They recommend using a metal putty knife. But if you are working with a super light roman clay color (like Piano Room which came highly recommended) then you are going to want to use a plastic putty knife. I guess with light colors the metal can leave dark marks.

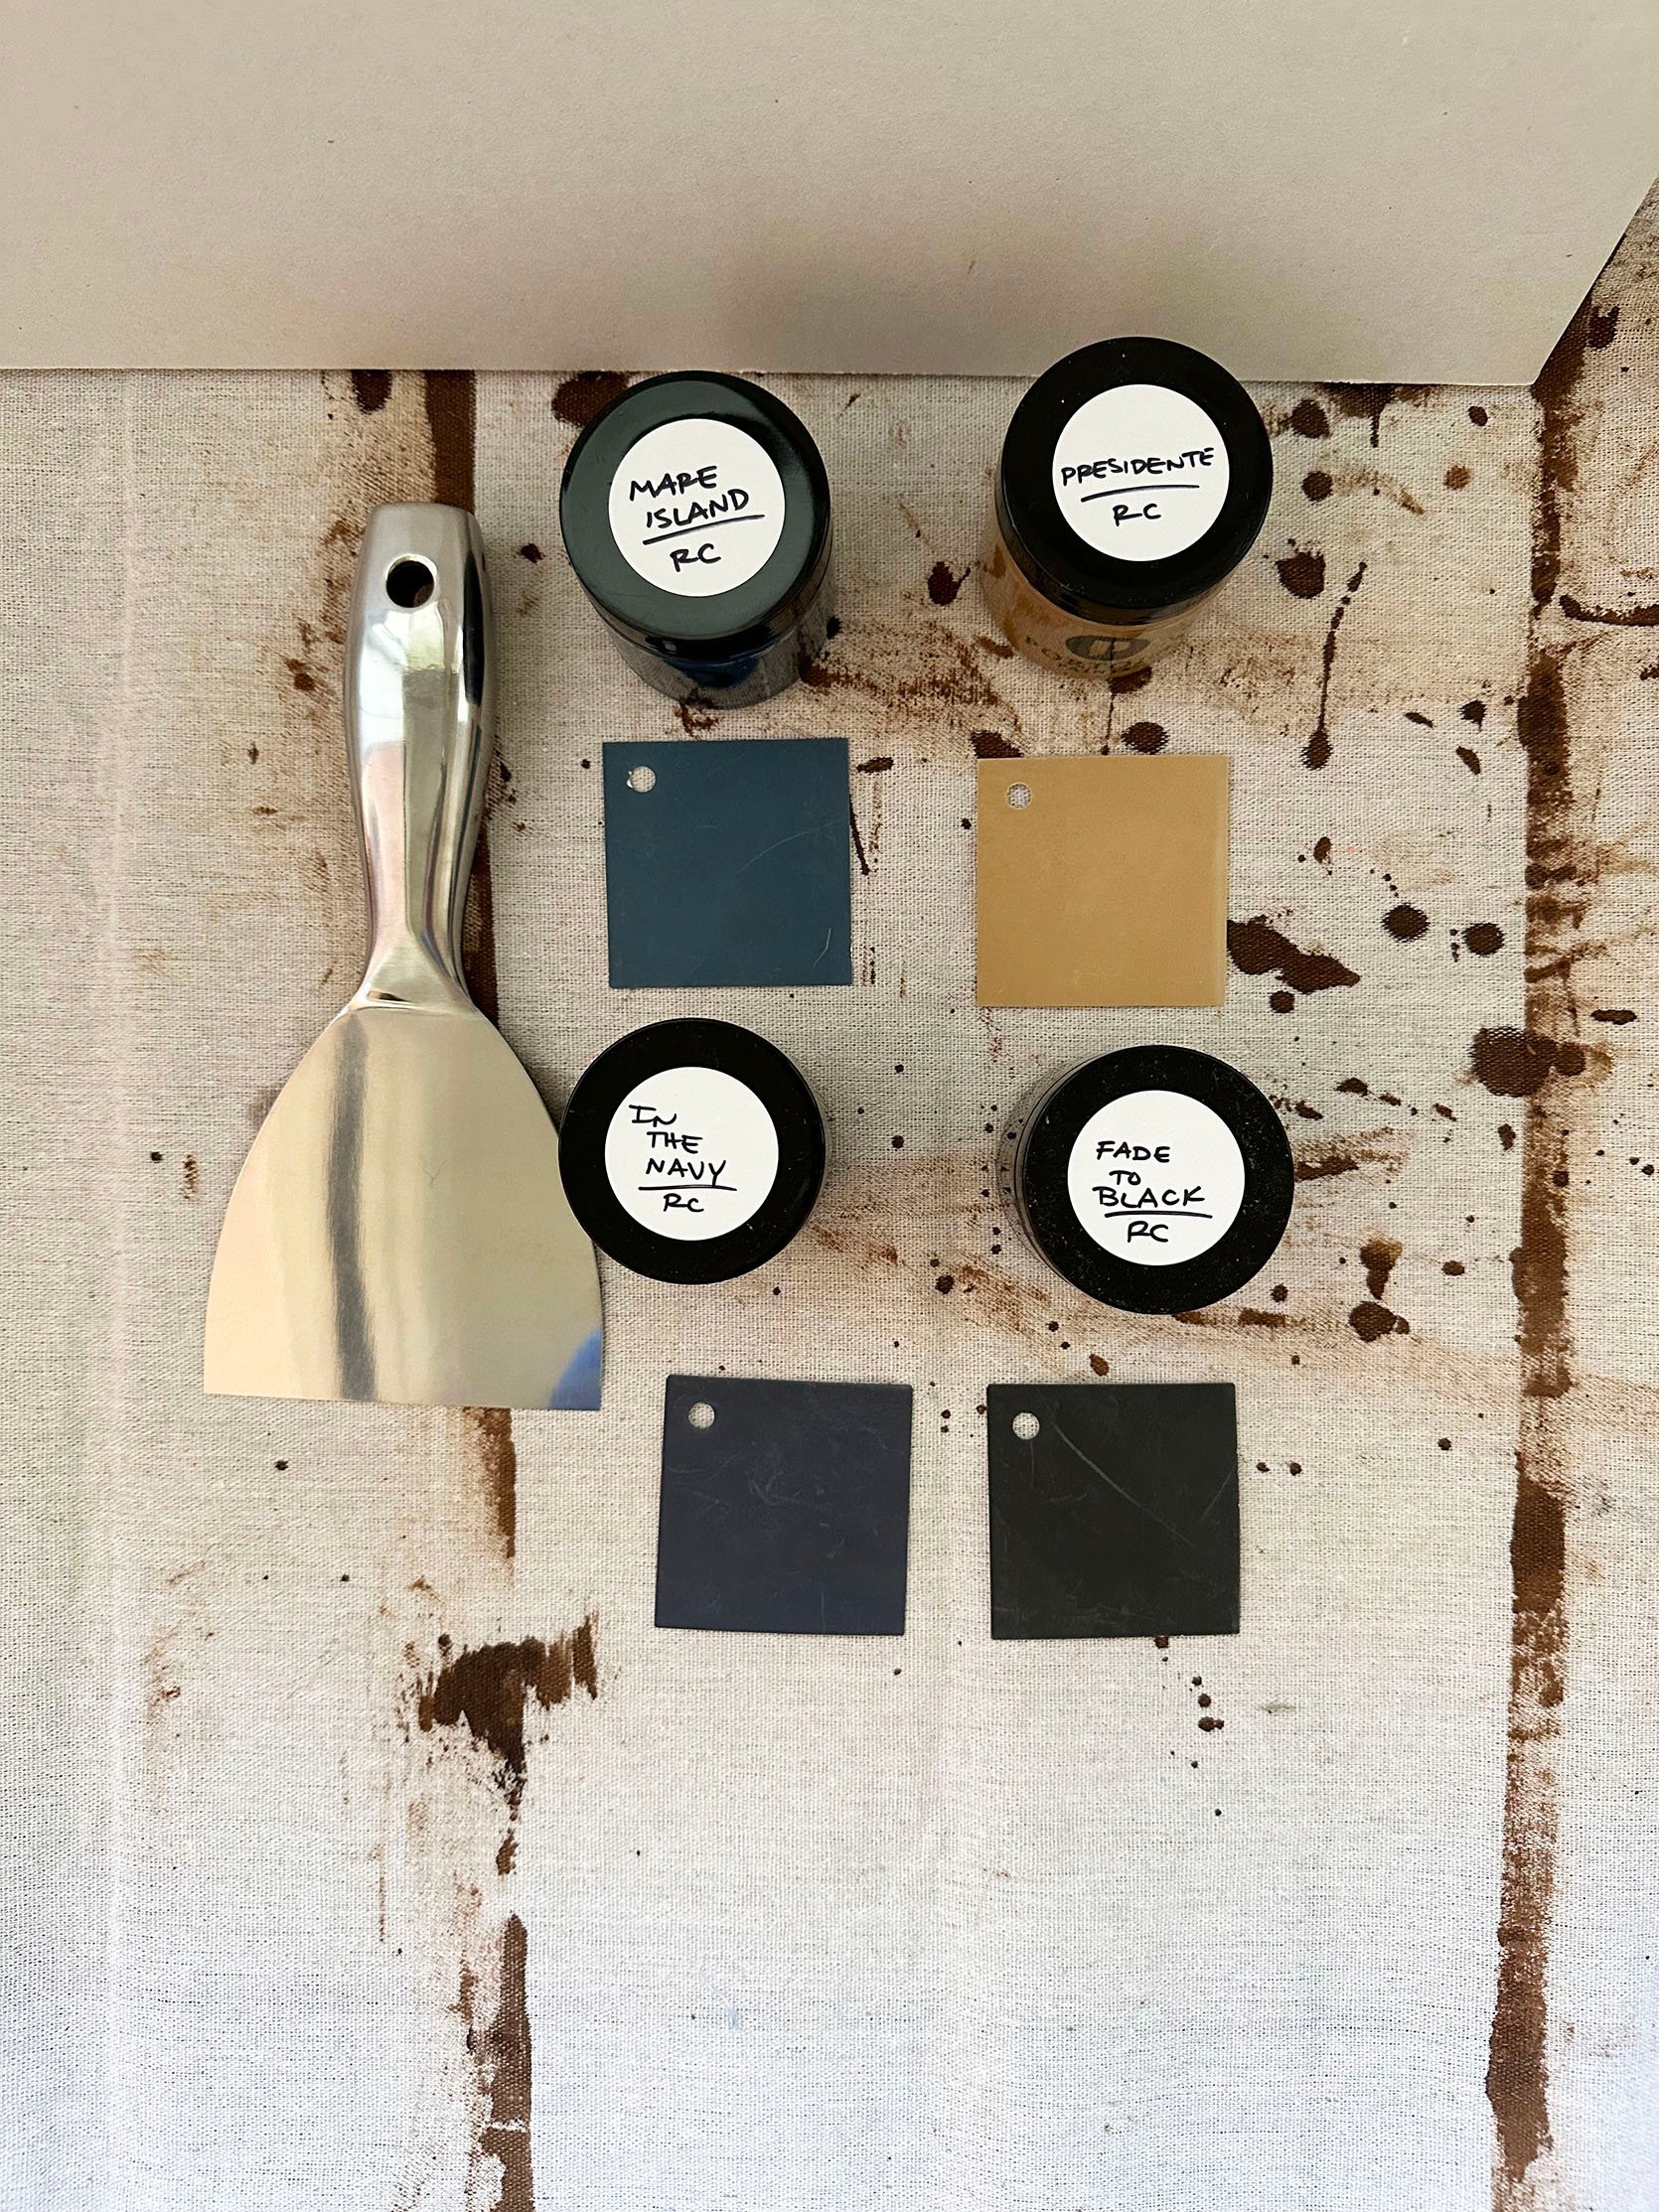
Naturally, I was nervous because if I “failed” my whole design plan would be out the door. Dramatic much? Well, I gave it a go anyway on two small pieces of drywall I bought at Home Depot. But first I carefully watch their YouTube tutorial as I continually glanced at my two empty canvases thinking that all those art classes as a youth had to pay off right now. I also decided that I would try the Presidente (on the left) and Mare Island (on the right) as my two base options. I really liked the light grey but didn’t feel it would make the statement I wanted.
Honestly, after my first coat, I wasn’t mad, slightly impressed even. I think trying to do it on the floor made the bottom halves a little trickier but ultimately I felt like I might not be a lost cause after all .

Then after that first coat dried, I gave it a light sand with 320 sanding sheets, wiped it down with a rag, and went for the second coat. The process is a little laborious but too not terrible.
I then let them dry overnight and the next morning I was ready to try out the stencil method I was taught. Here’s how to do it…


1. Draw your shape directly only on the wall.
2. Cover it with preferably light-colored masking tape.
3. Draw your shape again on top of the tape (I don’t think this is necessary as long as you can see your original stencil FYI).
4. Use an Exacto knife to cut along your stencil line.
5. Remove excess tape.
6. Take a clear sealer, and then with your finger, rub it over the edge of where you are going to paint (for me that’s inside the circle).
7. Take a cloth and remove the excess sealer from the inside. This will keep your paint from bleeding out under the tape.
8. Get your tape and add more to the outside area of your shape to give yourself more of a “cushion” to avoid getting paint where you don’t want it.
9. “Paint” away!


As you can see I added more tape for extra protection but this is how my first and second coats looked. You can go a little thicker on the second coat if you want less “variation”. Just don’t forget to sand and dry wipe after the first coat.


Here is my first full attempt with Presidente and Fade to Black…as you can see I had some mishaps with the tape pulling off the clay. NOT GREAT! But I went back to Portola and asked them if this happened because I applied the clay directly to the drywall without a primer. They kindly said yes and that for my real walls, as long as the current wall paint is water-based paint I will be 100% fine and priming isn’t even necessary!! I was so relieved. I mean if there weren’t all of those tears I would be super happy with it.


And this is my first attempt with Mare Island and Fade to Black. Now, as much as I appreciated that guy showing me his taping method, since my patterns are in a line I came up with a better way that I’ll show you in a minute:)

And here’s how the first round turned out. Not toooooo bad for my first time, right?? I mean sure it was a bit mind-numbing stenciling, taping, cutting, putty knifing(?), sanding, and then putty knifing again…but that’s what I do. Nothing is allowed to be simple with me, I guess. I mean remember the bench??? But the bench turned out amazing and I can’t wait to show you!
Ok, ok. This is how I decided to tape for the second round…

I used two long strips across instead of a million tiny pieces of tape! This way also made it easier to line everything up so I didn’t accidentally trend upward or down. I should also warn you that your cuts (especially if you have circles) are not going to be perfect. Unless you have a VERY steadiest hand! I like the imperfect look for this project.

See how much better that is!? Even with that tear, it’s so much easier to take off.
But now let’s take about which combo looks the best. I photoshopped the pictures so that there weren’t any tears since they are really distracting and won’t be in the final product:)


Ok, so the top row is the Fade to Black and the bottom is In the Navy. I know it’s hard to see the blue on the tan color but that’s just because the lighting is weird. I think I’m leaning toward the blue-on-blue and here’s why…

While this photo was taken at night (aka zero natural light), I think the blue base gives a nice depth, and the lighter blue pattern is more playful.


Also, if you look at the two options from this angle, I don’t love the idea of all of the trim being that tan color. The blue makes more sense to go on every surface inside the closet and it works with the tile of the bathroom better, right?
P.S. Did you notice my new little brass rod??!

And to give you a little design direction for the bathroom, these are the towels I am crossing my fingers I can get. I know that all the combos technically go with these towels but I just like of contrast of the blue with them a bit more.
To be honest, I’ve realized that I am easily scared by dark paint (or plaster) colors in my own home when trim and doors are involved (FYI I’ll be using acrylic paint in the same color for the trim and doors). It feels a little overwhelming and what if it looks bad?? Those are just some silly thoughts that come into my brain but I want/need to quiet them because it’s just paint and I can always pivot.
So thoughts? Feelings? Has anyone worked with roman clay and has tips? Let’s talk because I’m starting next week!
Love you, mean it.
THIS POST WAS ORIGINALLY PUBLISHED HERE.
