Tomorrow we have the reveal of the patio (come back!) so I wanted to take a second to revisit how far we’ve come and walk you through some things that I learned along the way about patio construction. One of the best (and worst) things about this job is the constant learning. I’m in very good hands here, with so many different teams helping both the design and execution. In fact, with this project in particular there might have been a “too many cooks” situation if everyone didn’t work so well together (I love a buffet)! Here’s how it went down (you might need to take notes): Yardzen reached out about partnering on the areas around the house, specifically this patio area and I was so excited to see what they came up with and we hit it off. Great! Right before that Cali, from Studio Campo had signed on to design the whole homestead and our visions were so aligned, so she of course needed to be kinda involved here as well to make sure it was cohesive. We still needed a landscape contractor so we hired Native Northwest to execute the plans. They are also a design-build company, and with Studio Campo being based both in Colorado and Oregon, there were times when we leaned on them for design changes, and when plans change then the design changes…so there was a lot of coordination. Lastly, of course, ARCIFORM was at the time doing the renovation of the house, including the exterior finishes, which shouldn’t necessarily affect the landscaping, but there are some things that crossed over – i.e. stairs, hardscape, the covered walkway, lighting, etc. It’s actually way less confusing than it sounds, but I suppose being more streamlined might have benefitted my brain at times haha. So, it’s kinda hard to talk about credit here as it was such a team effort and very nuanced. OH, and then I went ahead and changed some things at the end anyway because I’m ALSO a designer. HAHAHAHAH. I will absolutely admit that I might not have been the best client this year, BTW. It is what it is. So here we go…
Covered Walkway Change
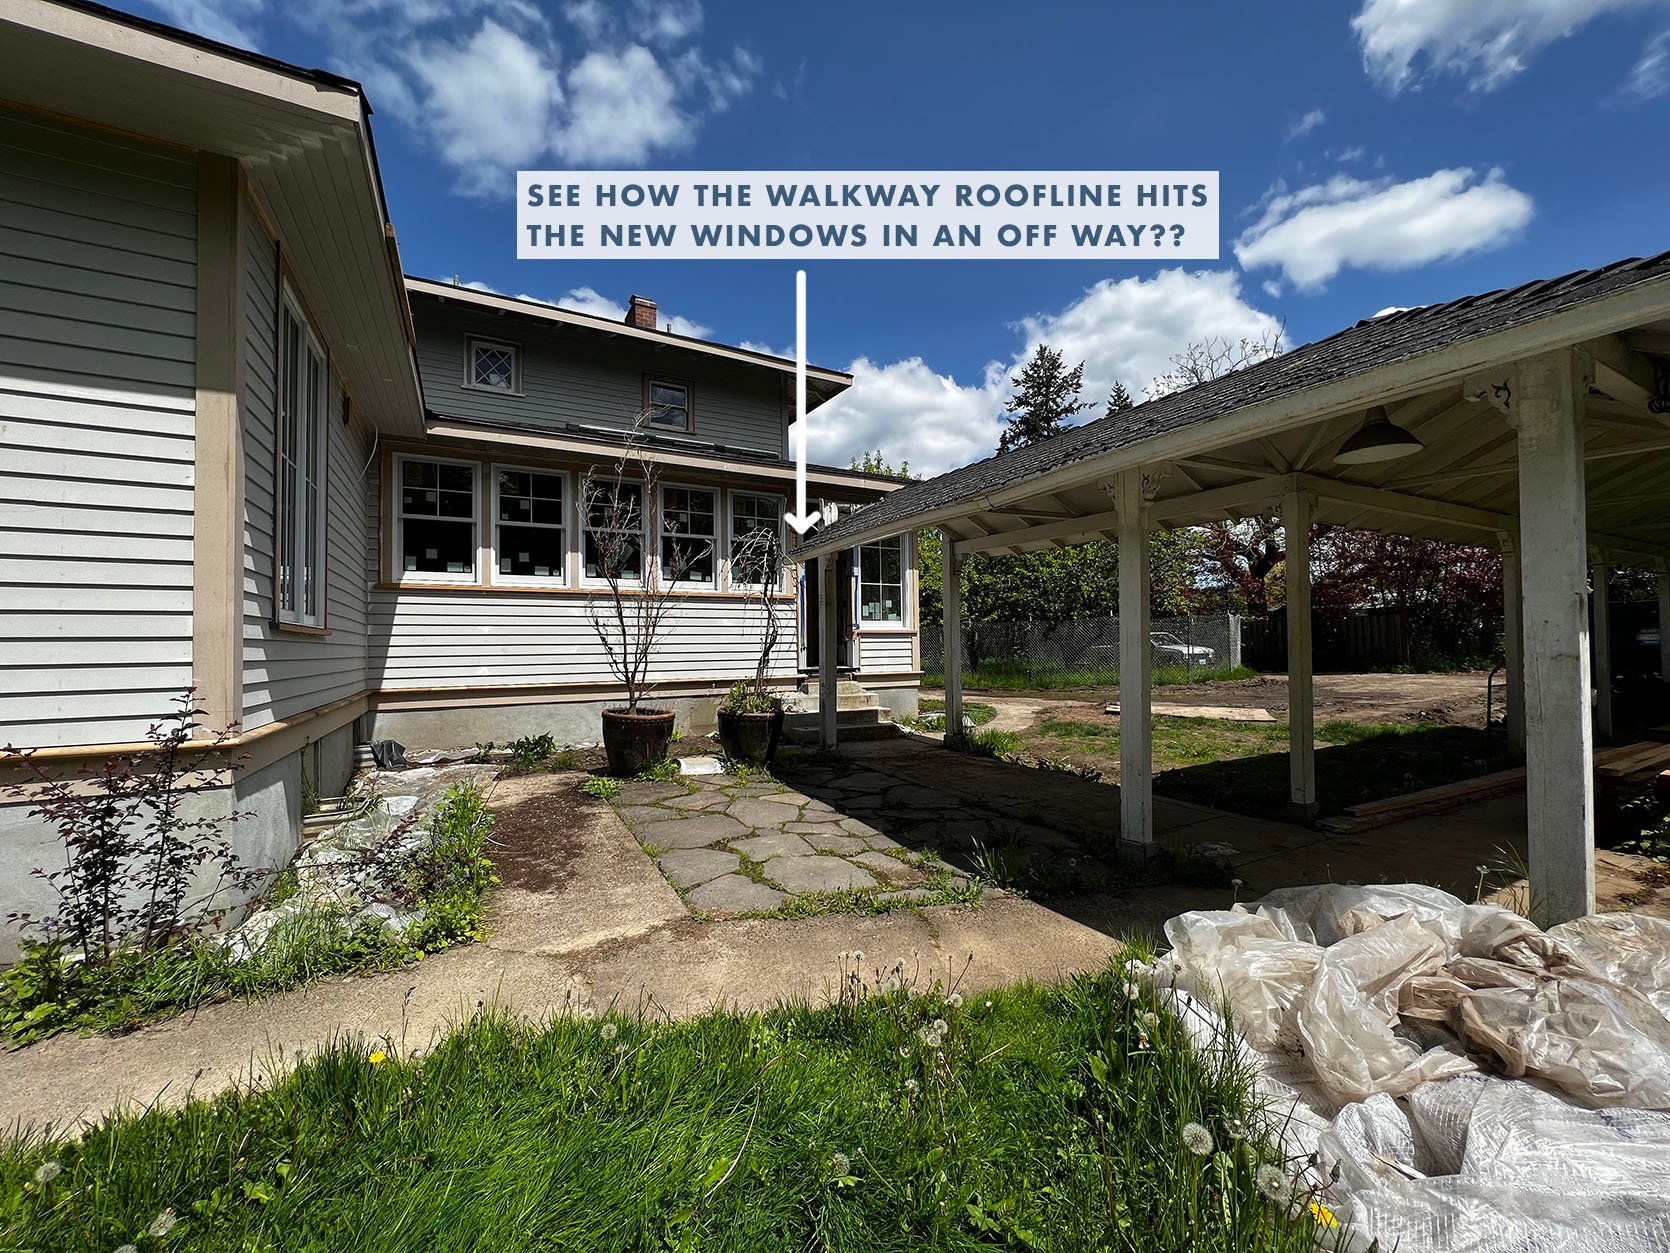
We loved this covered walkway when we bought the house but the kitchen from the inside was designed with so many windows that the covered walkway actually hit halfway through one of the windows. I don’t think that the walkway was calculated in the interior elevations and we weren’t living here. So, after the windows were installed we came to the house and we were like, uh guys. After many months of trying to figure out how to fix it (and it was rotting anyway), we ultimately decided that the kitchen would be better if we simply cut off half of it because even if the door had lined up with the walkway (it didn’t), we would be staring out the kitchen window onto a roofline. But not having a covered walkway in Oregon is pretty unadvisable. At this point, our roof was already done on our house so we couldn’t even add an overhang over the stair landing unless we ripped off part of the roof and reframed it, and since our kitchen windows are so tall there is no room to add even a bracket to do an overhang or awning. Believe me, we went through ALL of the options. Do I wish the kitchen door had a 3′ overhang so that the kids could take off their shoes before they come in? Sure. But honestly, it bothers us way less than we thought it would.
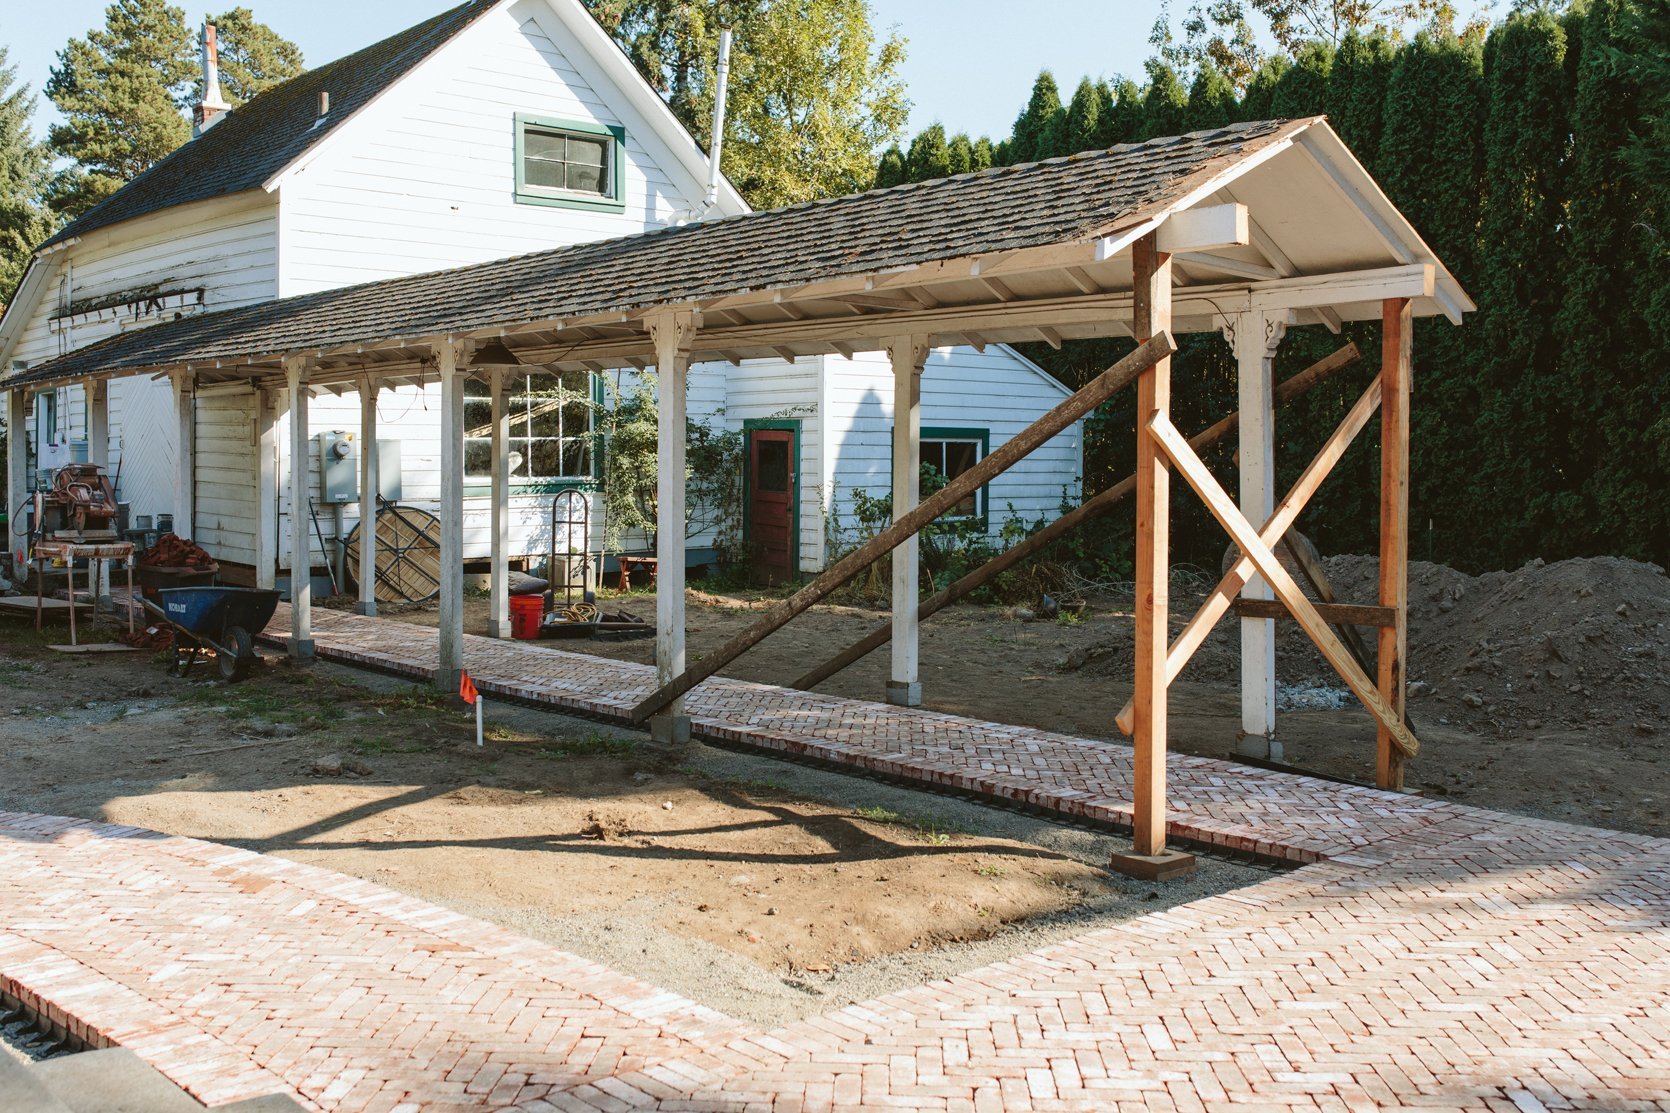
Where the walkway ends is a bit abrupt so we are going to mask it with a mature cherry tree that is like “look at me look at me” and eventually add more rain chains (my new favorite architectural jewelry) to bling up that awkwardness. Jamie (ARCIFORM) cut it off and made it as solid and seamless as possible but there was a while when no one knew whose responsibility it was to design or fix it and it held up literally everyone’s plans. I’ve learned this happens way more than you think and that’s ok:)
Brick Layout Obsession, Then Last Minute Change
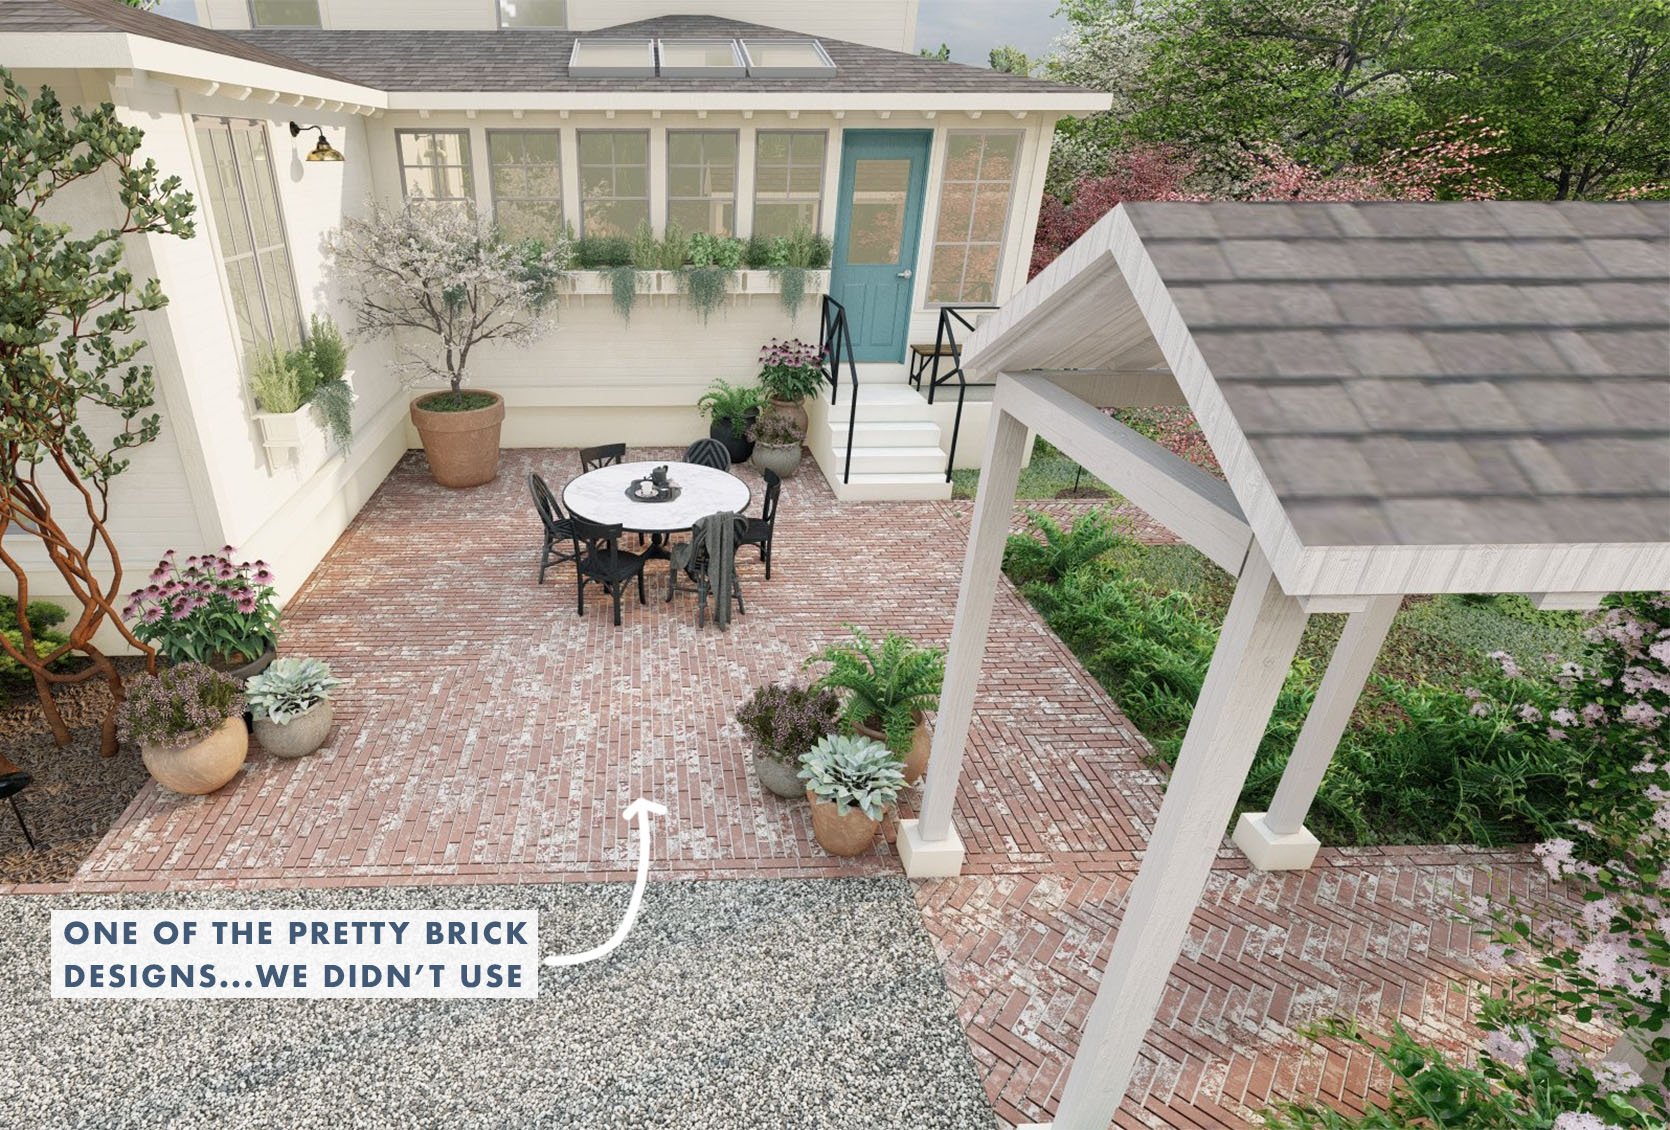
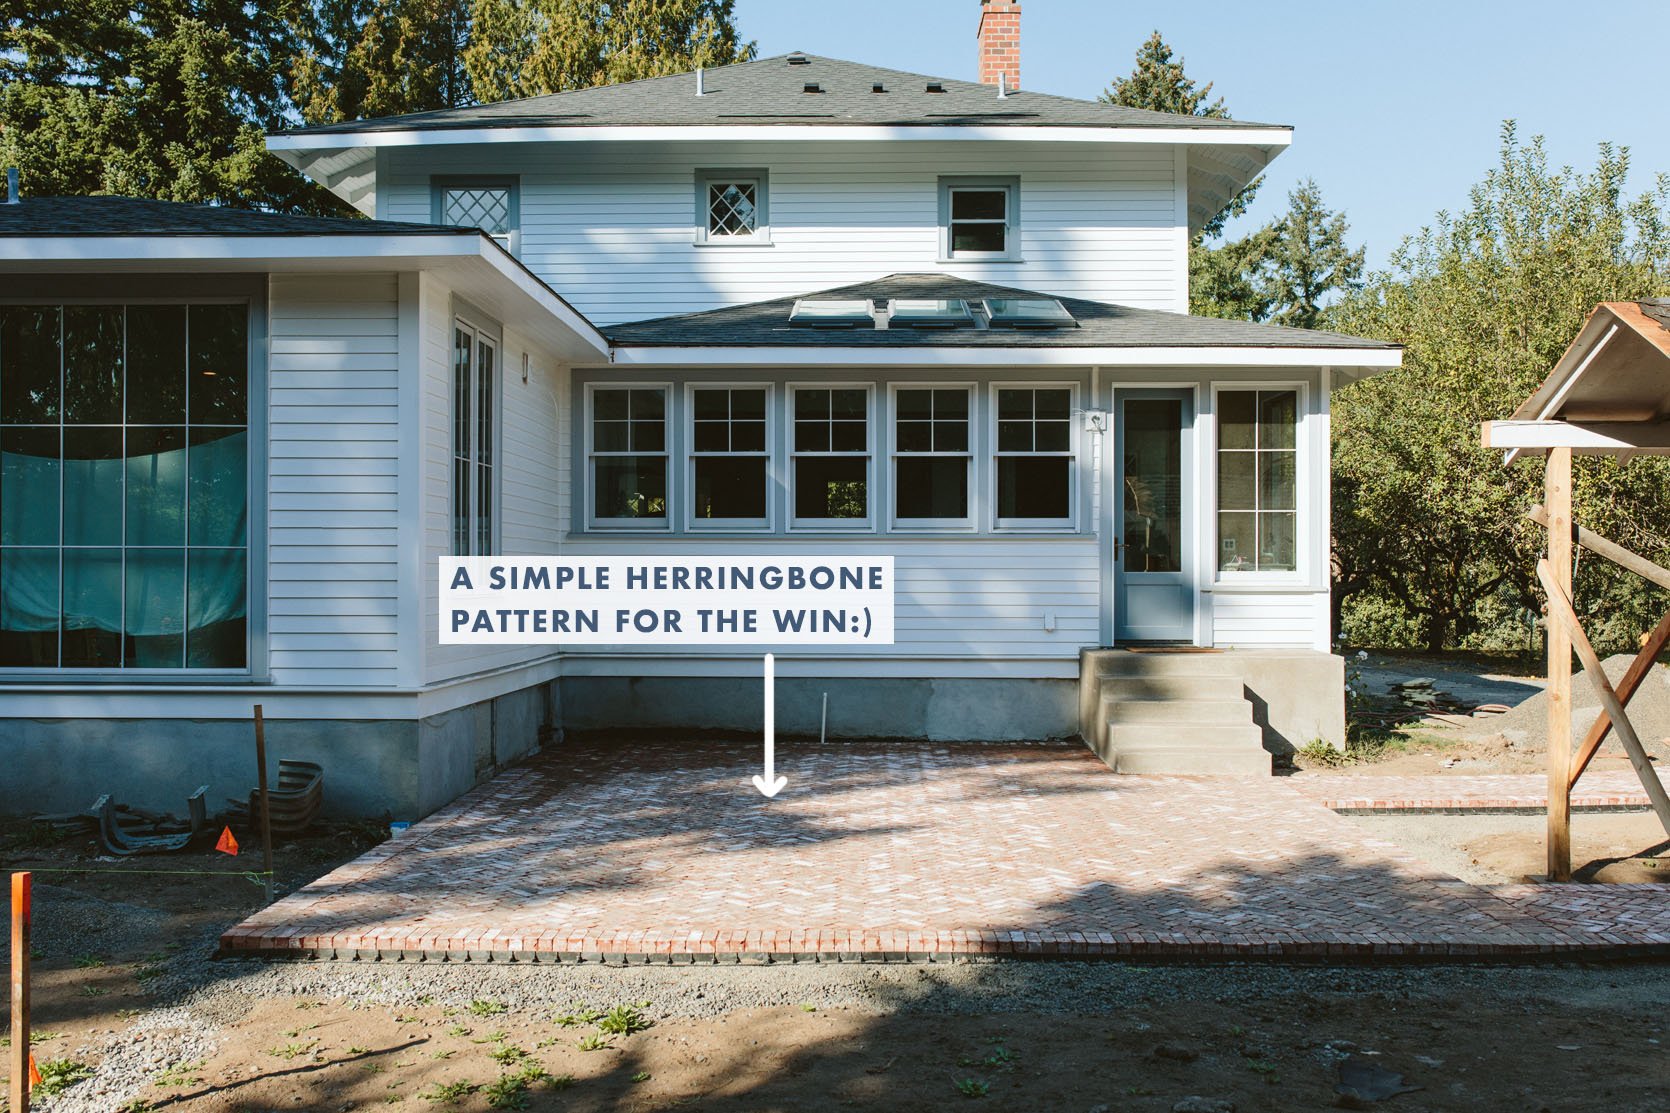
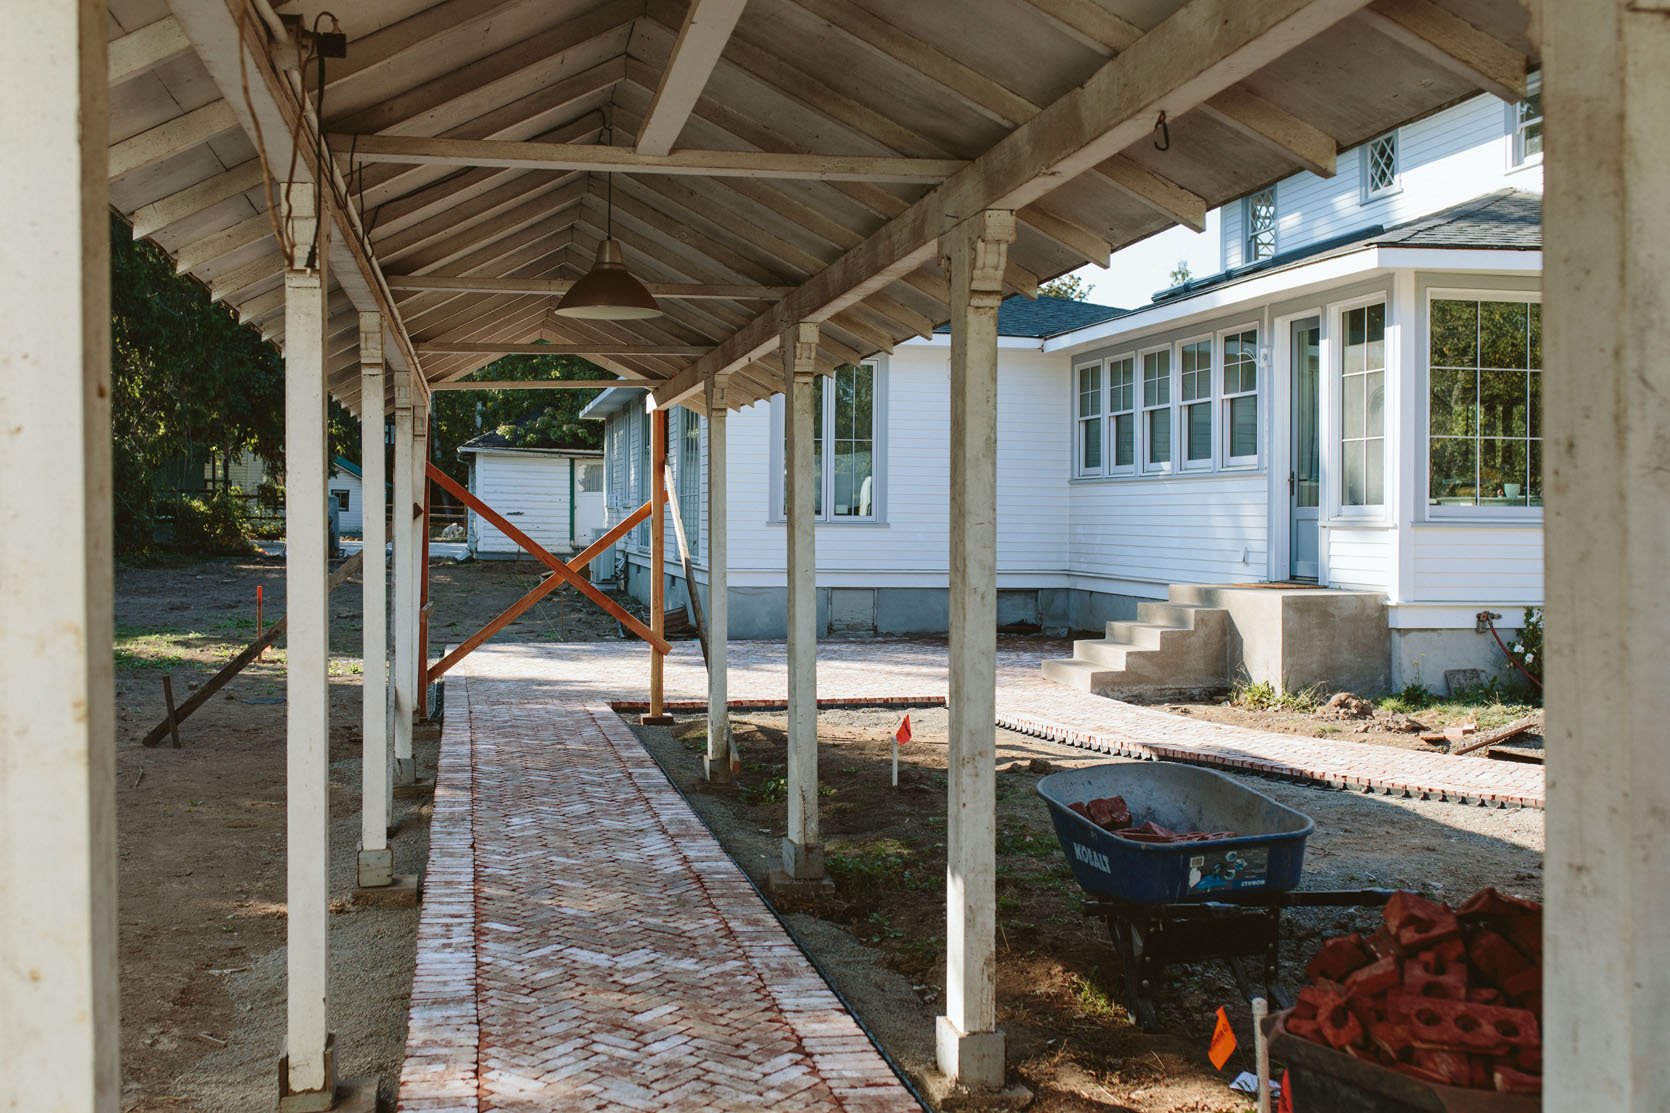
Yardzen came up with a cool brick design layout, per my request, but ultimately when we got the brick on site I chickened out and decided to do a classic herringbone. We had some designs that were so pretty, but there was going to be more waste (and would take more labor) and I was like, “You will never regret a herringbone with a border, just do that”. But this is after I sourced like 55 different aged bricks of different sizes and played with like 90 different pattern configurations. Sometimes classic wins, but it’s “nice” to go through the obsessive exercise to make sure that you exhausted all the more interesting stuff, in favor of the stuff you will never regret (Brian will say that this is my true specialty – remember the sunroom floor?). We ended up using an aged 4×8 brick that you would normally stack vertically (think a wall or fireplace) but it has holes in the side and we wanted to lay it skinny side up (so 2″) for that look, which we LOVE, but it meant digging down further to allow for the 4″ of space and of course, it took more material. We knew this going into it and I’m very happy we chose what we chose, even though it cost more.
All in all, I believe that the bricks were $7k (including the long walkway) and the labor was around $10k (maybe more, it’s hard when it’s all wrapped up together in a huge job). Again, Native Northwest did an excellent job executing. Shout out to Dan’l, Scotty, and their crew for their extreme precision (which is super important when it comes to hardscape).
The Cement Stairs Decision
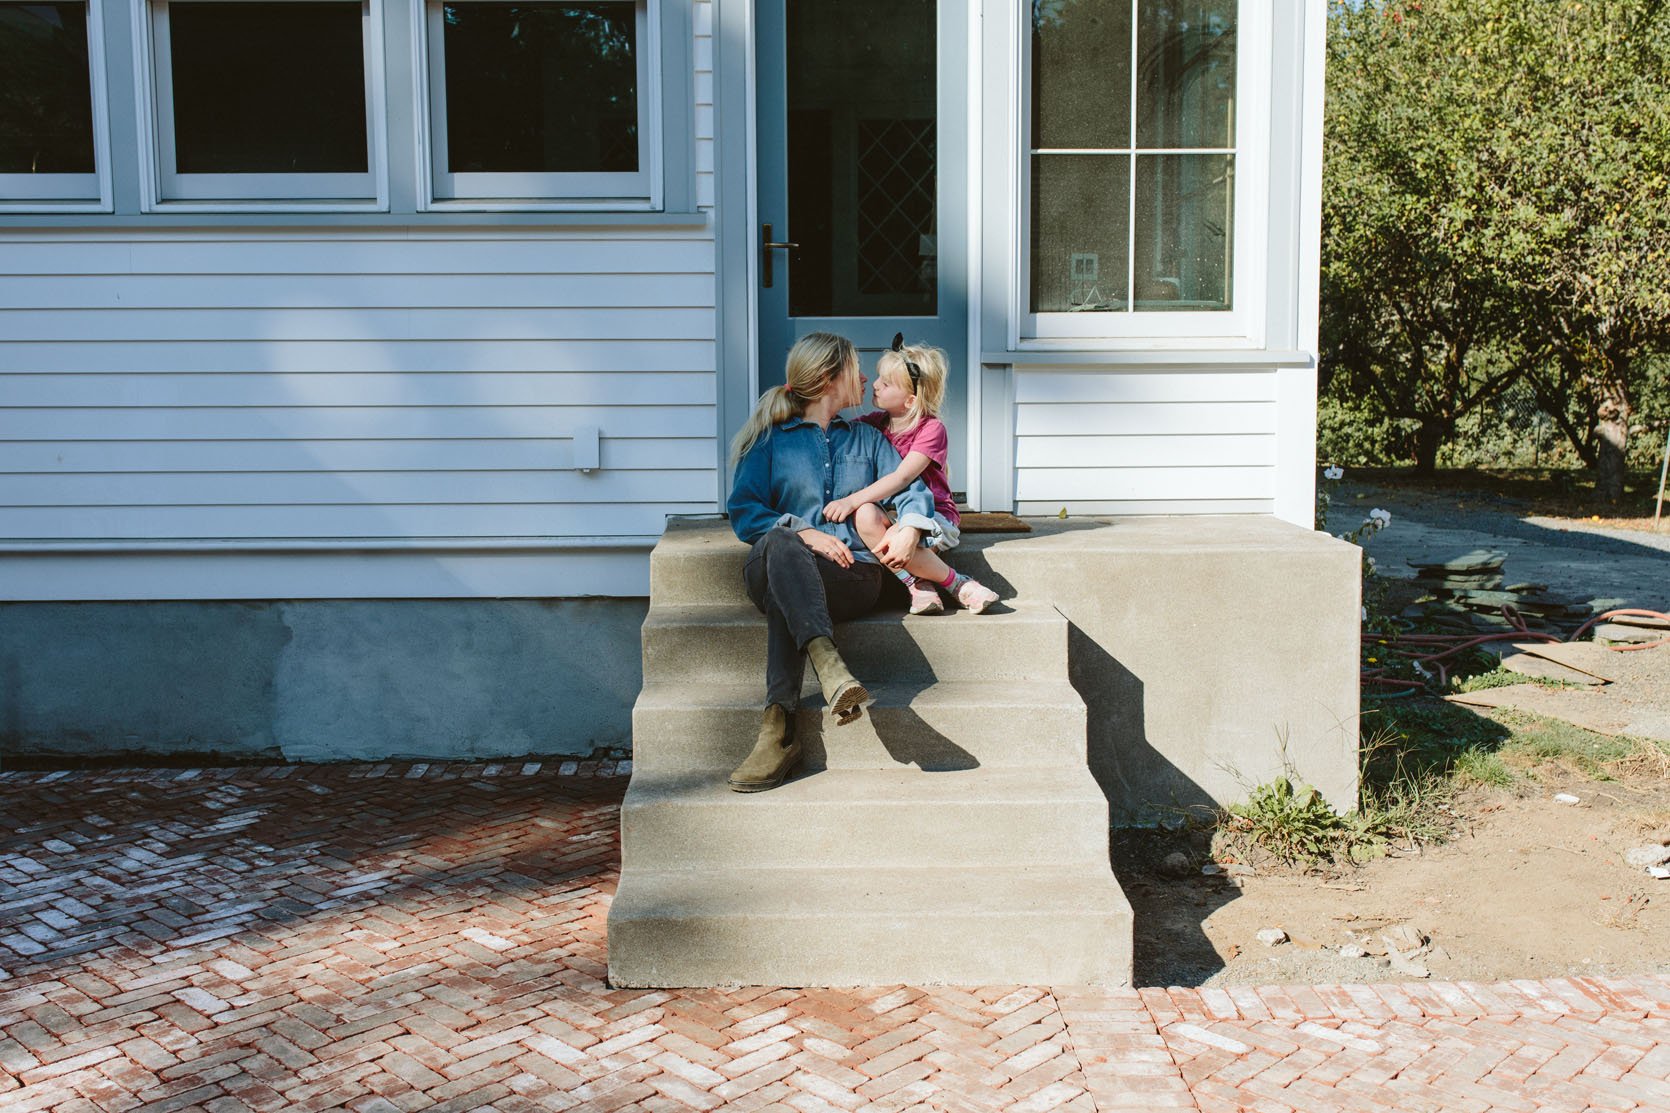
Onto the more boring side of things – the cement stairs. Listen, I wanted more interesting stairs. I did. I wanted brick or just something, special. But ultimately we had four sets of stairs and they came in at $10k total ($2,500 each) for pouring cement, which everyone told me was by far the cheapest option. We were done spending money at that point. But this felt like a sad way to spend $10k – on something that I wasn’t even excited about design-wise and I still think that had we had more time I could have come up with a solution. But y’all, you have to have stairs to get into your house and we designed this house with five exits – one wood porch on the back, but the other four are cement. You can’t really do one brick while the others are cement (although I did fight for it). Ultimately, I said yes to the boring cement, paid the money, they came and did the mold and it was done in two days (which was great). While it’s still not my most favorite architectural feature, the ARCIFORM team was right in saying that once everything else looks done and pretty you don’t notice the stairs AT ALL and they just disappear. You’ll see tomorrow:) (but are there times when I want to clad it in the veneer version of the aged brick?? YES).
Our Siding Choice
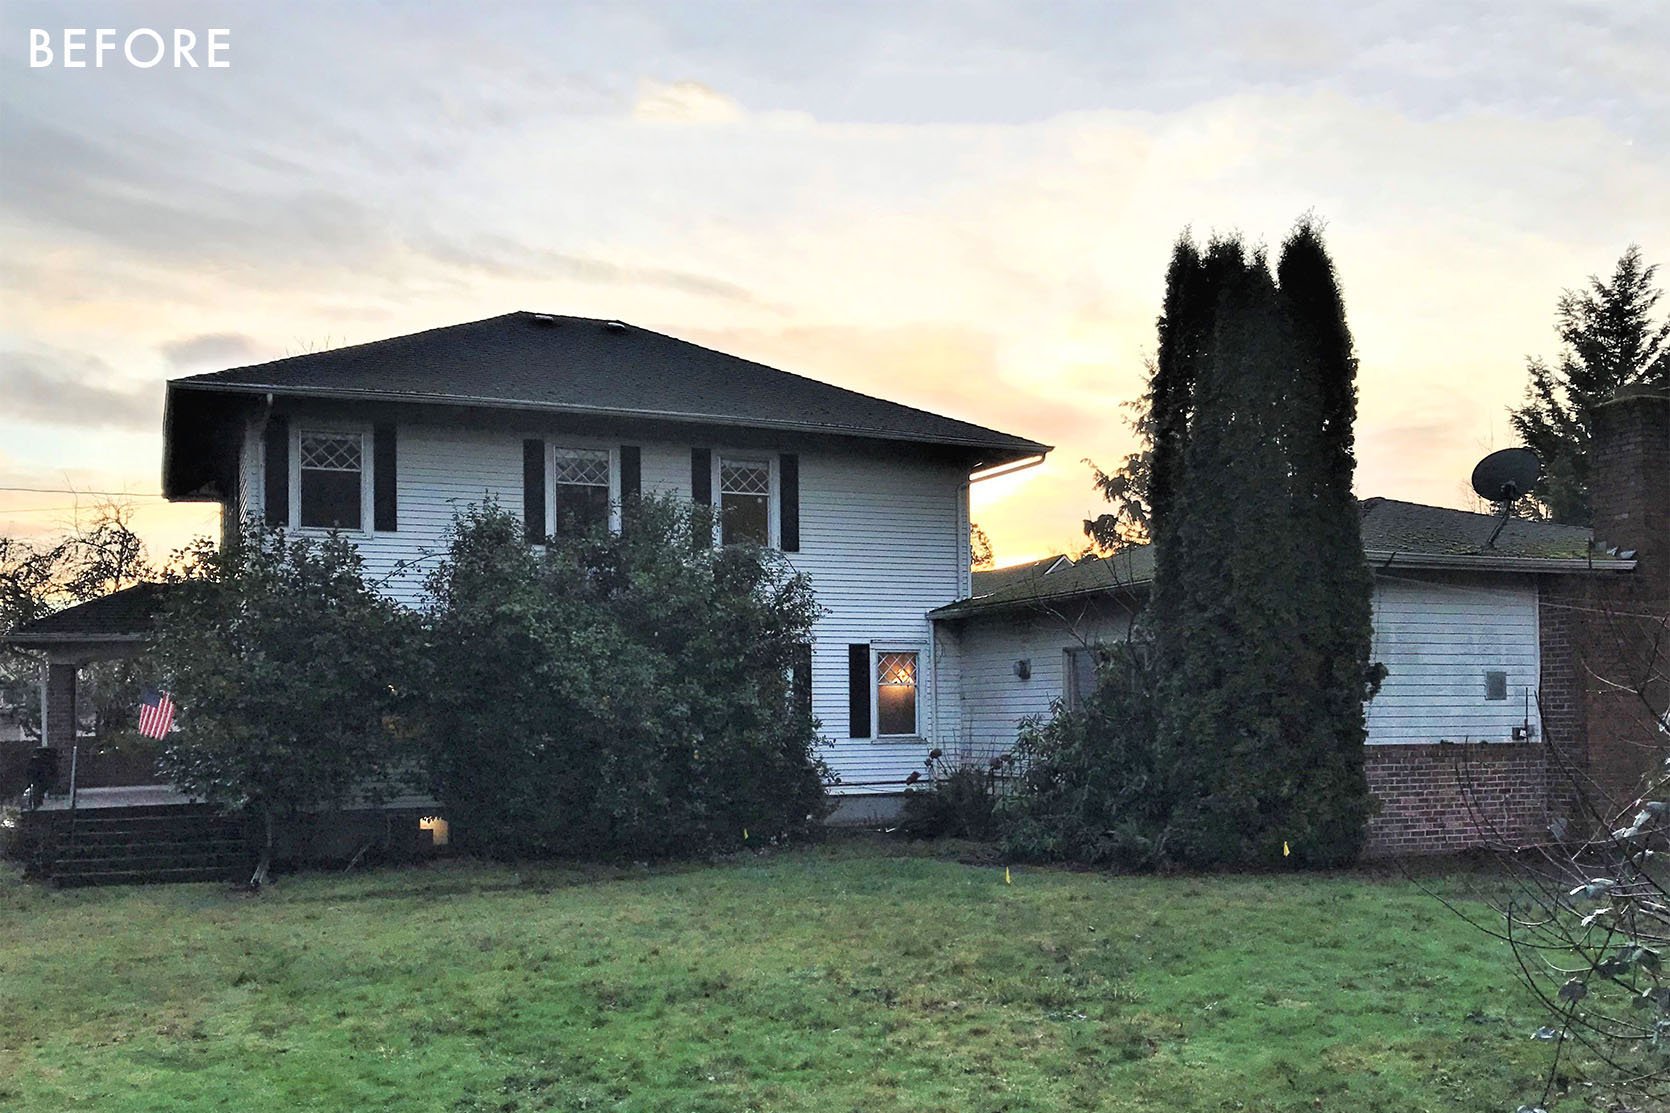
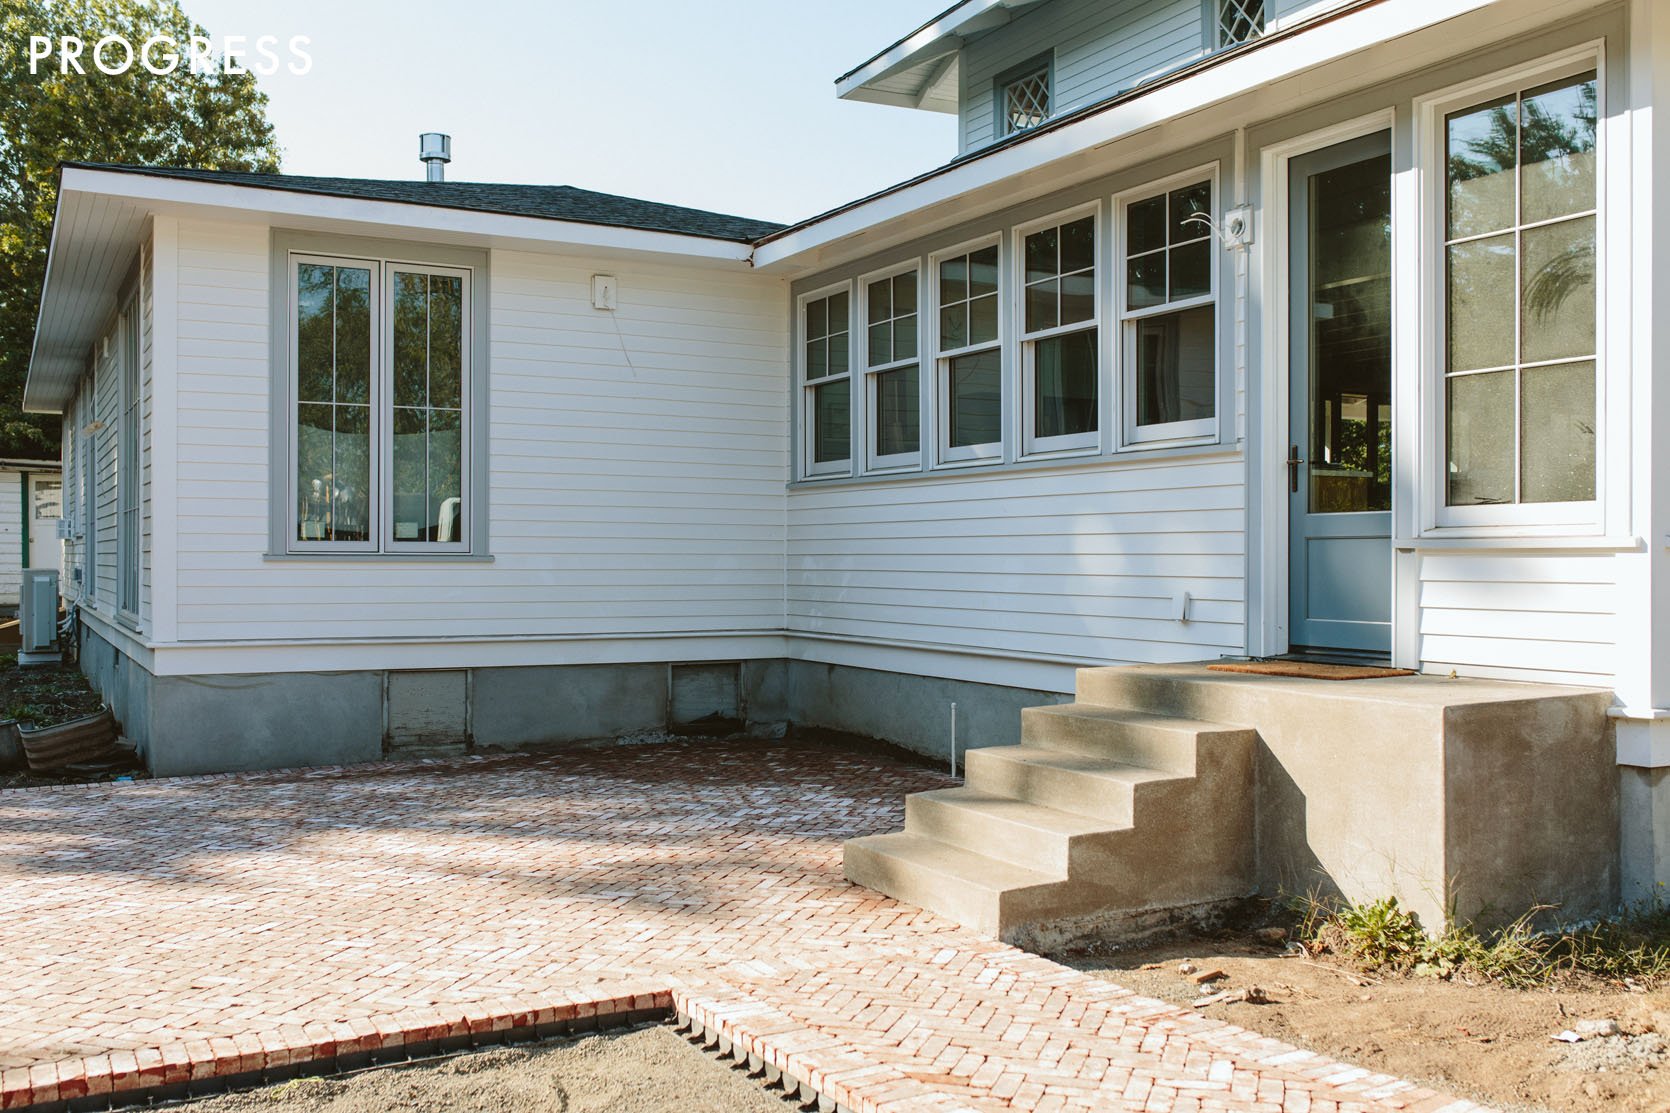
Quite possibly the easiest decision ever was the siding, and that’s because ARCIFORM was so clear about the overall vision – that it should look like the original house from 1910. Thank god for them. They reined me in when I was shouting about scalloped belly bands and shark tooth details. When we bought the house it had 3″ aluminum siding painted white, but underneath was the original wood siding (in bad condition of course – she’s old) and essentially what we put back on top – a 5″ lap siding. GREAT, DONE WAHOO! I LOVE how it turned out. We painted it SW 7005 Pure White By Sherwin–Williams which might have been one of the better days of my life. Instantly transformed! Hope before our eyes.
Our Sconce Whoopsie/Switch
Around the entire house, we have these awesome very classic farmhouse Carson sconces (from Rejuvenation) on a gooseneck in the most beautiful copper that is going to patina like Martha Stewart on the cover of Sports Illustrated. Great. Check that box. But Brian and I’s obsession with large windows (fine, we might have overdone it) meant that on the outside we didn’t have enough room to open the door without hitting the shade. So as you’ll see tomorrow we switched out the sconce for a smaller one that totally works (but admittedly isn’t as cohesive as I’d like). We have a lot of black metal around the house so you literally don’t notice it because everything else is so pretty. I feel like I have such design mistake resilience at this point. like WHOOPS, PIVOT, TRY AGAIN, TELL THE WORLD, GET IT RIGHT. It’s a cycle I’ve become very used to.
Gutters, Storm Drainage, And WHAT ARE Dry Wells???
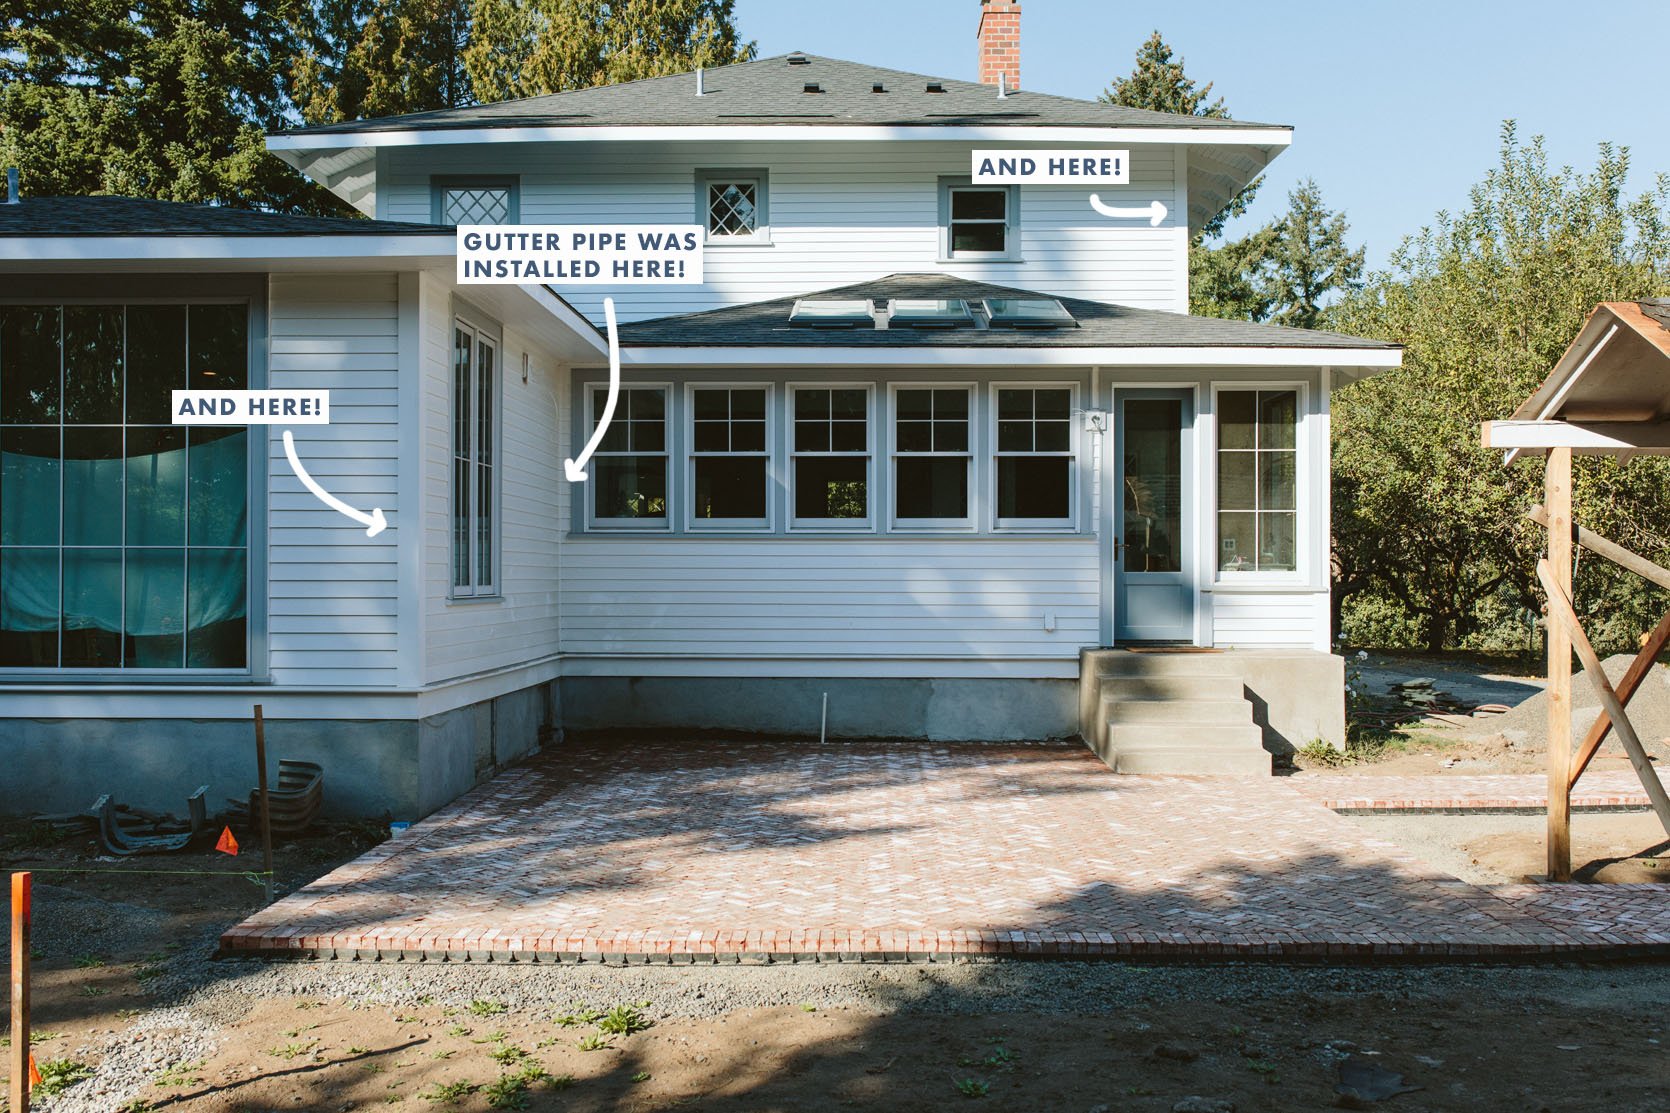
Another super fun way to spend $5k is gutters. We went back and forth for months about white versus copper, ultimately deciding that copper might actually be too much on this white house (looks better on darker houses IMHO). So we listened to ARCIFORM and just got white metal (not plastic). They are very important up here, I get that. But that’s not where it ends. Yes, they installed gutters, but the downspouts went directly into this kitchen patio (and the foundation). Native Northwest called it pretty quickly and suggested we put in storm drainage – something you don’t need in California, but you really do in Oregon. Water is insidious. We are not going to mess with flooding, mold, foundation problems, etc. So they put in storm drainage that led to a dry well that deposited in the middle of the lawn (admittedly I don’t totally know what that means, but there are NO water issues even on the days that don’t ever stop raining so a big thank you to Dan’l’s crew).
Rain Chains (Pretty And Practical?)
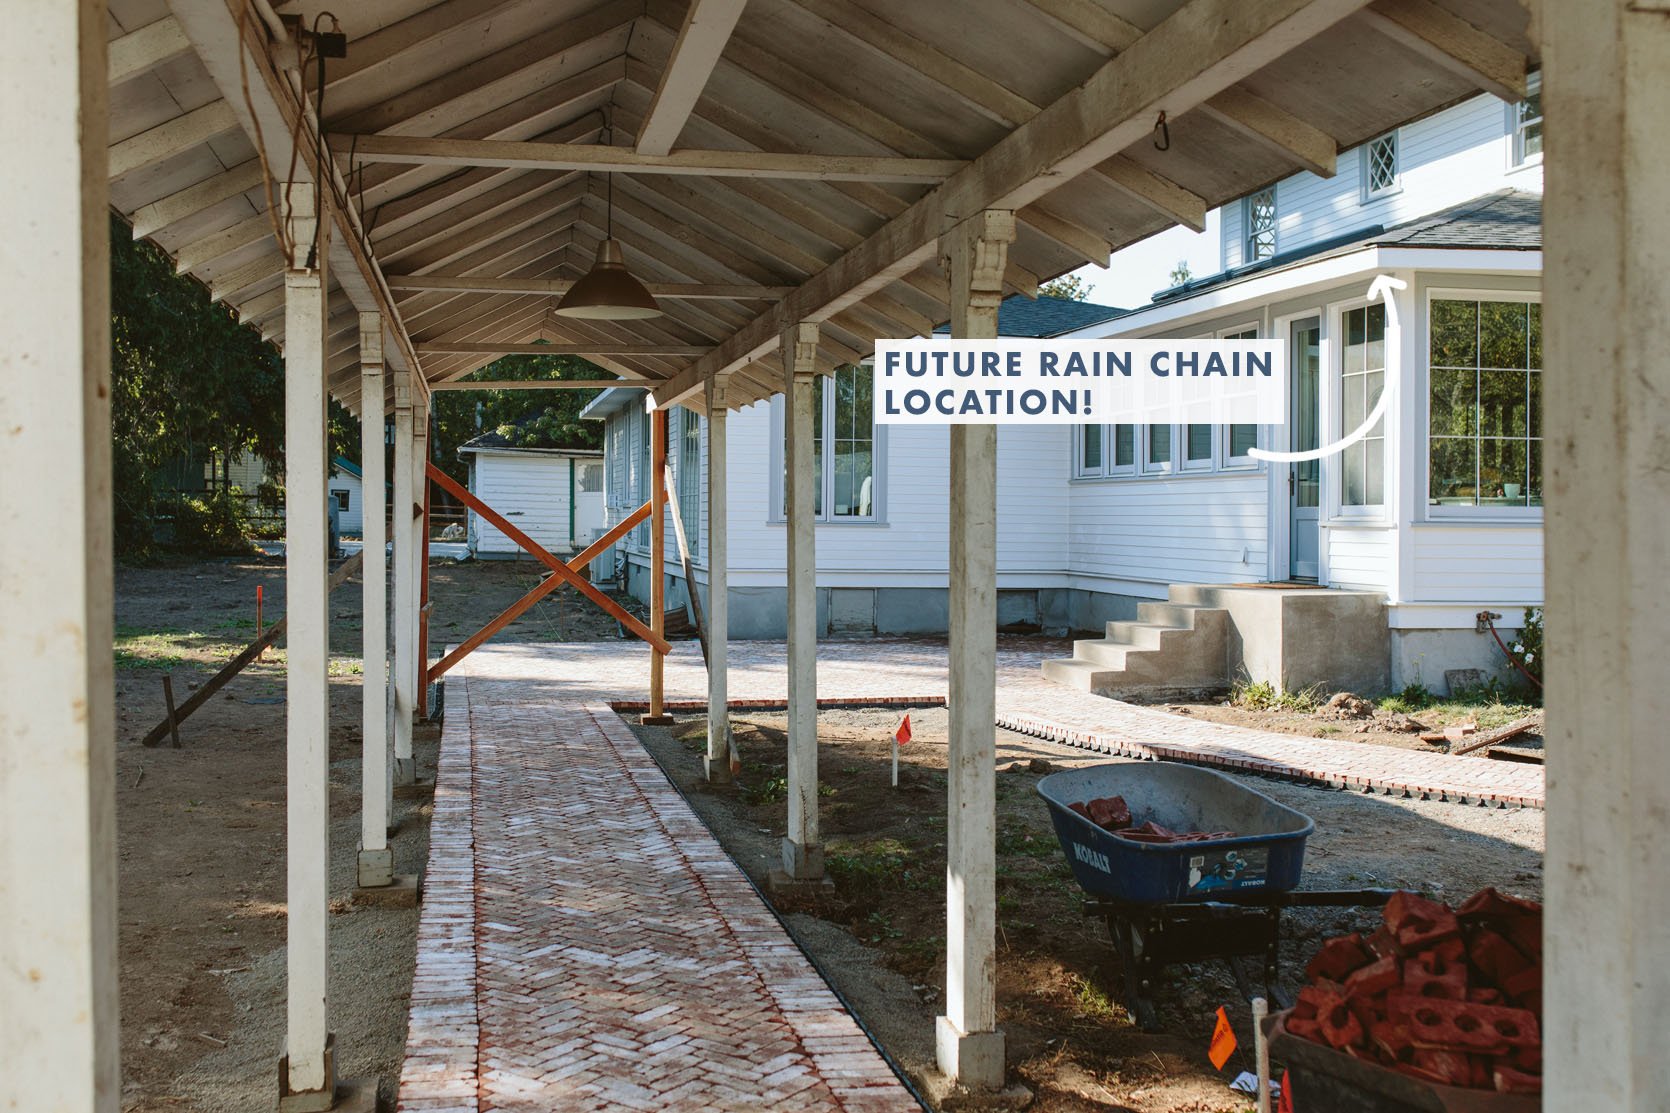
On to good news that might make some of you enraged. I’m not a gutter purist (??) but I typically don’t like to put unnecessarily architectural things on houses (wait, isn’t that just what we do as creatives???). But the gutter was designed for the downspout to be in the corner of the kitchen patio, NOT the edge of the house where the rain chain was meant to go. You don’t need both a downspout and a rain chain – the rain chain is the downspout. So instead of re-doing the downspout or the gutter altogether, (duh) I had the rain chain installed to look like it functions, but it doesn’t. No one will know but all of you. I didn’t even tell ARCIFORM so shhh… We have three more left to hang (two on the covered walkways where they actually act as downspouts) and hang I will because they are so beautiful and special and I want them EVERYWHERE.
Stub Up For Irrigation (Why Is Borning Stuff SO Crucial)
Another thing I didn’t really know about is how important it is to irrigate underneath the patio and then stub up for planters to be watered with a drip line. This wasn’t my idea and I’m so glad it happened. We haven’t hooked them up to the pots yet, but will very soon (that reminds me I need to go water the plants).
I think that is all the boring stuff that we did, that cost $$$ and or stress but ultimately I’m so grateful to have been able to get done. Come back for the big reveal and pretty photos! xx
THIS POST WAS ORIGINALLY PUBLISHED HERE.
