Rarely is there a post that does better on the blog than a kitchen reveal so THIS IS A BIG WEEK for you and me both! It’s what I think I just coined KRW: Kitchen Reveal Week. This time around, it’s a budget-friendly but non-DIY upgrade that I’m very excited to show you. You guys, there’s floral wallpaper, there’s dark green paint, there’s a newly blasted ceiling! SO. MUCH. GOOD.
A few months ago, we put out a call to our Portland followers for a kitchen that needed an update with some design and functional elements to make it better but in the “no demo reno” kind of way (truly my favorite flavor of makeovers). Most people simply want a kitchen with more function and yes, with elevated design, but don’t necessarily have the budget or time to do a full gut job. I know I don’t have to tell you, but y’all, a full kitchen remodel with custom cabinets can be SO expensive and often feels dauntingly impossible (speaking from experience on the other side of one—I made it out alive, but I have a ton of compassion for all future kitchen renovators). After so many good submissions, we found our reader-kitchen duo (shout out to Julie!) and this week, we will be documenting the process of how it all came together with the big reveal at the end. I know patience can be tough in this instant gratification world, but it’ll be worth it. Promise.
This kitchen project is in collaboration with Crate & Barrel as they launch a new line of kitchen islands and finishing touches. When they approached me with the partnership, I asked to see the photos of the product before signing on and was extremely impressed. It’s no secret that Crate is killing it in the design department—I myself have pieces from the Jake Arnold and Athena Calderone collections. They are extremely cool and beautifully made. It was a fast and hard “YES” once I saw the island selection. All we needed was a kitchen that checked the following boxes:
- Could be completed in a quick timeline: It didn’t need to be faux-HGTV fast, but we had under two months and needed to be done by June (so no major permitting, engineering, etc).
- Stylistically worked well with the island that I loved: This island honestly could work in so many different styles but we wanted to make sure that it didn’t feel plugged into the wrong house design-wise.
- Had the right size and scale: We weren’t going to move walls so we had some size restraints for the product.
- Within a reasonable affordable non-DIY budget: This couldn’t be a teardown—there had to be good enough existing bones for an upgrade. We had a budget of $15-20k, not the usual $100k that kitchens require these days. I say “non-DIY” because we weren’t doing it ourselves and would hire out, but honestly, most of these things could totally be done by a handy homeowner (so it could have been a budget kitchen remodel).
- The existing island (if there was one) couldn’t have a sink or stovetop that we had to re-home. The island is freestanding with storage but no plumbing or electrical.
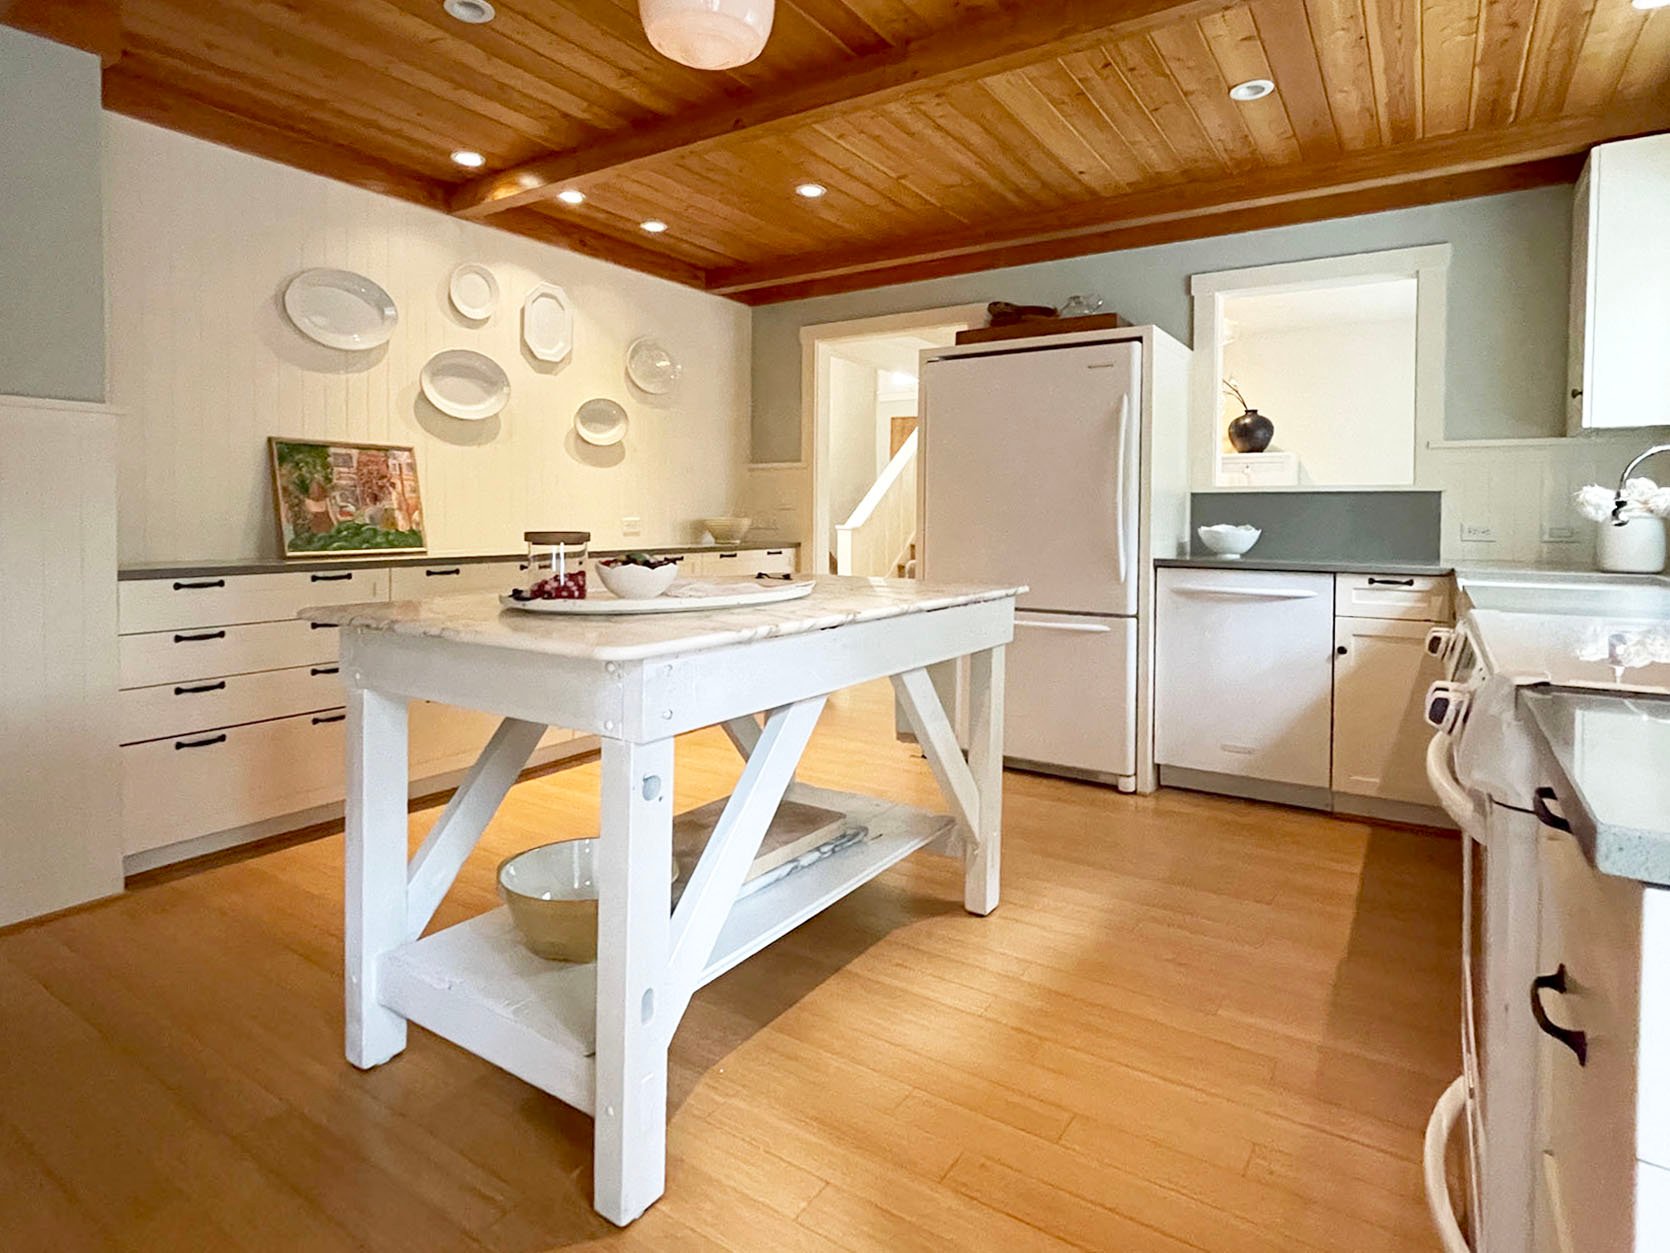
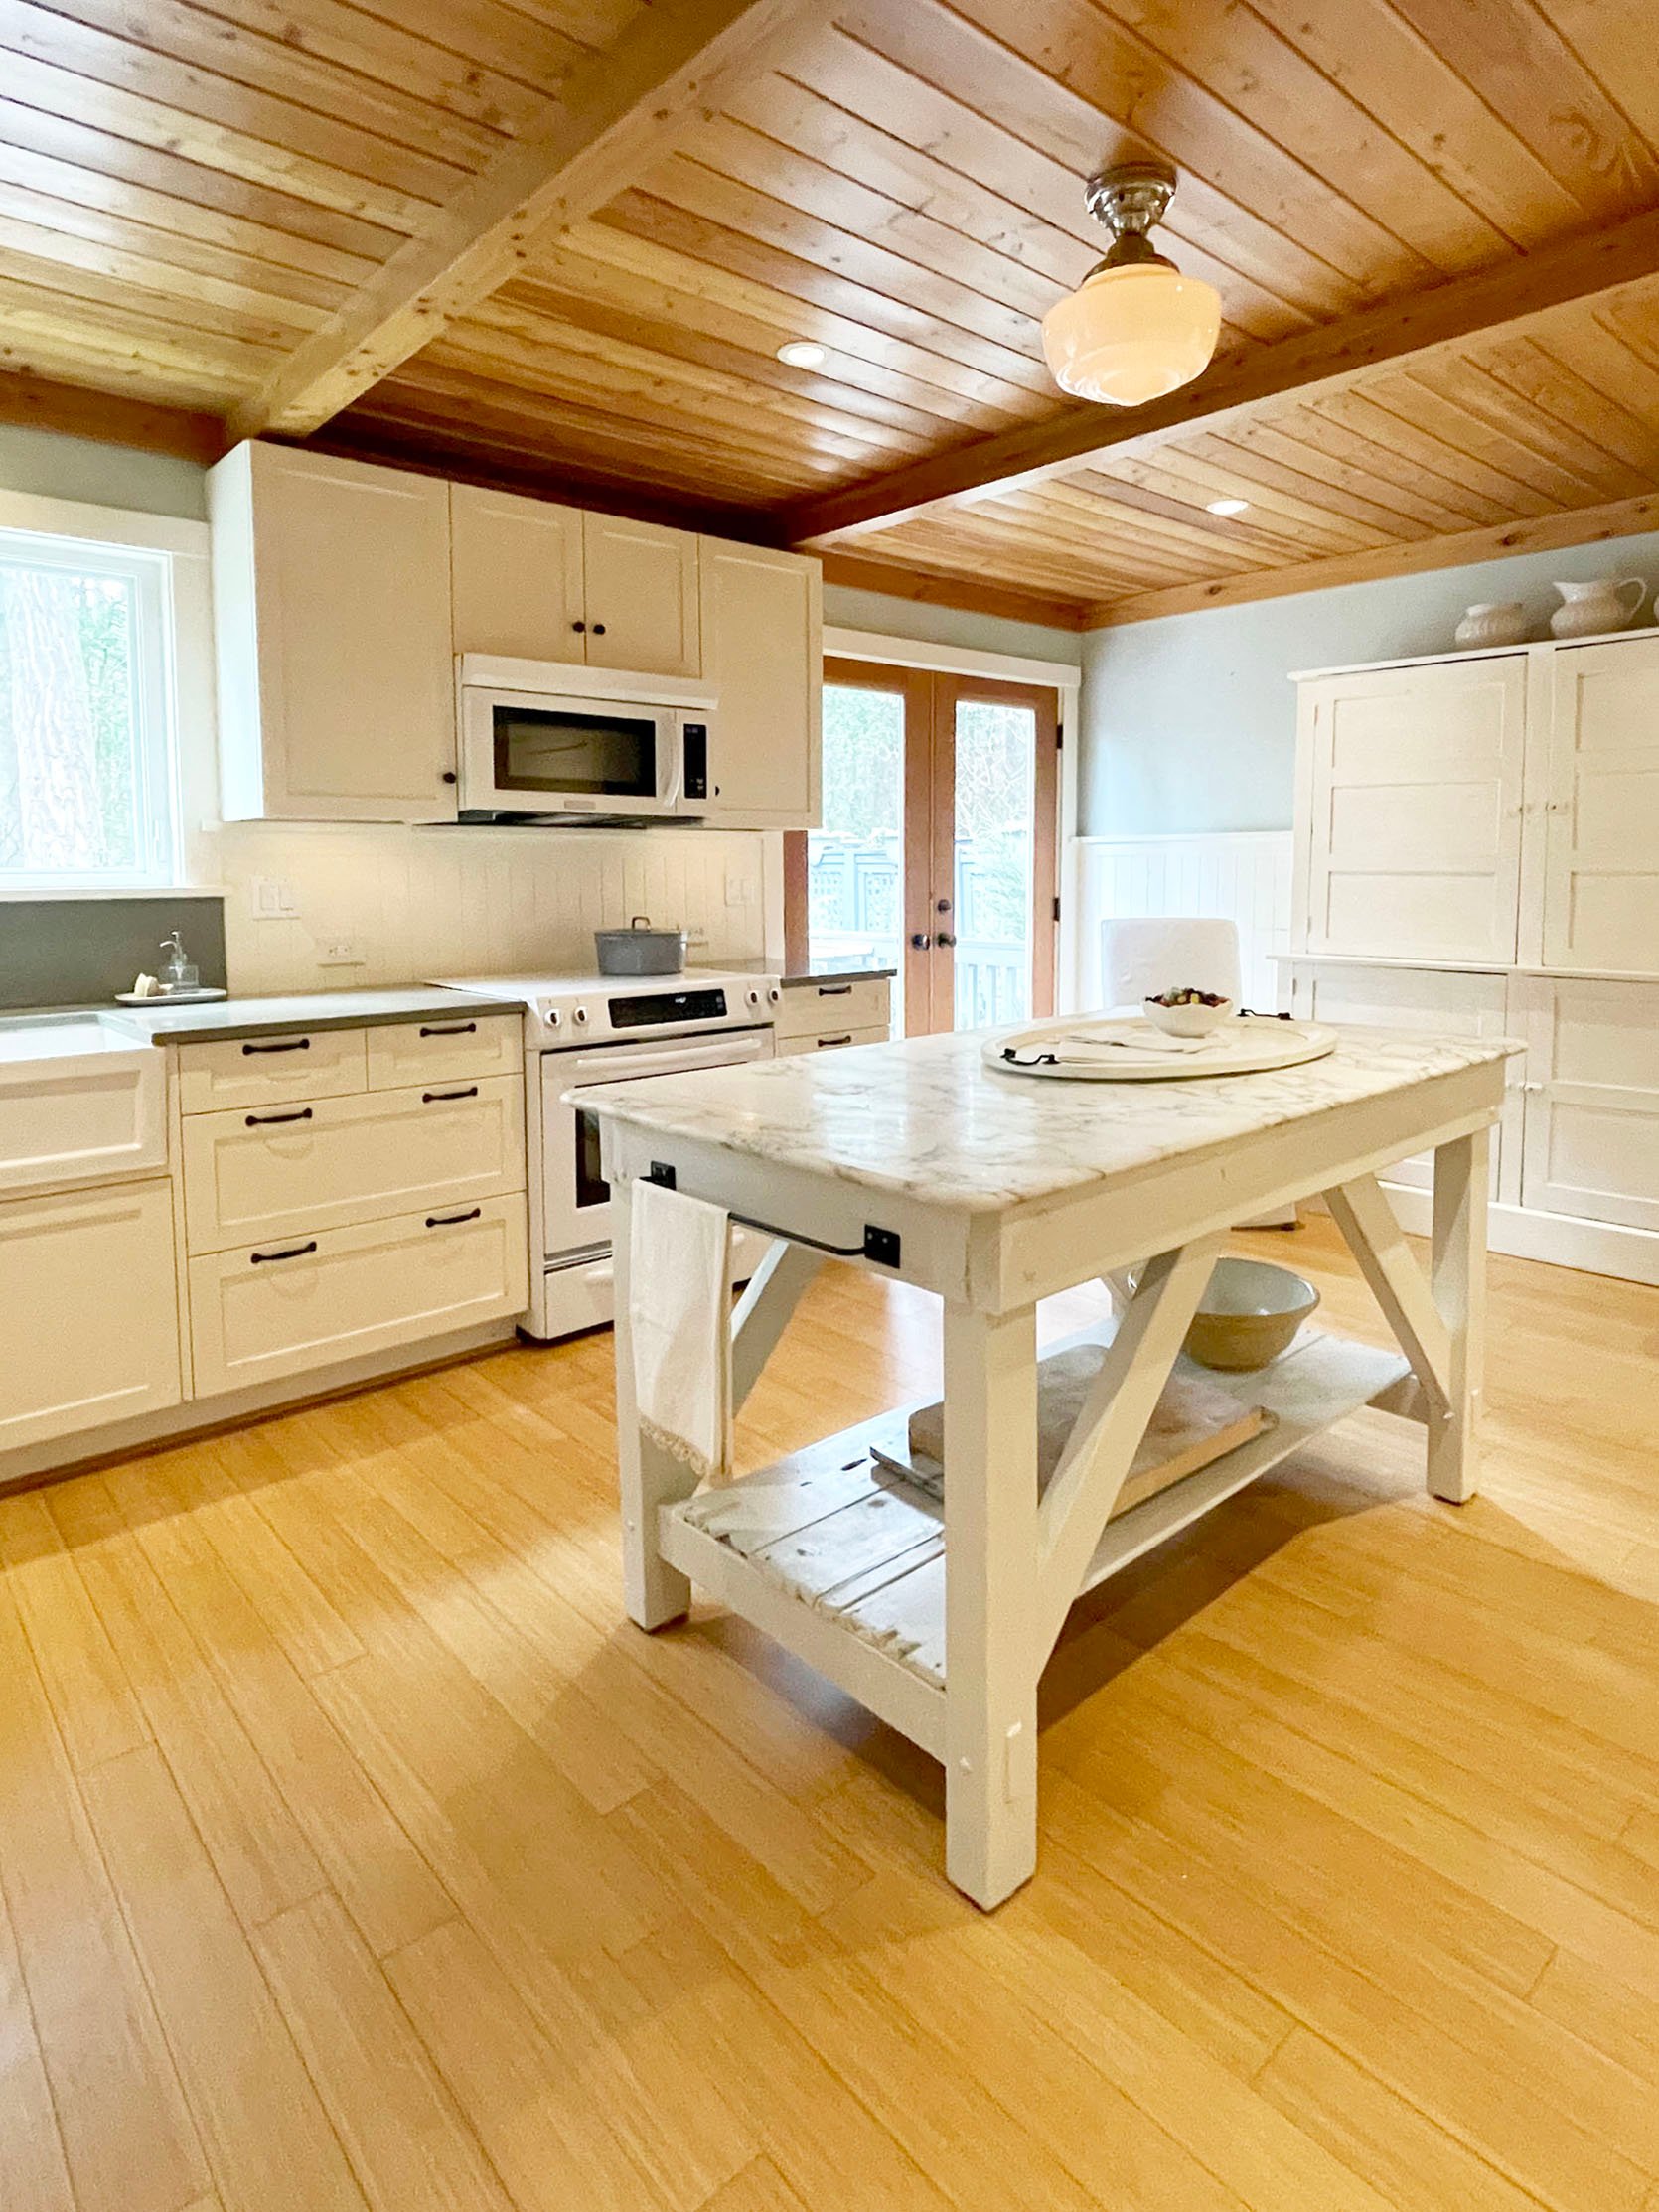
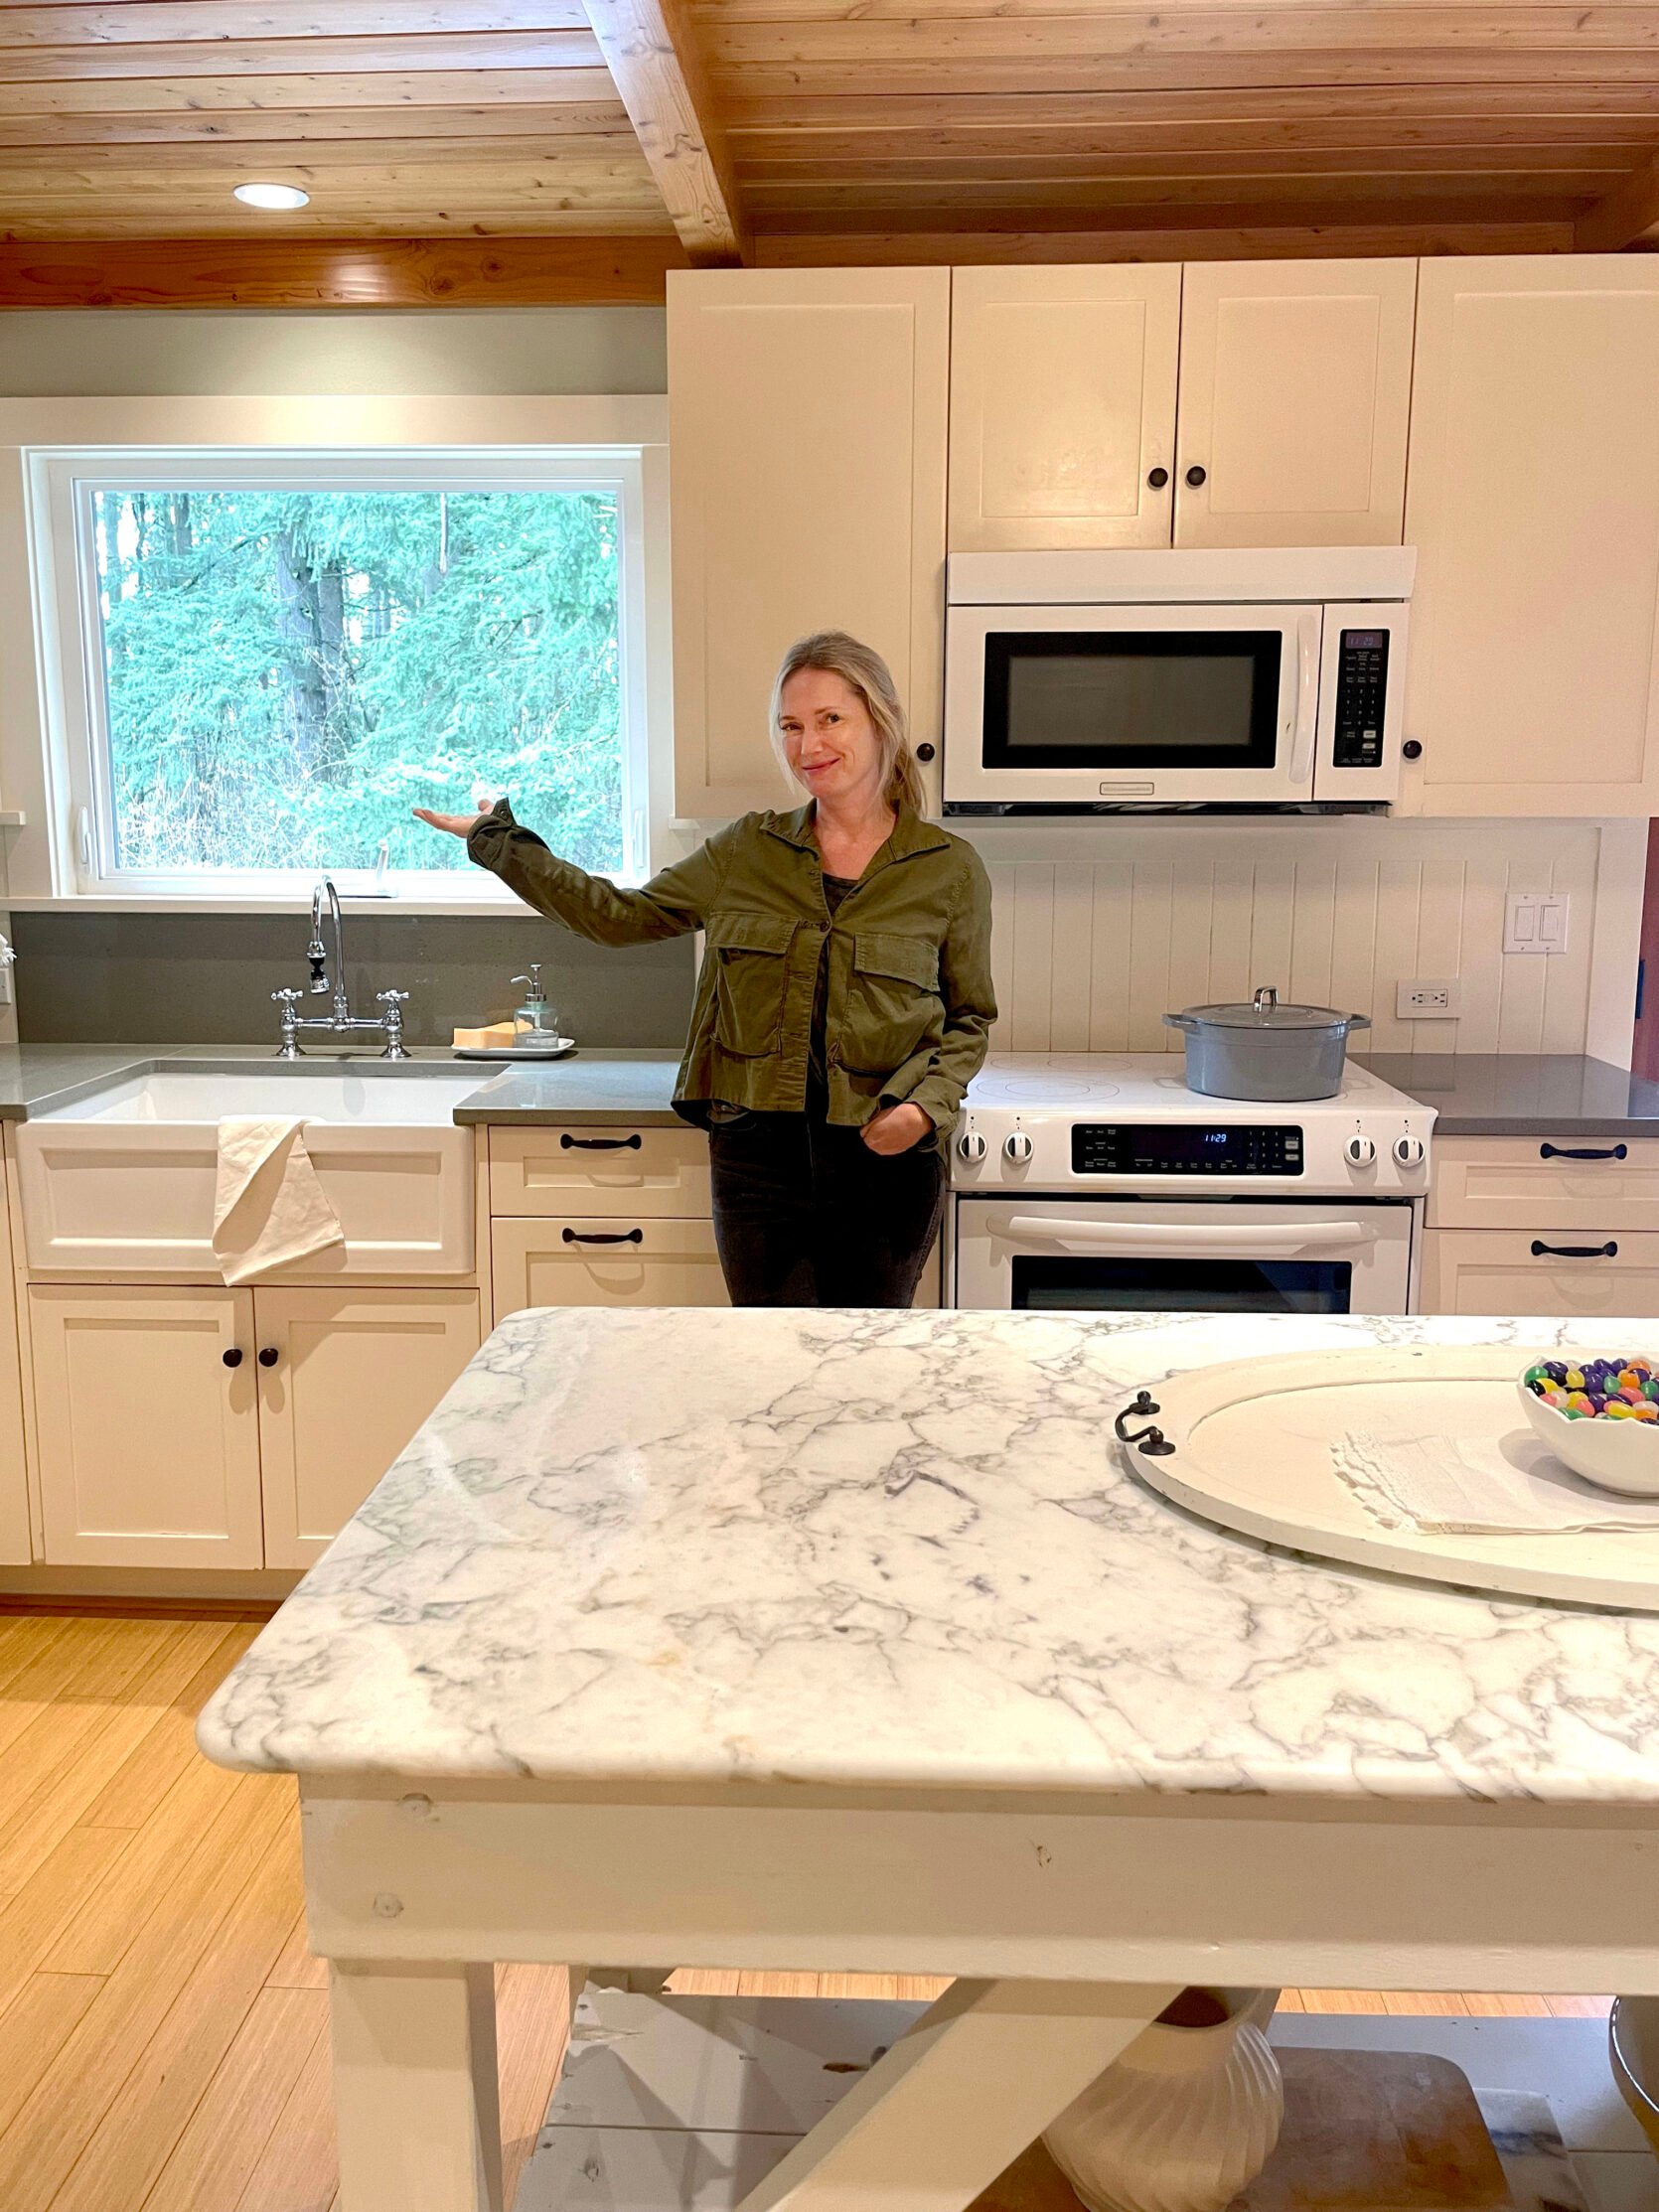
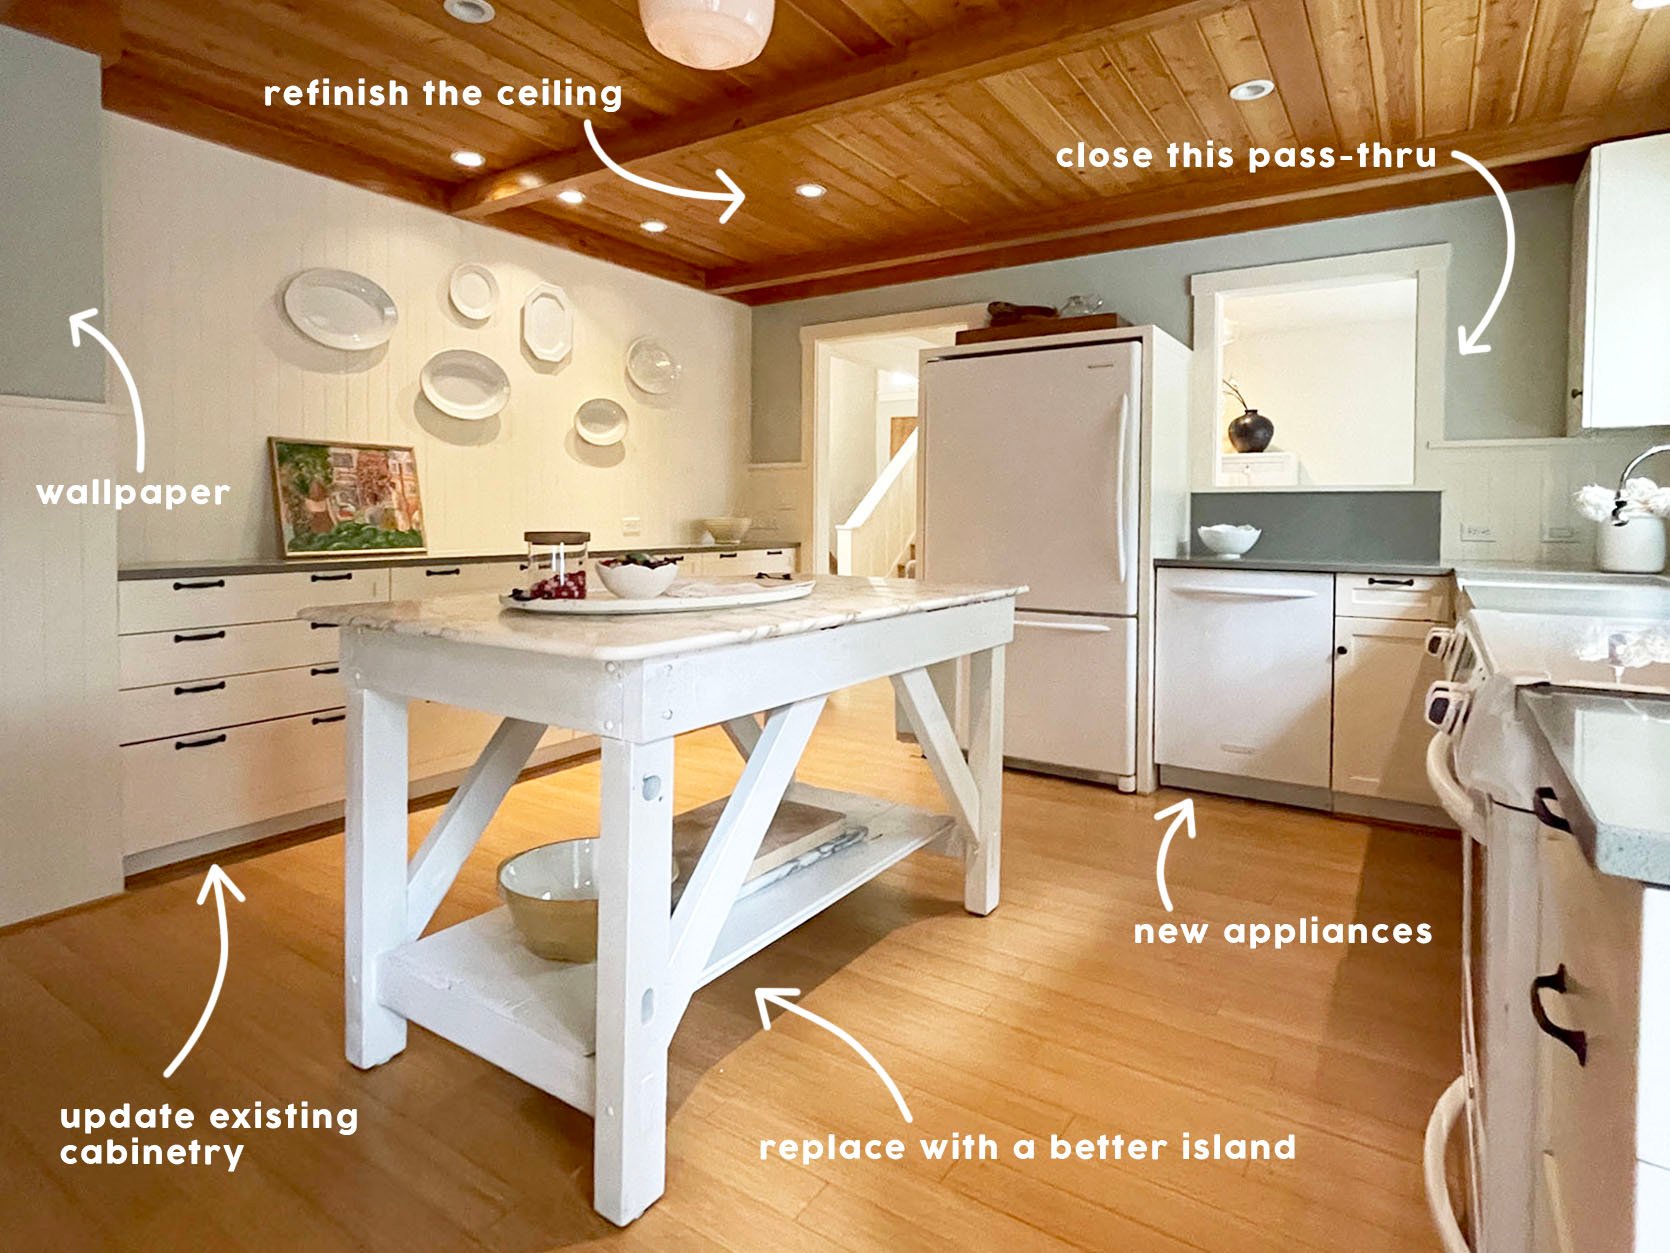
THE BEFORE
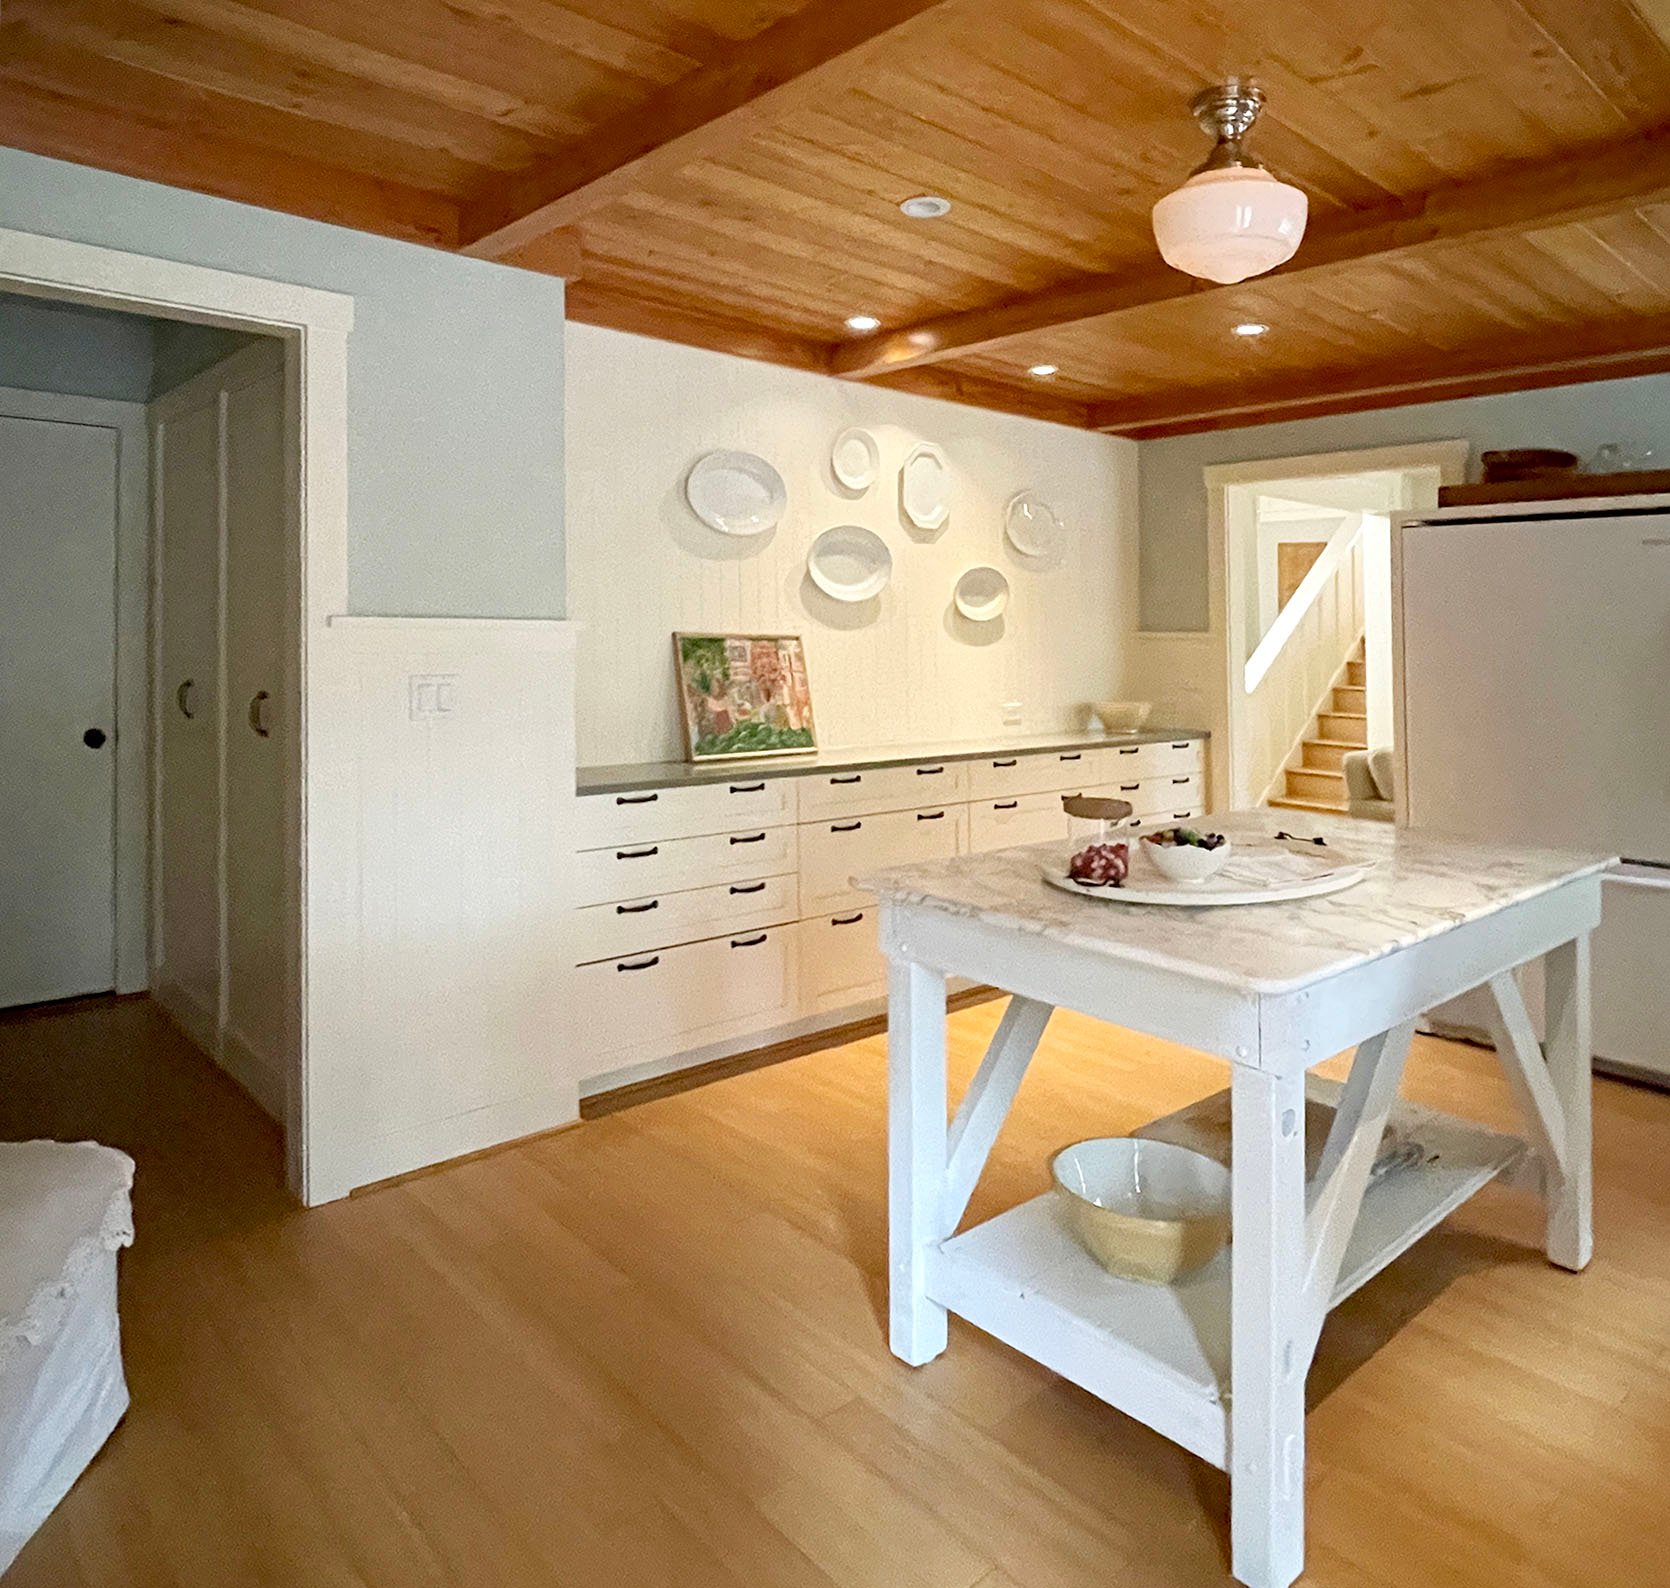
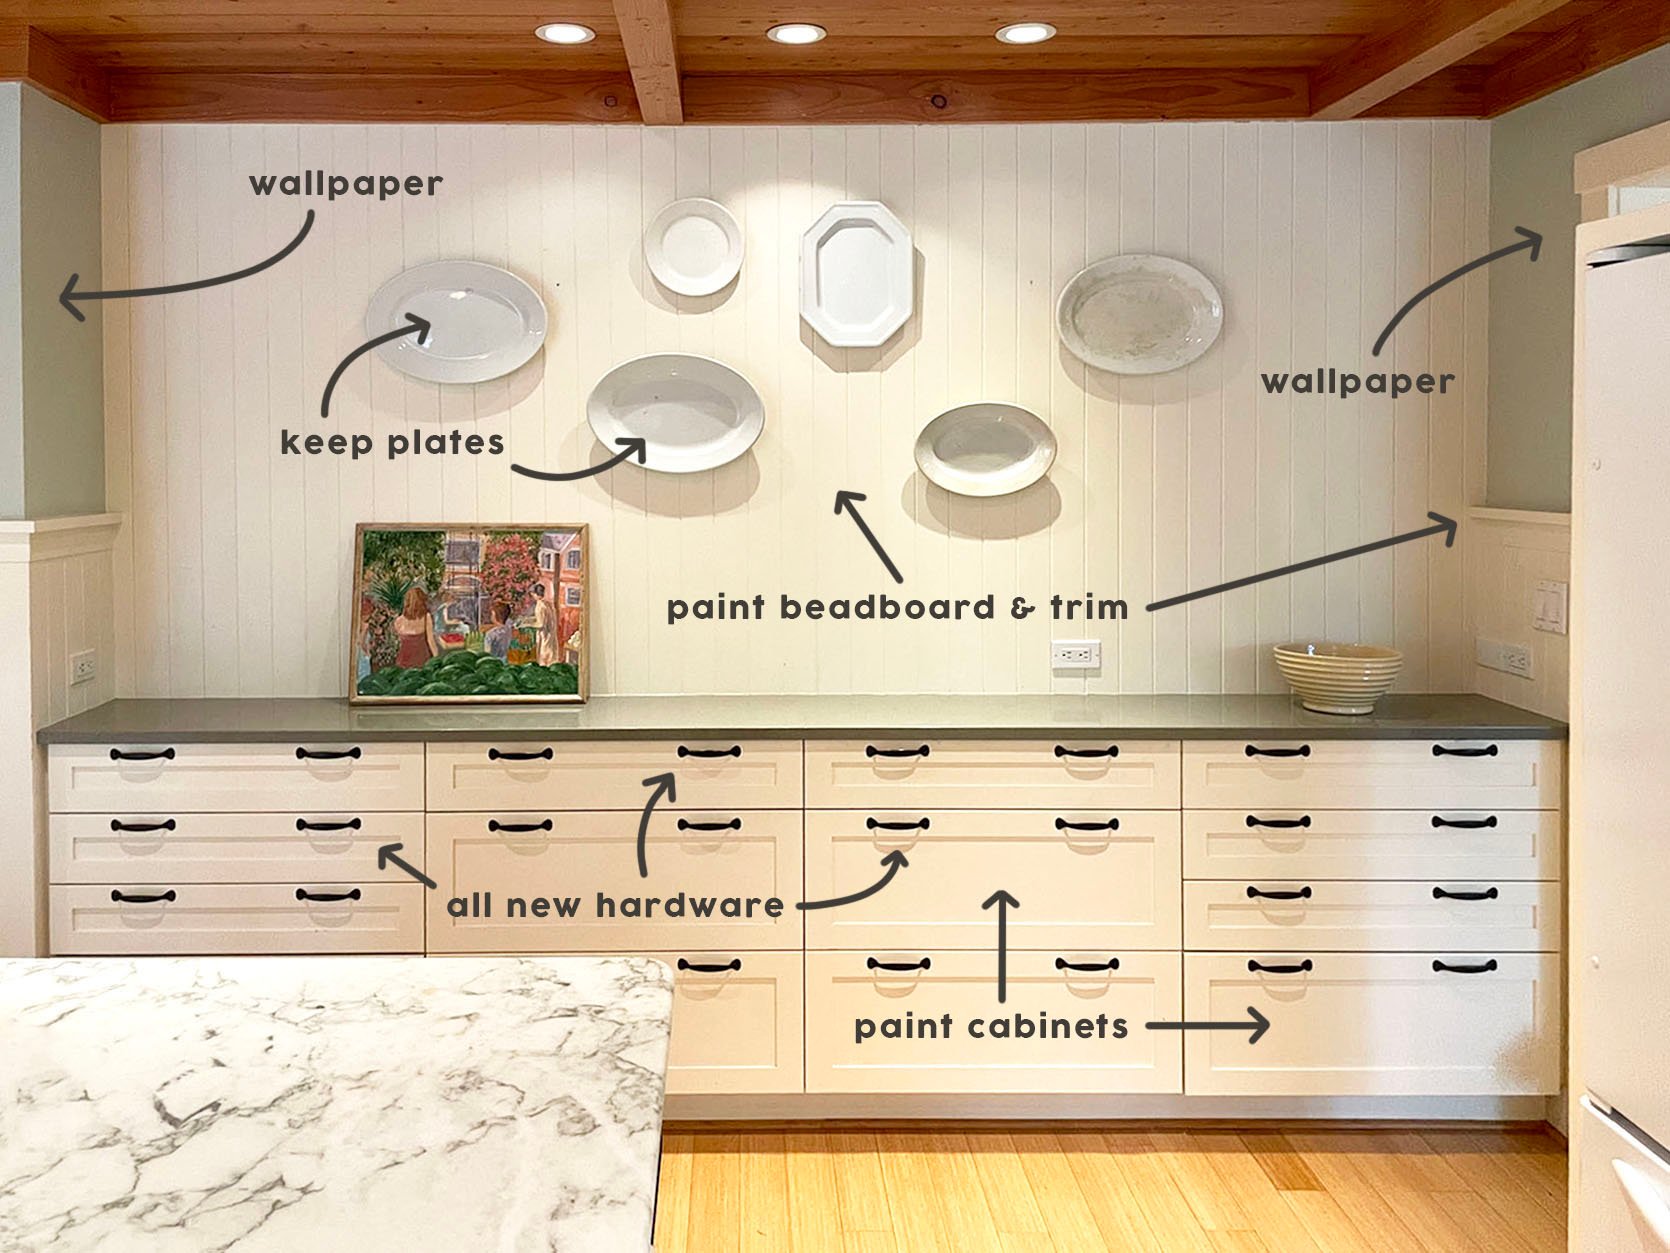
Clearly, this kitchen had potential and was already pretty cute. But Julie, the homeowner gave us some insight into how old it was and how it wasn’t meeting their family’s needs. Julie also is a huge antiques enthusiast (and even had booths that I’ve bought from many times!), thus having cool pieces.
Julie’s Needs
The house was remodeled in the 1990s and it clearly wasn’t bad, but some of the design choices in the space could use a touch-up. Additionally, some of the cabinets were chipped and wonky. Her biggest grievances were as follows:
- The appliances were old and not terribly attractive. (Although TBH, at least they were white and kinda disappeared). We split the appliance budget with her as this wasn’t an appliance partnership and those can add up.
- Her island was so pretty but there wasn’t anywhere for her boys to sit and hang, and she could use more storage for bigger items.
- She just wanted it to feel more designed and give it a point of view. Nothing is wrong with the current iteration, but it could have more color, pattern, contrast, impact, etc.
THE ISLAND
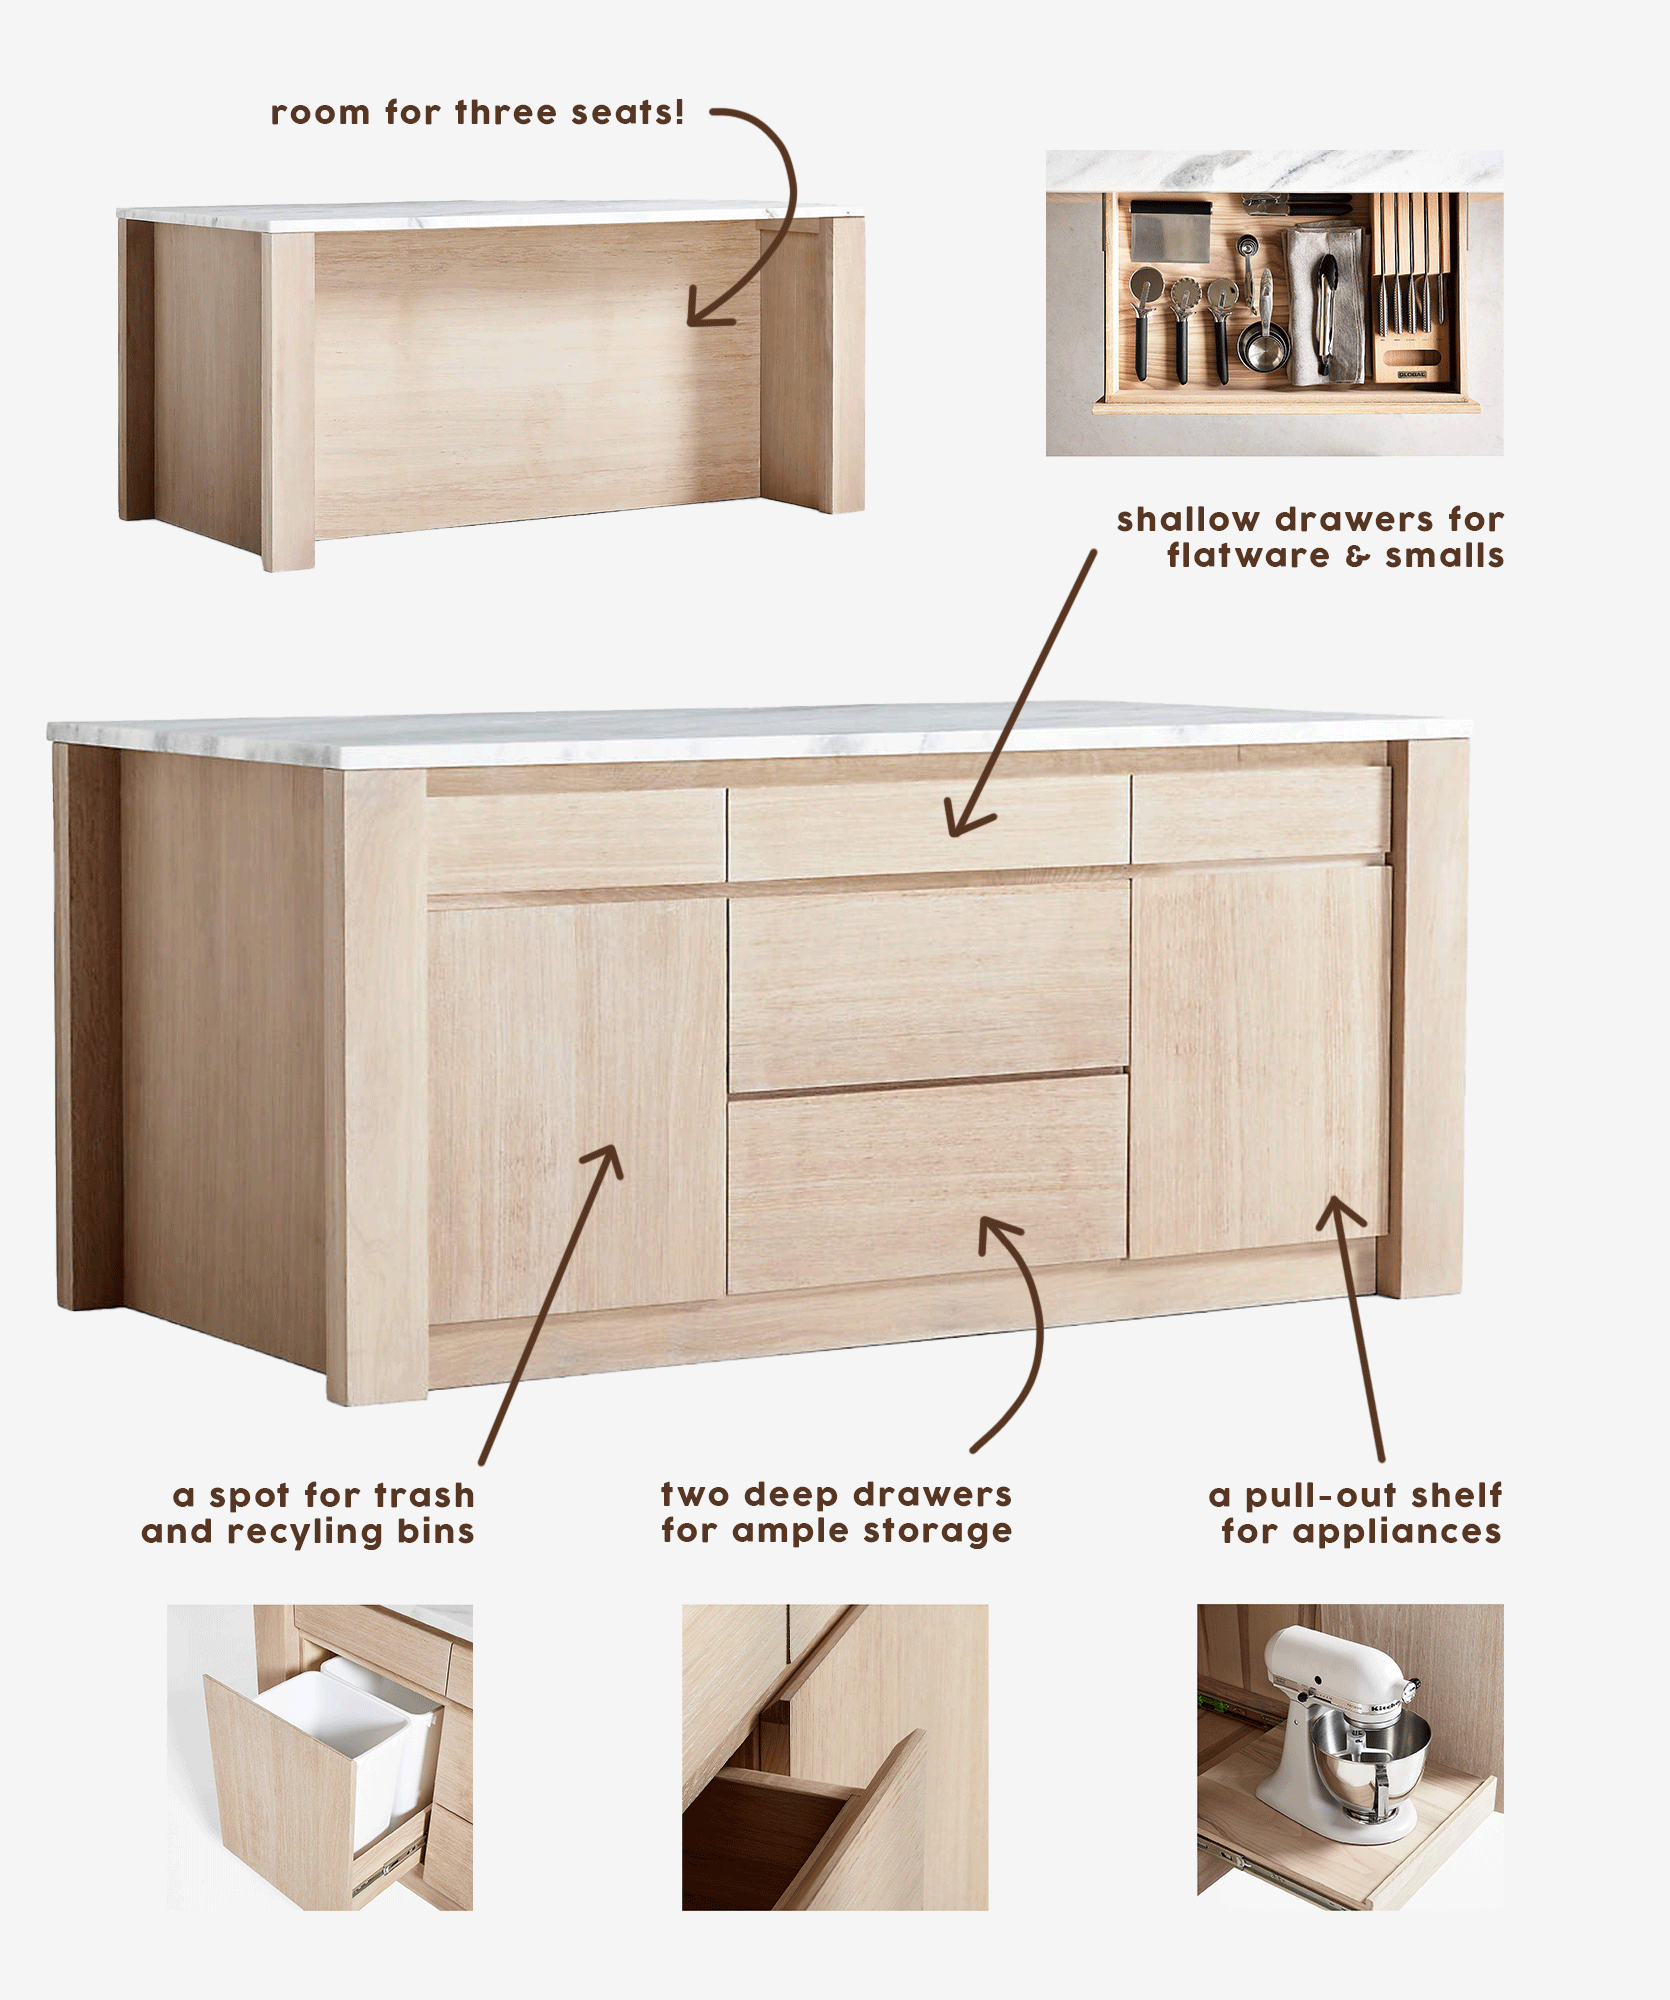
Here is the beautiful island we chose for this project and after seeing it installed in person, I can tell you that it is STUNNING and extremely high-quality. It’s made from white oak with a solid honed marble on top. It comes fully built and has so many functions such as a pull-out garbage compartment on the left, storage for a stand mixer on the right, and huge deep drawers for pots, pans and large mixing bowls in the middle. And it has a 14.5-inch overhang that can easily sit three people.
This island truly looks custom-made, but again, it comes fully assembled, including the stone at $4,999. If you’ve done custom cabinetry before you’ll know that an island this size would typically be a lot more expensive, not including the stone. With this island, you are saving time and money. The slab on top is extremely impressive and beautiful (that veining is perfect, and mixed with the white oak looks so beautiful and classic and can go with so many styles.
THE DESIGN TEAM + Major Players
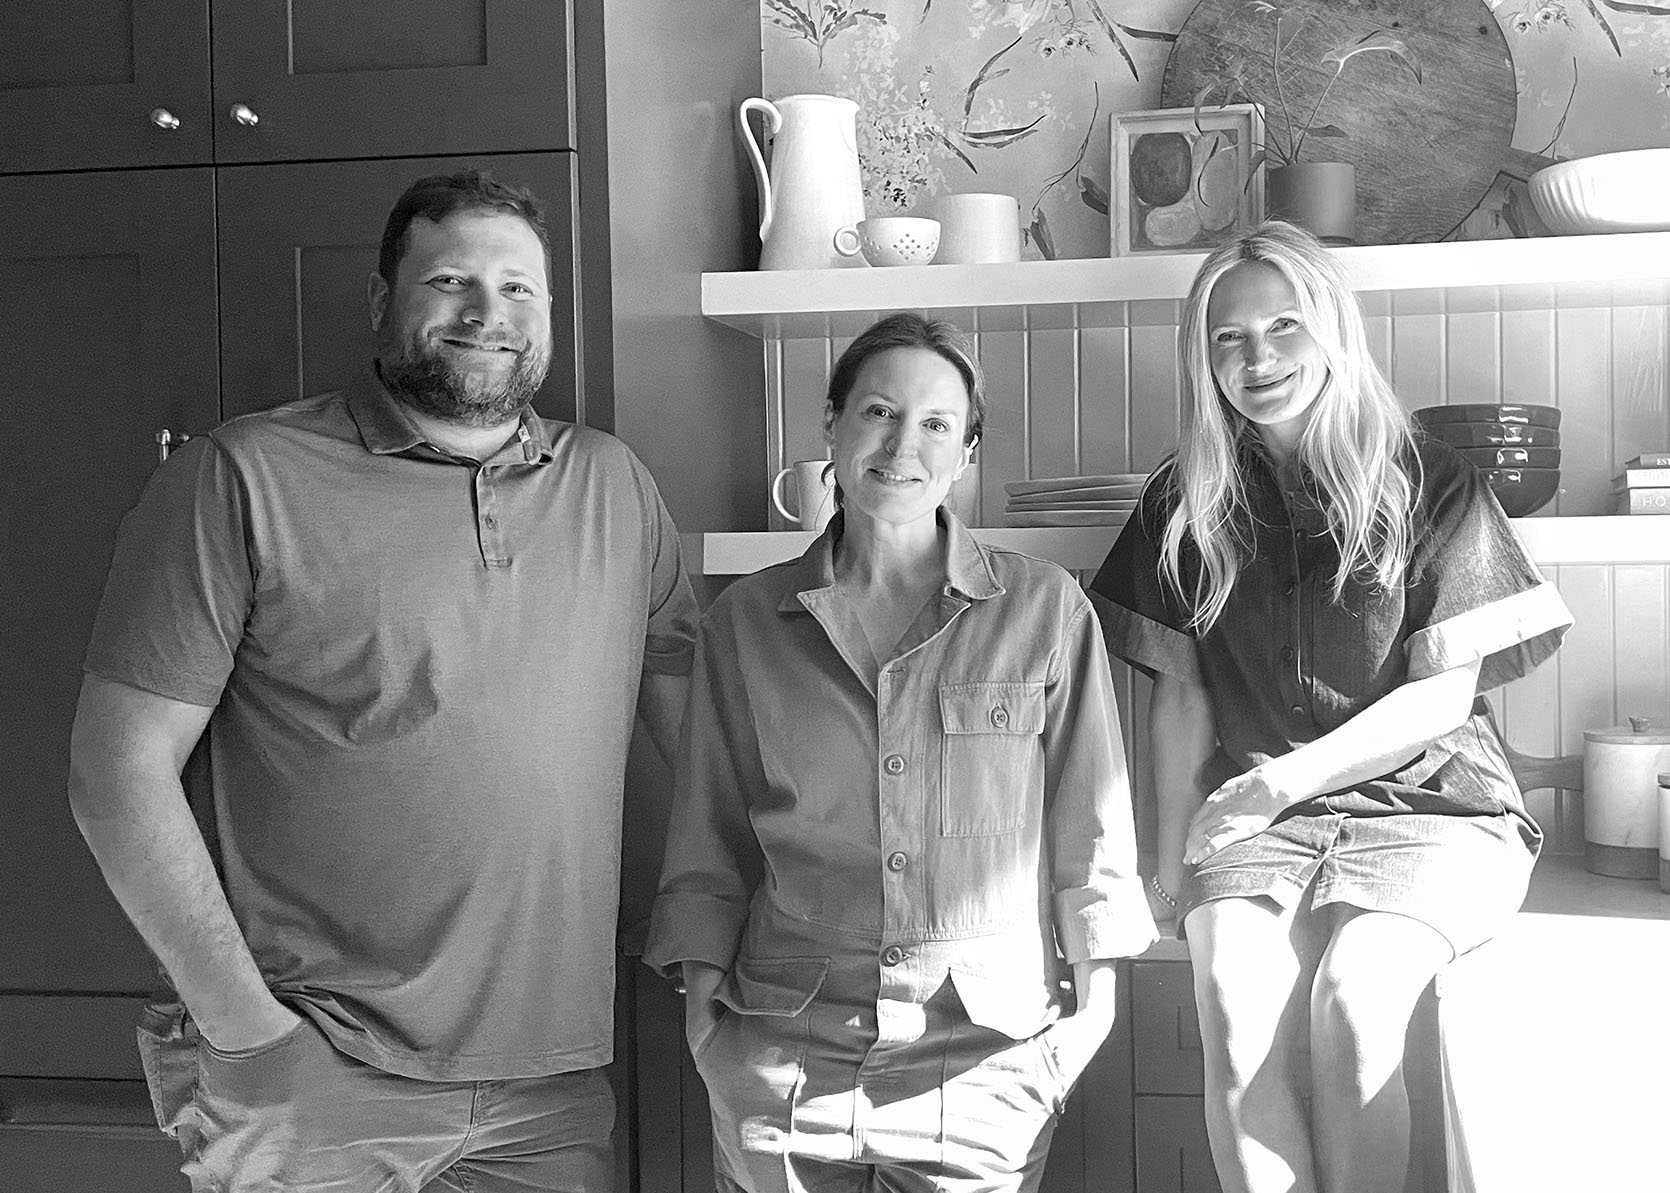
I hired Sarah Weldon (former PDX assistant, currently in design school) to be the design lead and project manager on this. I used to have an in-house design team but I don’t up here so I was SO HAPPY she said “yes.” We designed it together, but she was so instrumental both in ideas and especially in execution. After choosing the paint color, wallpaper and accent finishes, she went to town on the renderings and calculations.
I also hired my brother to be the contractor (he just got his license). This was a great first project for us because the scale of it was pretty darn manageable, but the timeline was fast. He was in charge of executing all the work, booking the subs, and being on-site for quality control, etc. It was SO FUN and pretty darn seamless working with him and Sarah. Emily M. and Gretchen (two of my Portland team) helped with content and the production of the shoot day.
We needed to create a labor and non-Crate & Barrel prop budget which is always hard without exact quotes, but we did our best. Here is what I initially mocked up:
Our Labor And Non-Product Budget:
- Appliances: $10-15k (our budget covered half and Julie was happy to pay the other half to get what she wanted.
- Demo: My brother did this in a day, so this was wrapped up in his fee.
- Refinishing the ceiling: $4-6k (you can see this in tomorrow’s post)
- Carpentry: i.e. shelving, any beadboard and trim work repair/replacement, and closing up the pass-through window.
- Paint cabinets: $4-6k?
- New cabinet fronts for new panel-ready appliances + upper cabinet above new fridge + new hood: $2-8k (I literally have no idea)
- Random non-Crate & Barrel necessities (appliance pulls, pot rack, new faucet): $2-3k
- Contractor fee: TBD but somewhere between $3-10K (huge range, I know)
- Wallpaper + wallpaper install: $1-2k
All of these were very padded and I left a lot of room for nuance. We were under on some but went over on others. There were some additional unexpected costs (per usual) like needing to cut the stone behind the old range to fit the new one, and having to hire an electrician because there were some issues being an older home that we didn’t predict when we installed our new lighting fixtures. We ended up coming in at $23k (not including any of our time, including Sarah’s rendering and project management time) and not including the Crate & Barrel product. Even no-demo reno kitchens can add up because labor or anything custom is very expensive these days, but I think a lot of this could have been DIY’d by a handy and patient homeowner.
Timeline With A Firm Deadline
Nothing like a booked photoshoot with a huge crew flying in to light a fire under your hood. I don’t remember the exact date we started but I think we had seven weeks before the shoot. It honestly felt really doable and safe (and we had such a great kitchen for it). We wanted to do an excellent job and meet the deadline, so one of the reasons that some of our costs were higher than they would normally be is what I like to call a “desperation and urgency” tax. We didn’t have the luxury of time to get multiple quotes, so if our first felt a little high but they could start immediately, we booked them to check the box. It’s such a domino effect and some people couldn’t even quote for weeks. A huge credit to my brother Ken for having a lot of connections and being so friendly that people want to work for him, even on small-ish jobs like this.
The Design Plan
We had the homeowner’s wants and a rough (but firm) budget. In terms of everything we had to get done in just under two months’ time? Here’s what we were aiming for:
- Refinish the ceiling. Ice blasting? sanding? Walnut blasting? Come back tomorrow and see!!
- Remove uppers to open up the space + install floating shelves.
- Hire a cabinet maker to make panels for the new panel-ready appliances. Fridge, dishwasher, hood, and upper cabinet above the fridge to look more integrated.
- Close up the pass-through window that they didn’t use. This would give us more shelving space.
- Repair and replace trim and beadboard where needed.
- Paint existing cabinetry boxes on site and all beadboard. All fronts were taken to a studio and sprayed.
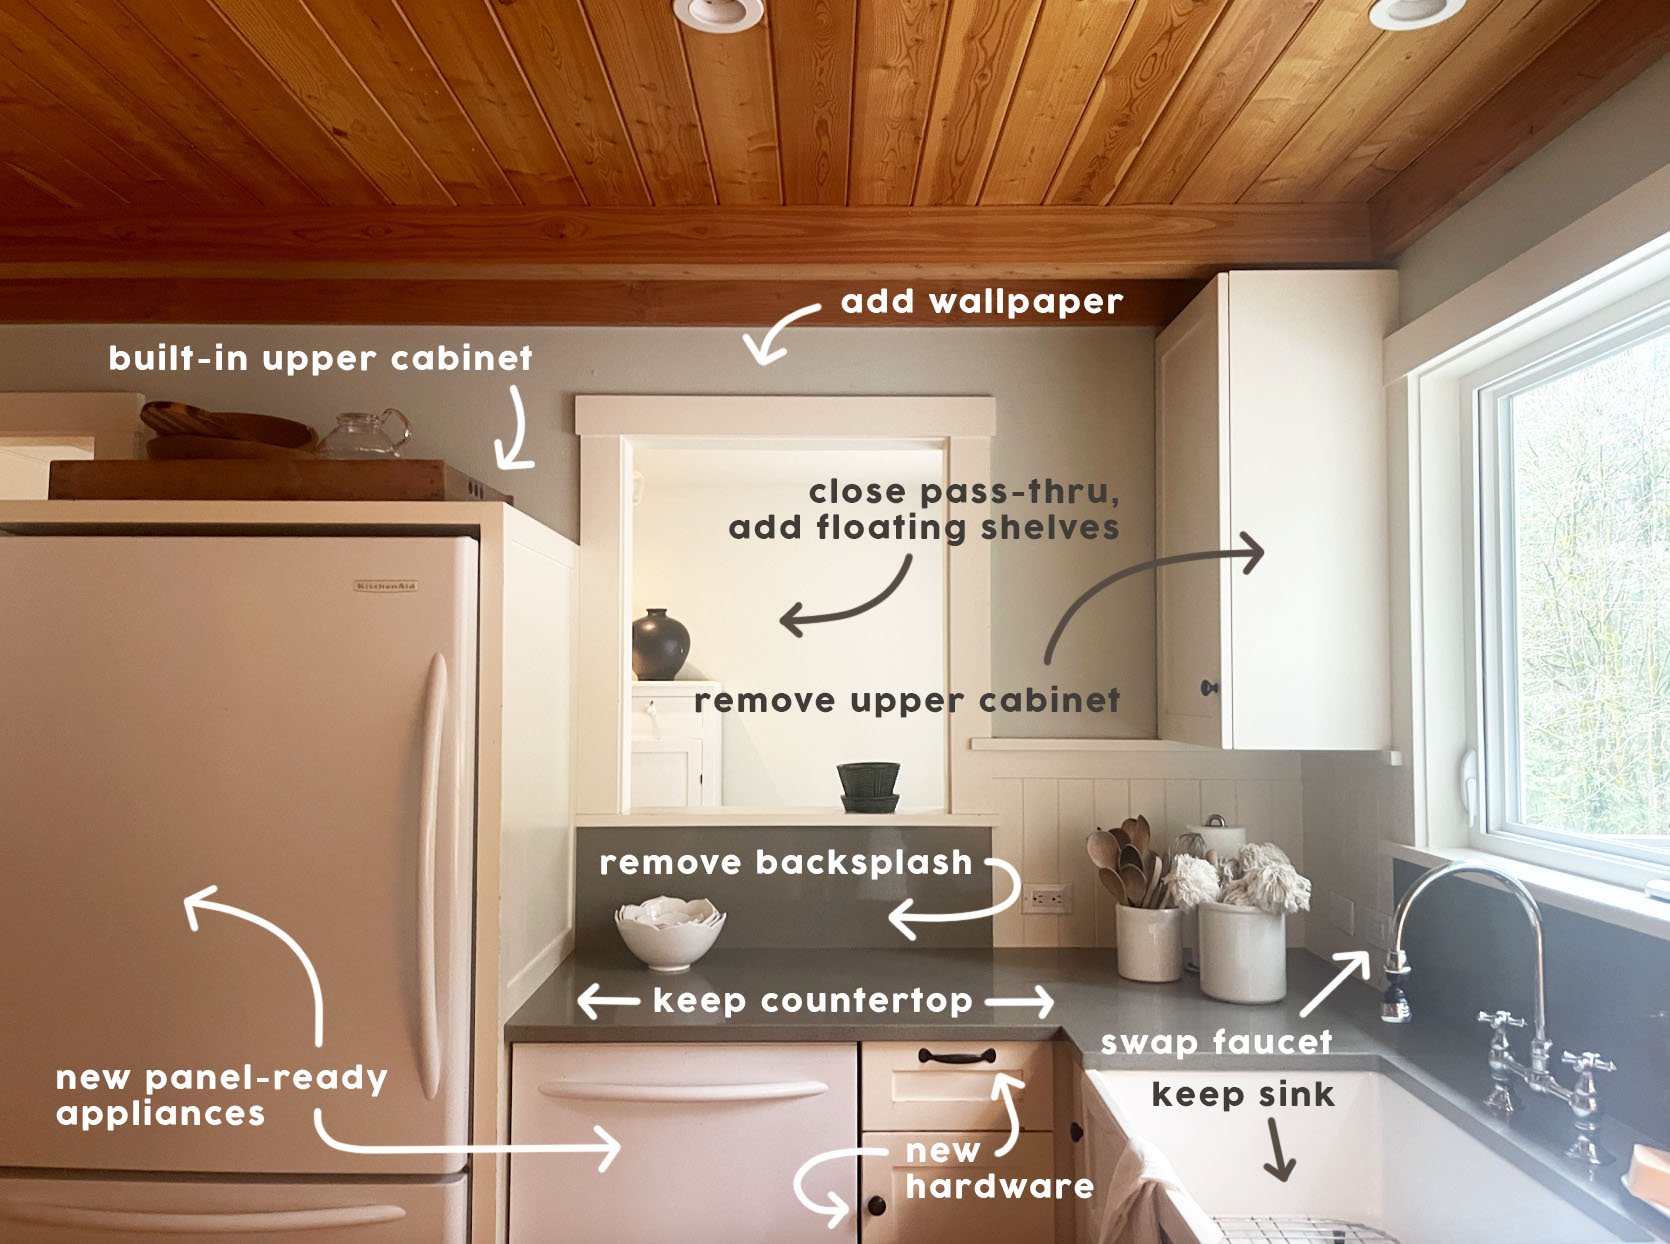
- Source panel-ready appliances (and hood) with literally NO lead time. These needed to be in stock in Portland.
- Change out the faucet.
- Change pendant over island.
- Change out all hardware. This required new holes. Our painter patched the old holes before he painted.
- Order wallpaper and hire an installer. Timing was sensitive.
- Shop and style it all out.
It sounds like a mountain to climb but it really did feel so doable, maybe in even under a month. I’ve done this so many times, though, that I knew that if we didn’t pad the timeline, we’d be in trouble if we ran into any hiccups or anything needing the luxury of time to troubleshoot. So much of it has to do with labor availability and we aren’t in control of that. Again, kudos to Ken for pulling it off. We actually got done a week early and we had so much time to style and play before the Crate executives and photographers showed up.
The Design Board
This isn’t the final design plan because I want to keep it a secret until the reveal on Thursday, but here you can get a sense for the direction we were headed and get a peek into what you are about to see later this week.
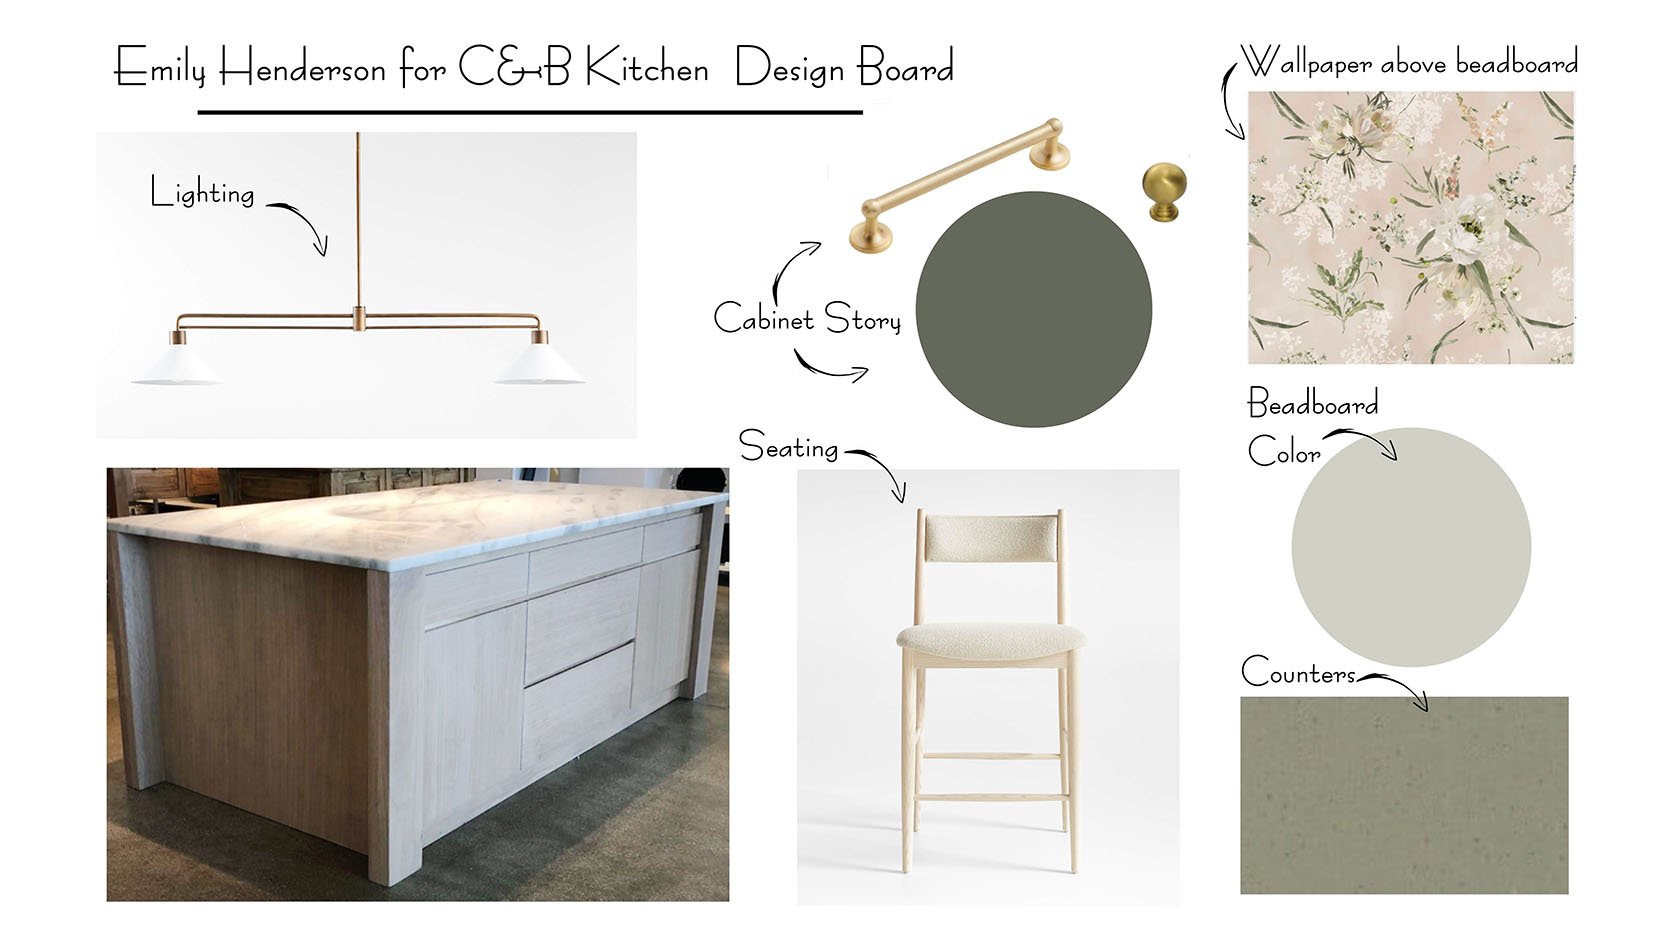
The final design is full of color, so fun and modern, and with a lot of whimsy. The transformation is real and high impact, all in seven weeks.
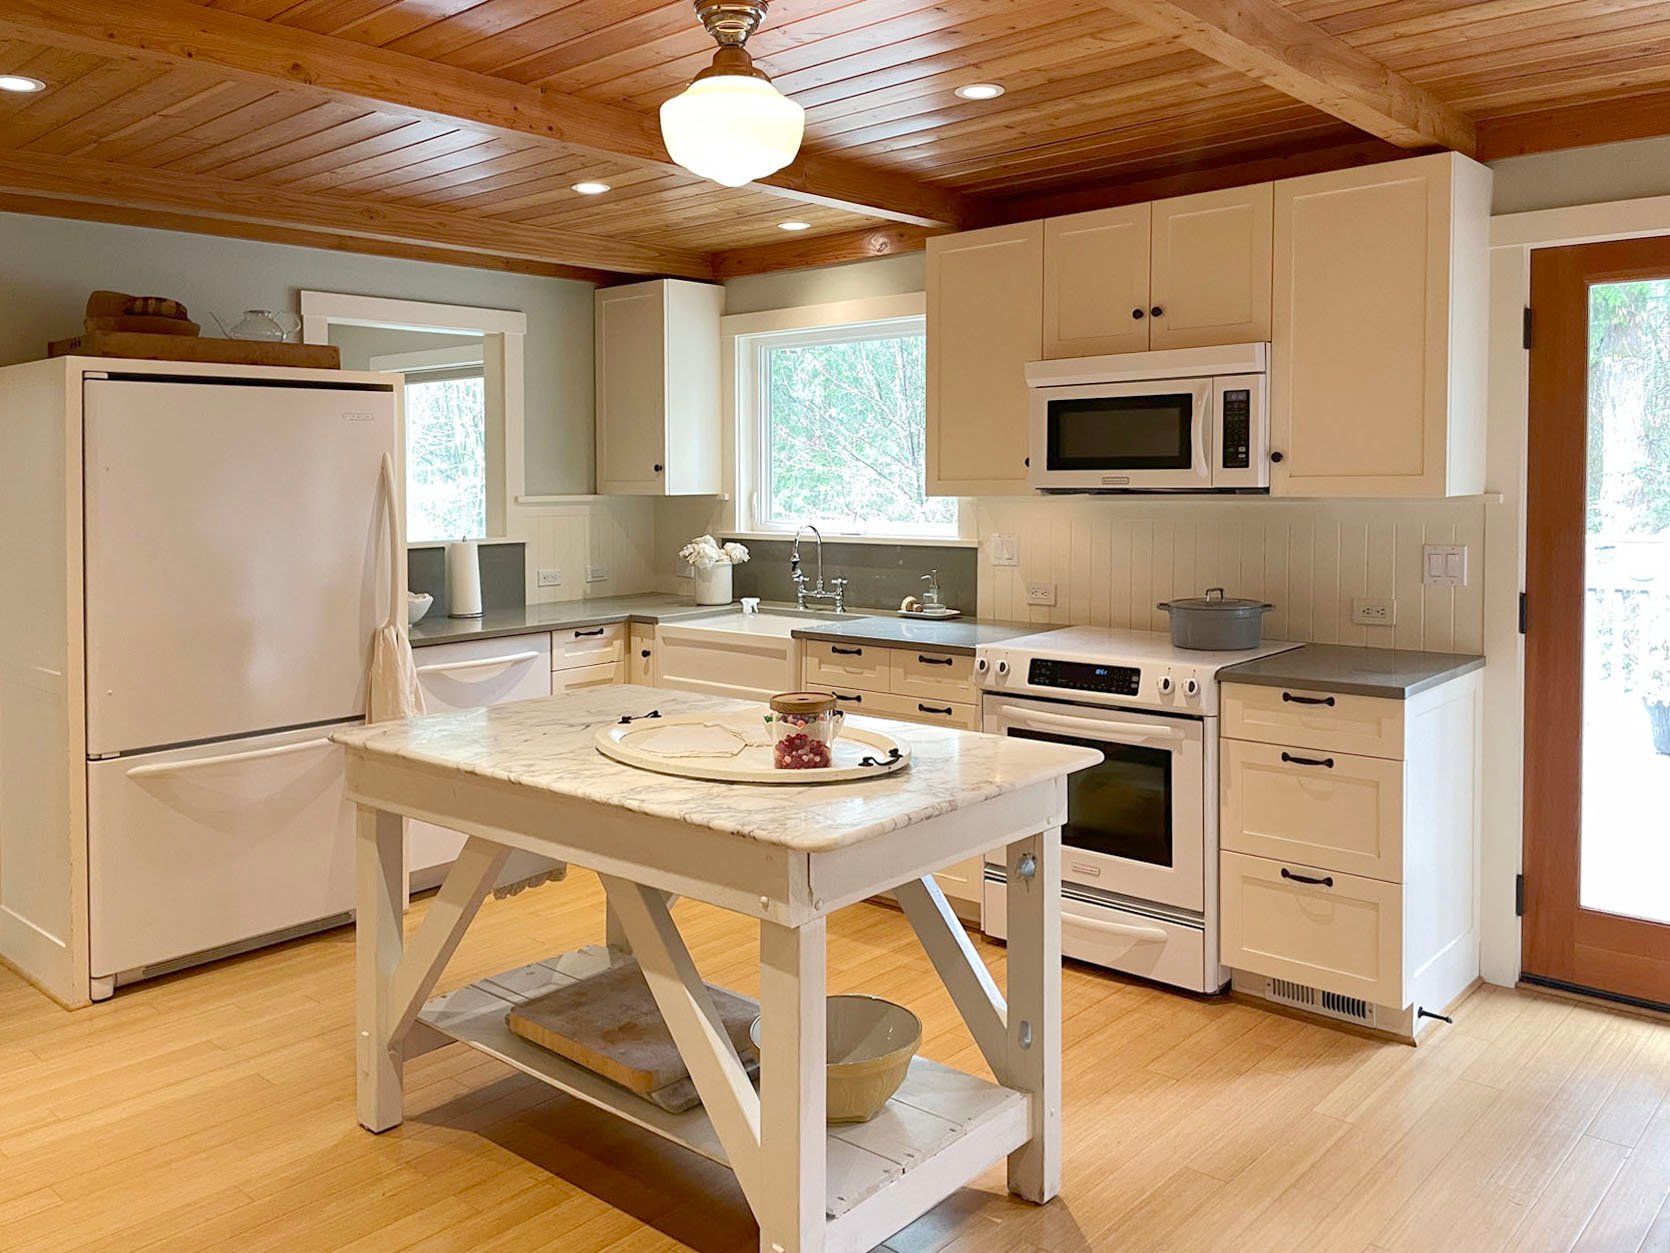
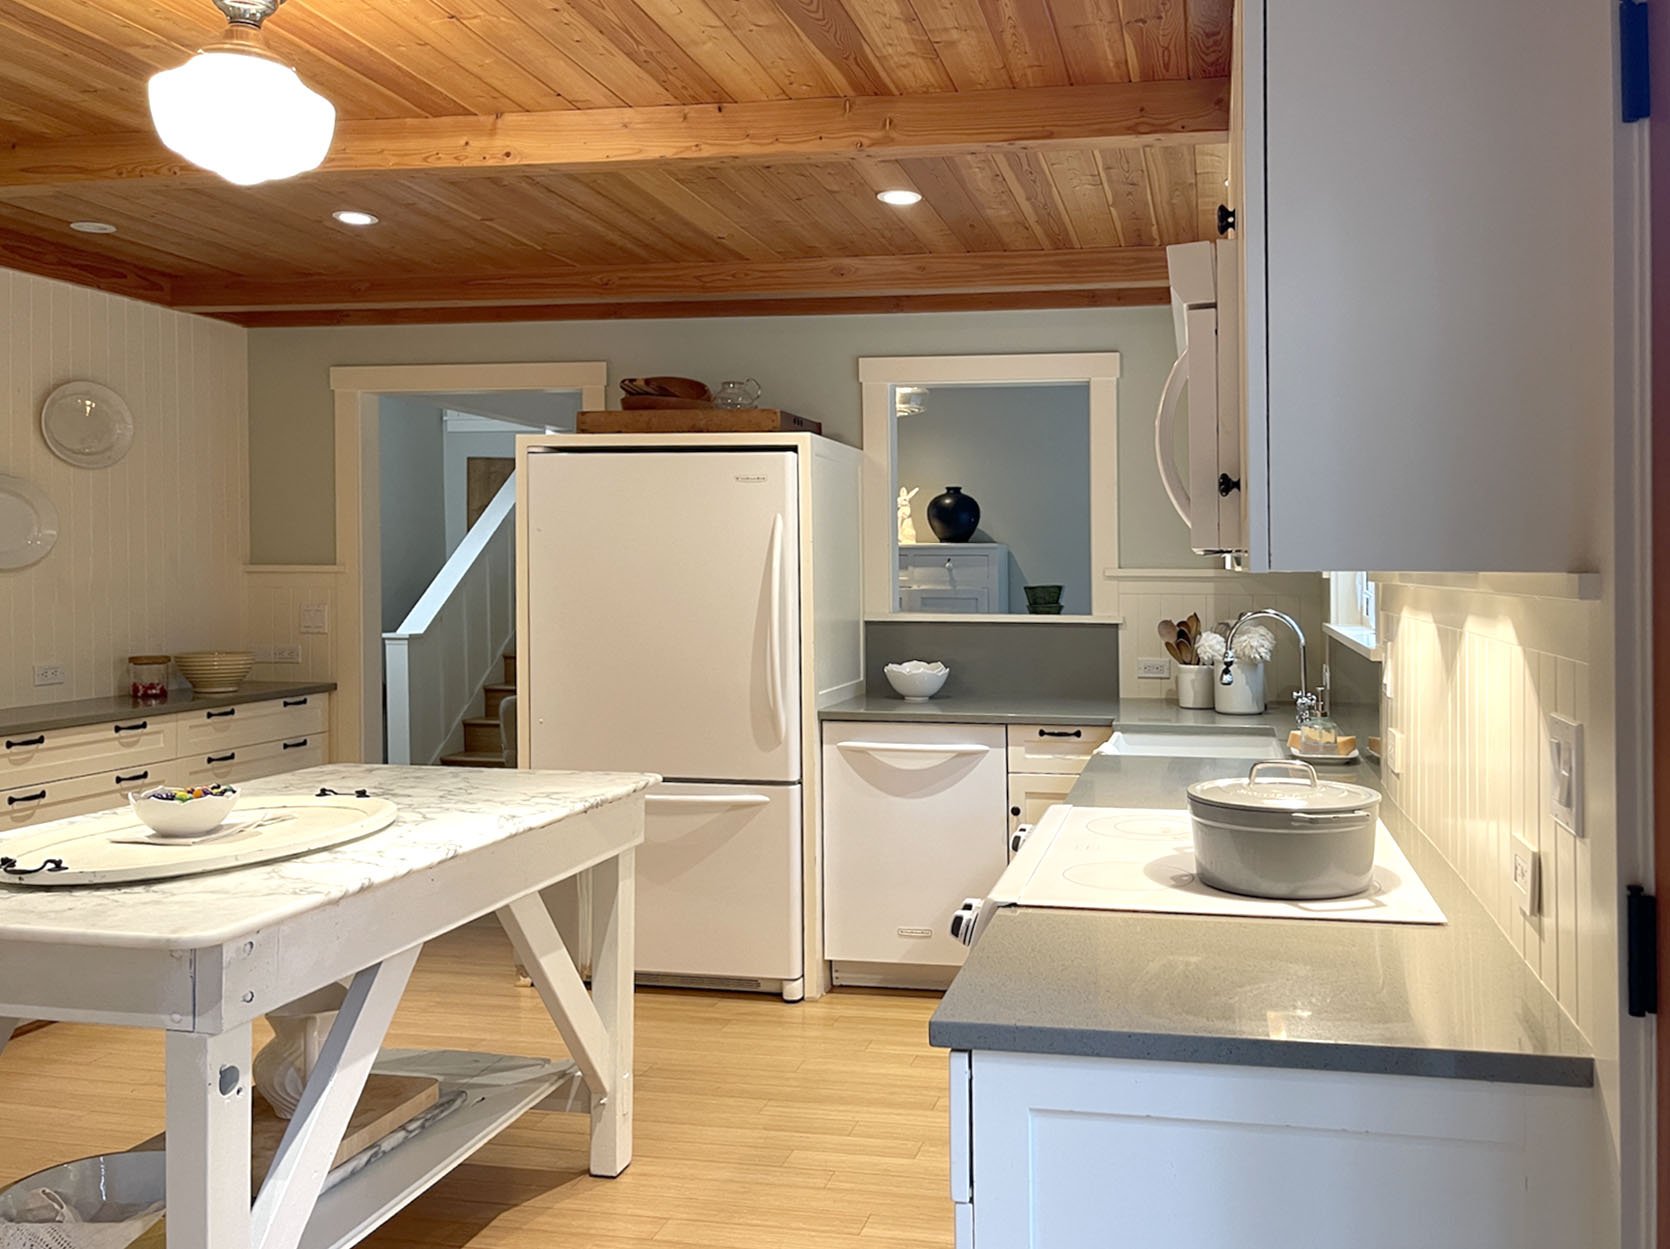
Sneak Peek!!
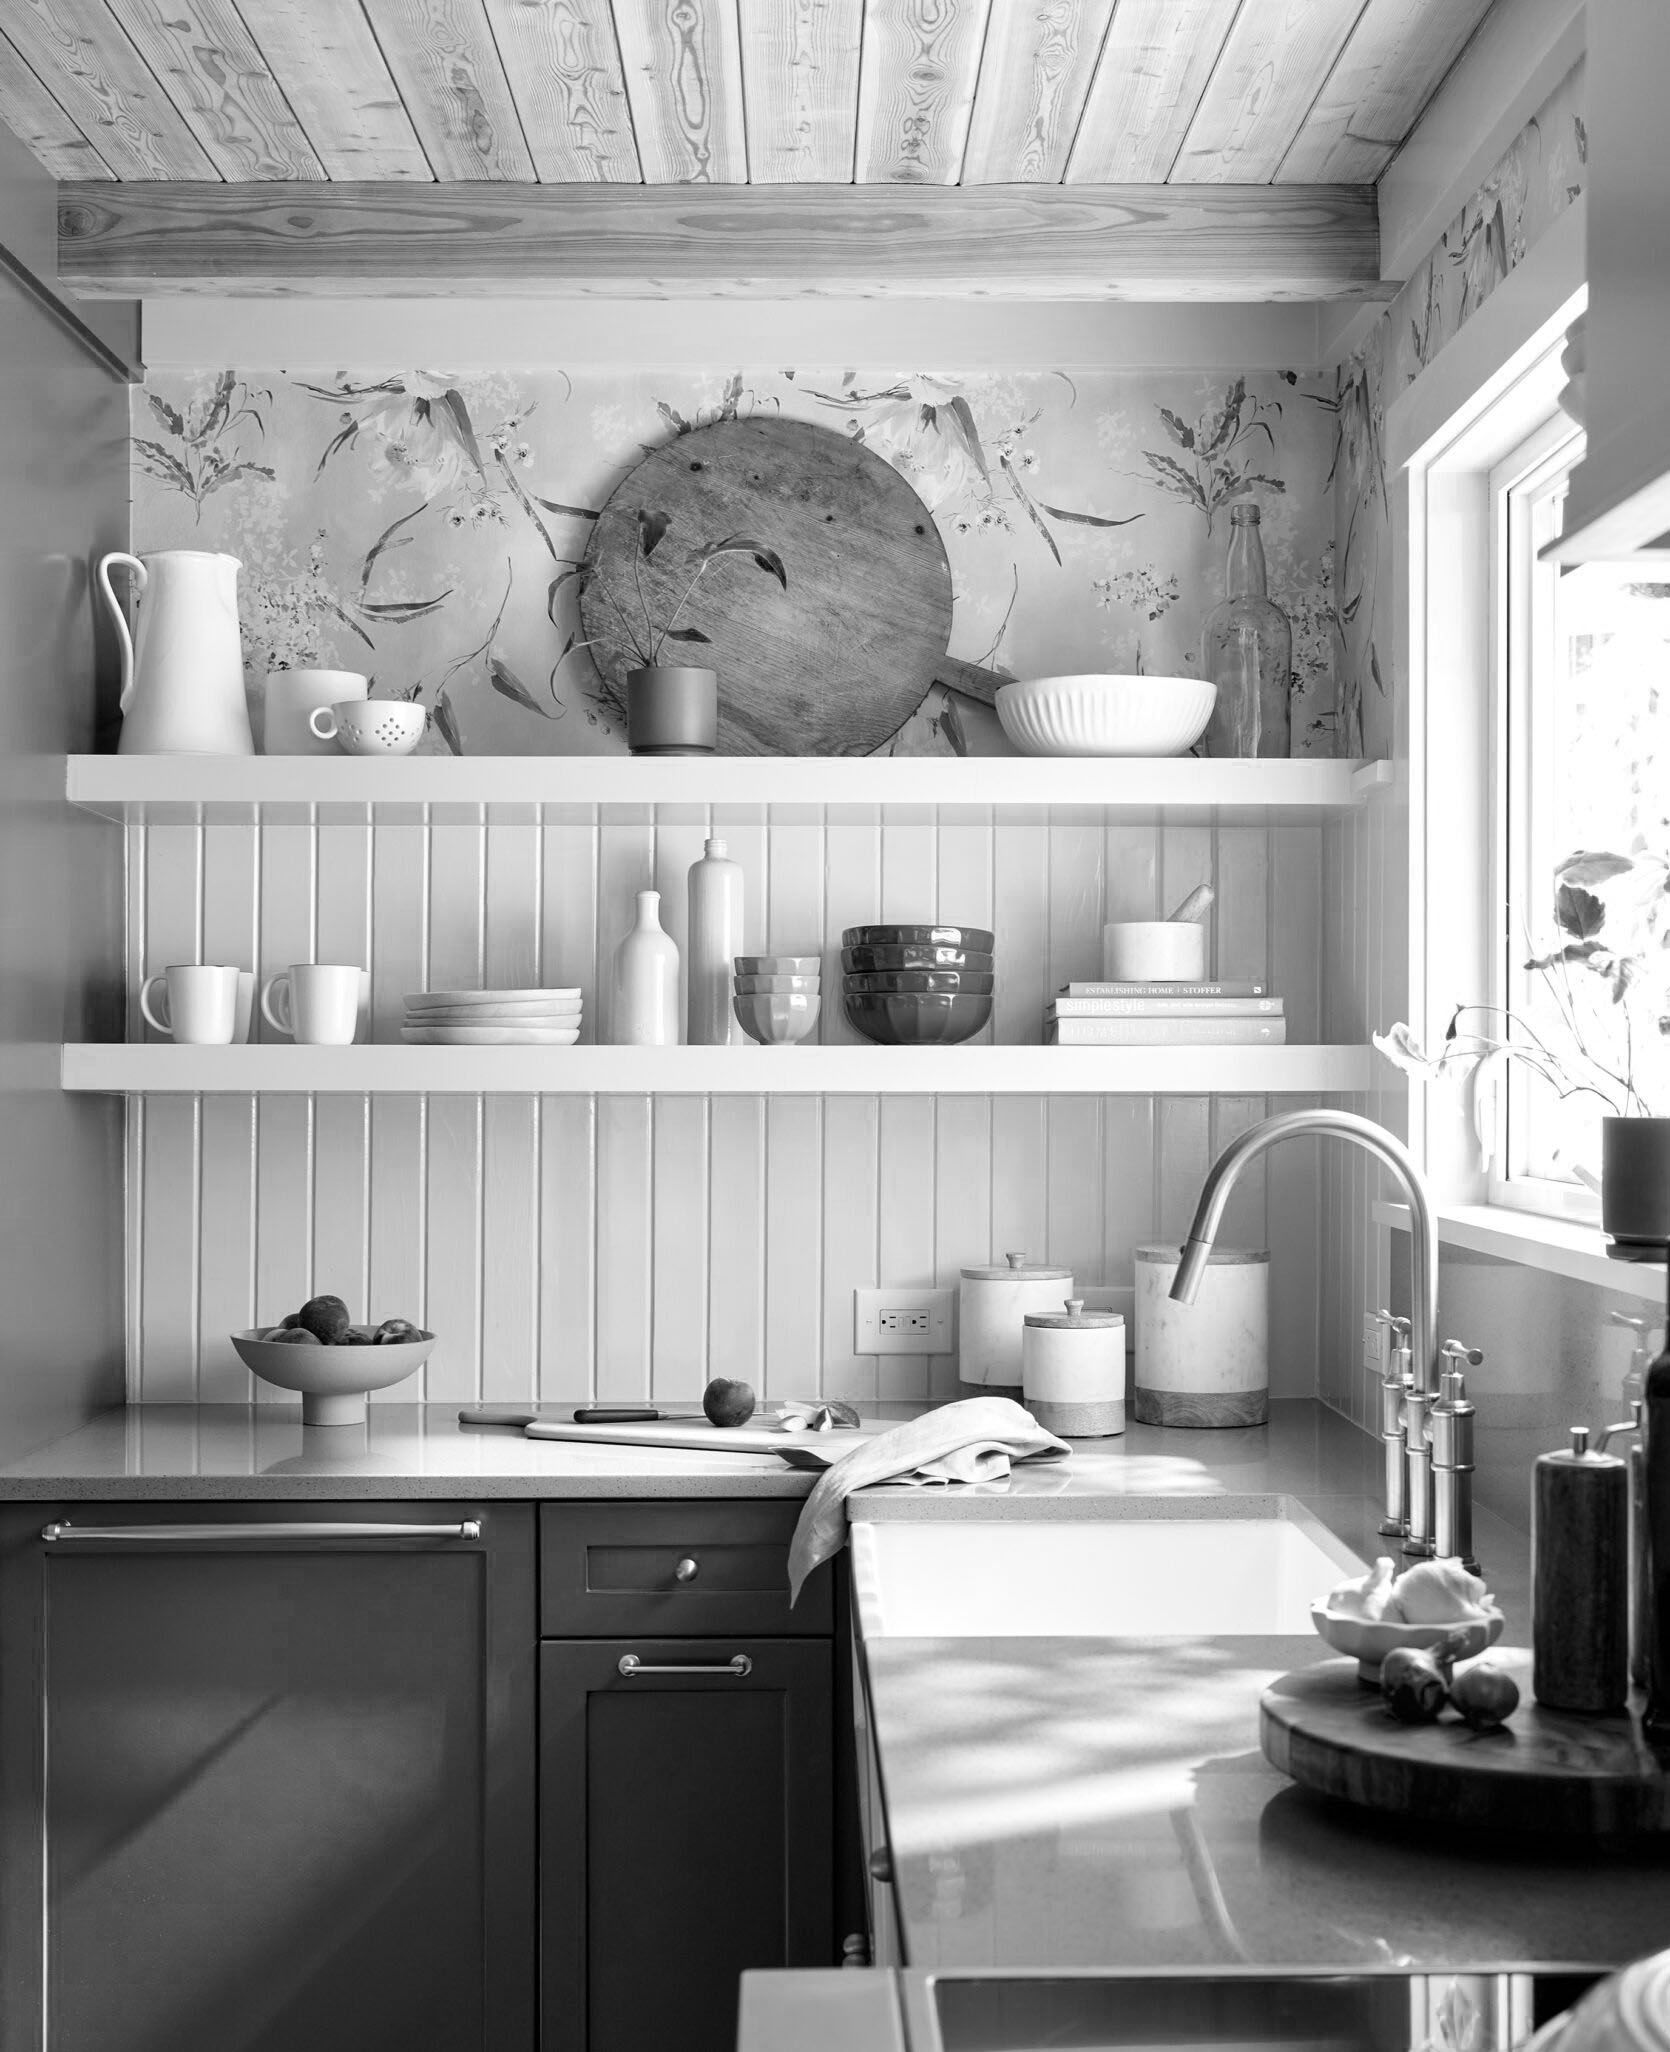
You know it’s hard for me to hold onto final images for too long, so here’s a little look into the final design but not the full colors (YET). Tomorrow, you’ll read about the ceiling refinishing (it’s a thing and our first go around did NOT turn out as we had hoped so it’s worth a whole post). And then come back Thursday for the full kitchen reveal. We are OBSESSED with how it turned out. It’s honestly so sweet and full of personality (like Julie). It has such a point of view now and it seemed like the homeowner couldn’t have been happier with her kitchen. She was so fun and easy to work with and the whole process was so seamless. I CAN NOT WAIT TO SHOW YOU.
A huge thanks to Sarah Weldon and Ken Starke for all their work on this, and Crate & Barrel for giving such creative freedom. T-minus TWO DAYS before the reveal of this kitchen. I think/hope you’ll love it as much as we do. xx
THIS POST WAS ORIGINALLY PUBLISHED HERE.
