Happy reveal day! I can’t express how exciting and downright fun this kitchen makeover has been to execute and see come to life. After doing my own three-year renovation-to-reveal process on our farmhouse, it has been incredibly satisfying to turn around a kitchen makeover in less than two months (!!). If you are just landing here today and this is all new to you, you’re going to want to head to this post to see all the before photos and read about the budget, timeline, and needs and wants of the homeowner. Then come back studied up and take in this beauty fully.
To help them launch their new line of renovation products, I collaborated with Crate & Barrel to give a new life to this kitchen. In just a bit, you’ll see the stunning kitchen island from the collection but know that there is so much more: a few kitchen island options, bathroom vanities, hardware, and, of course, lighting and accessories. Our reader/homeowner, Julie, submitted her kitchen for the makeover and we felt like it was the perfect space that checked all our boxes—timeline, budget, style, and the right space to show off the island. Then, we got to work. I hired a familiar team to me including my former PDX assistant, Sarah Weldon, to project manage and do all the renderings needed, as well as my brother Ken to be the contractor and manage all the subs. I have to say it went SO WELL, with a few normal problem-solving opportunities that we honestly sailed through together.
And before we get into the pictures and details here’s a fun video about the transformation! (just wait for the ad to play:))
Before
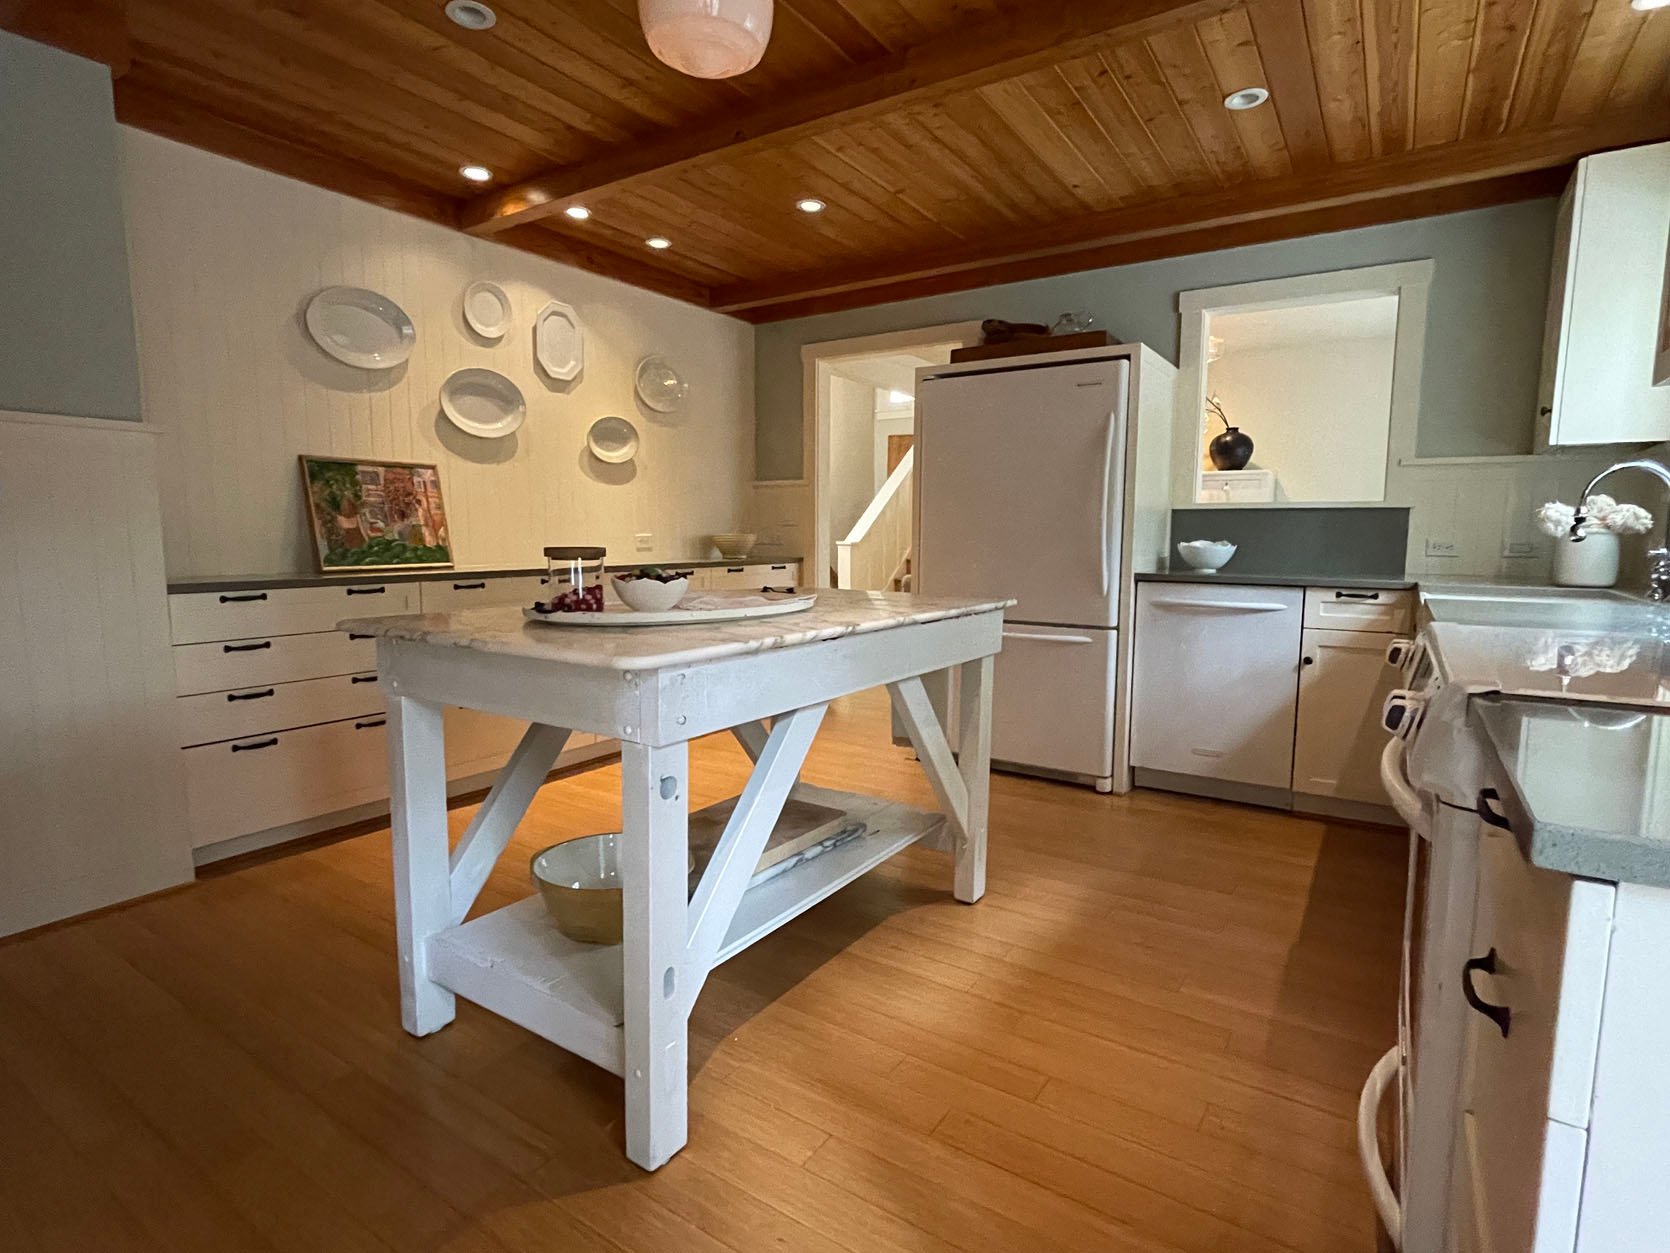
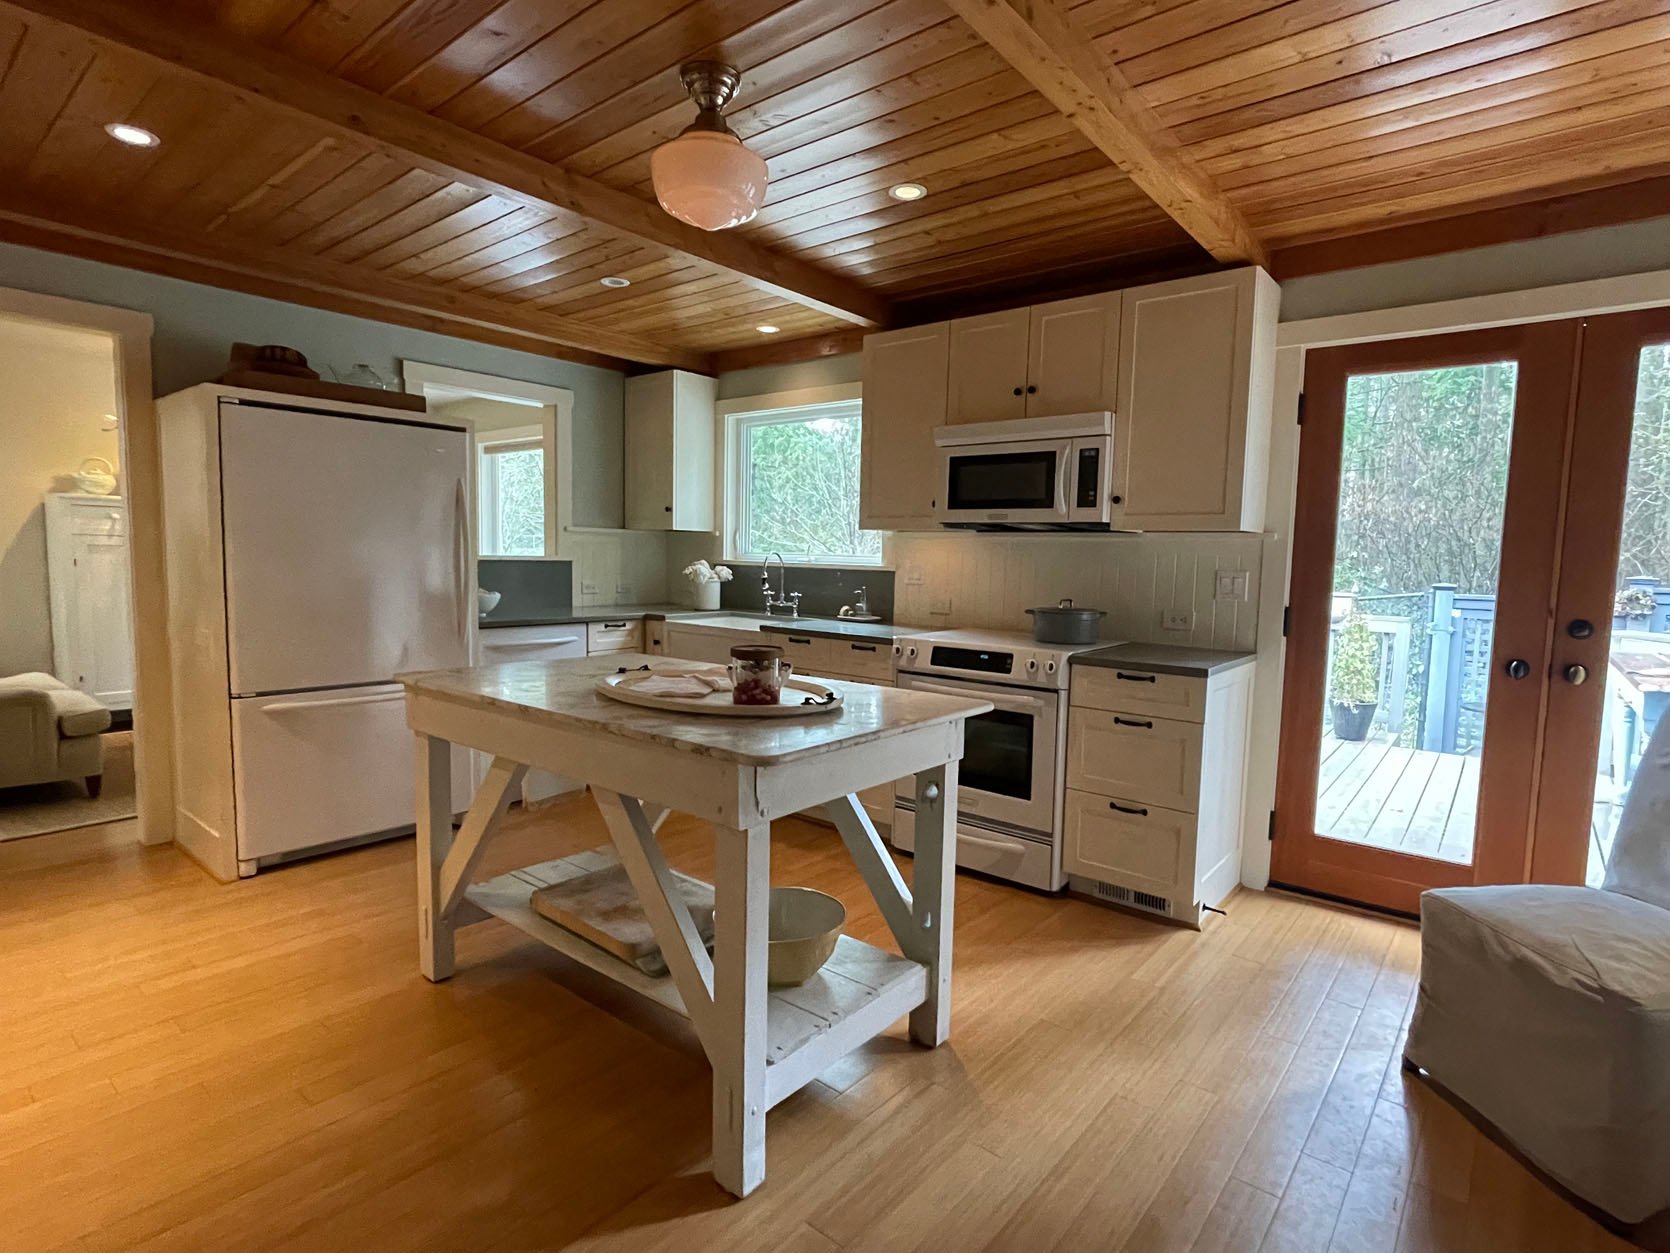
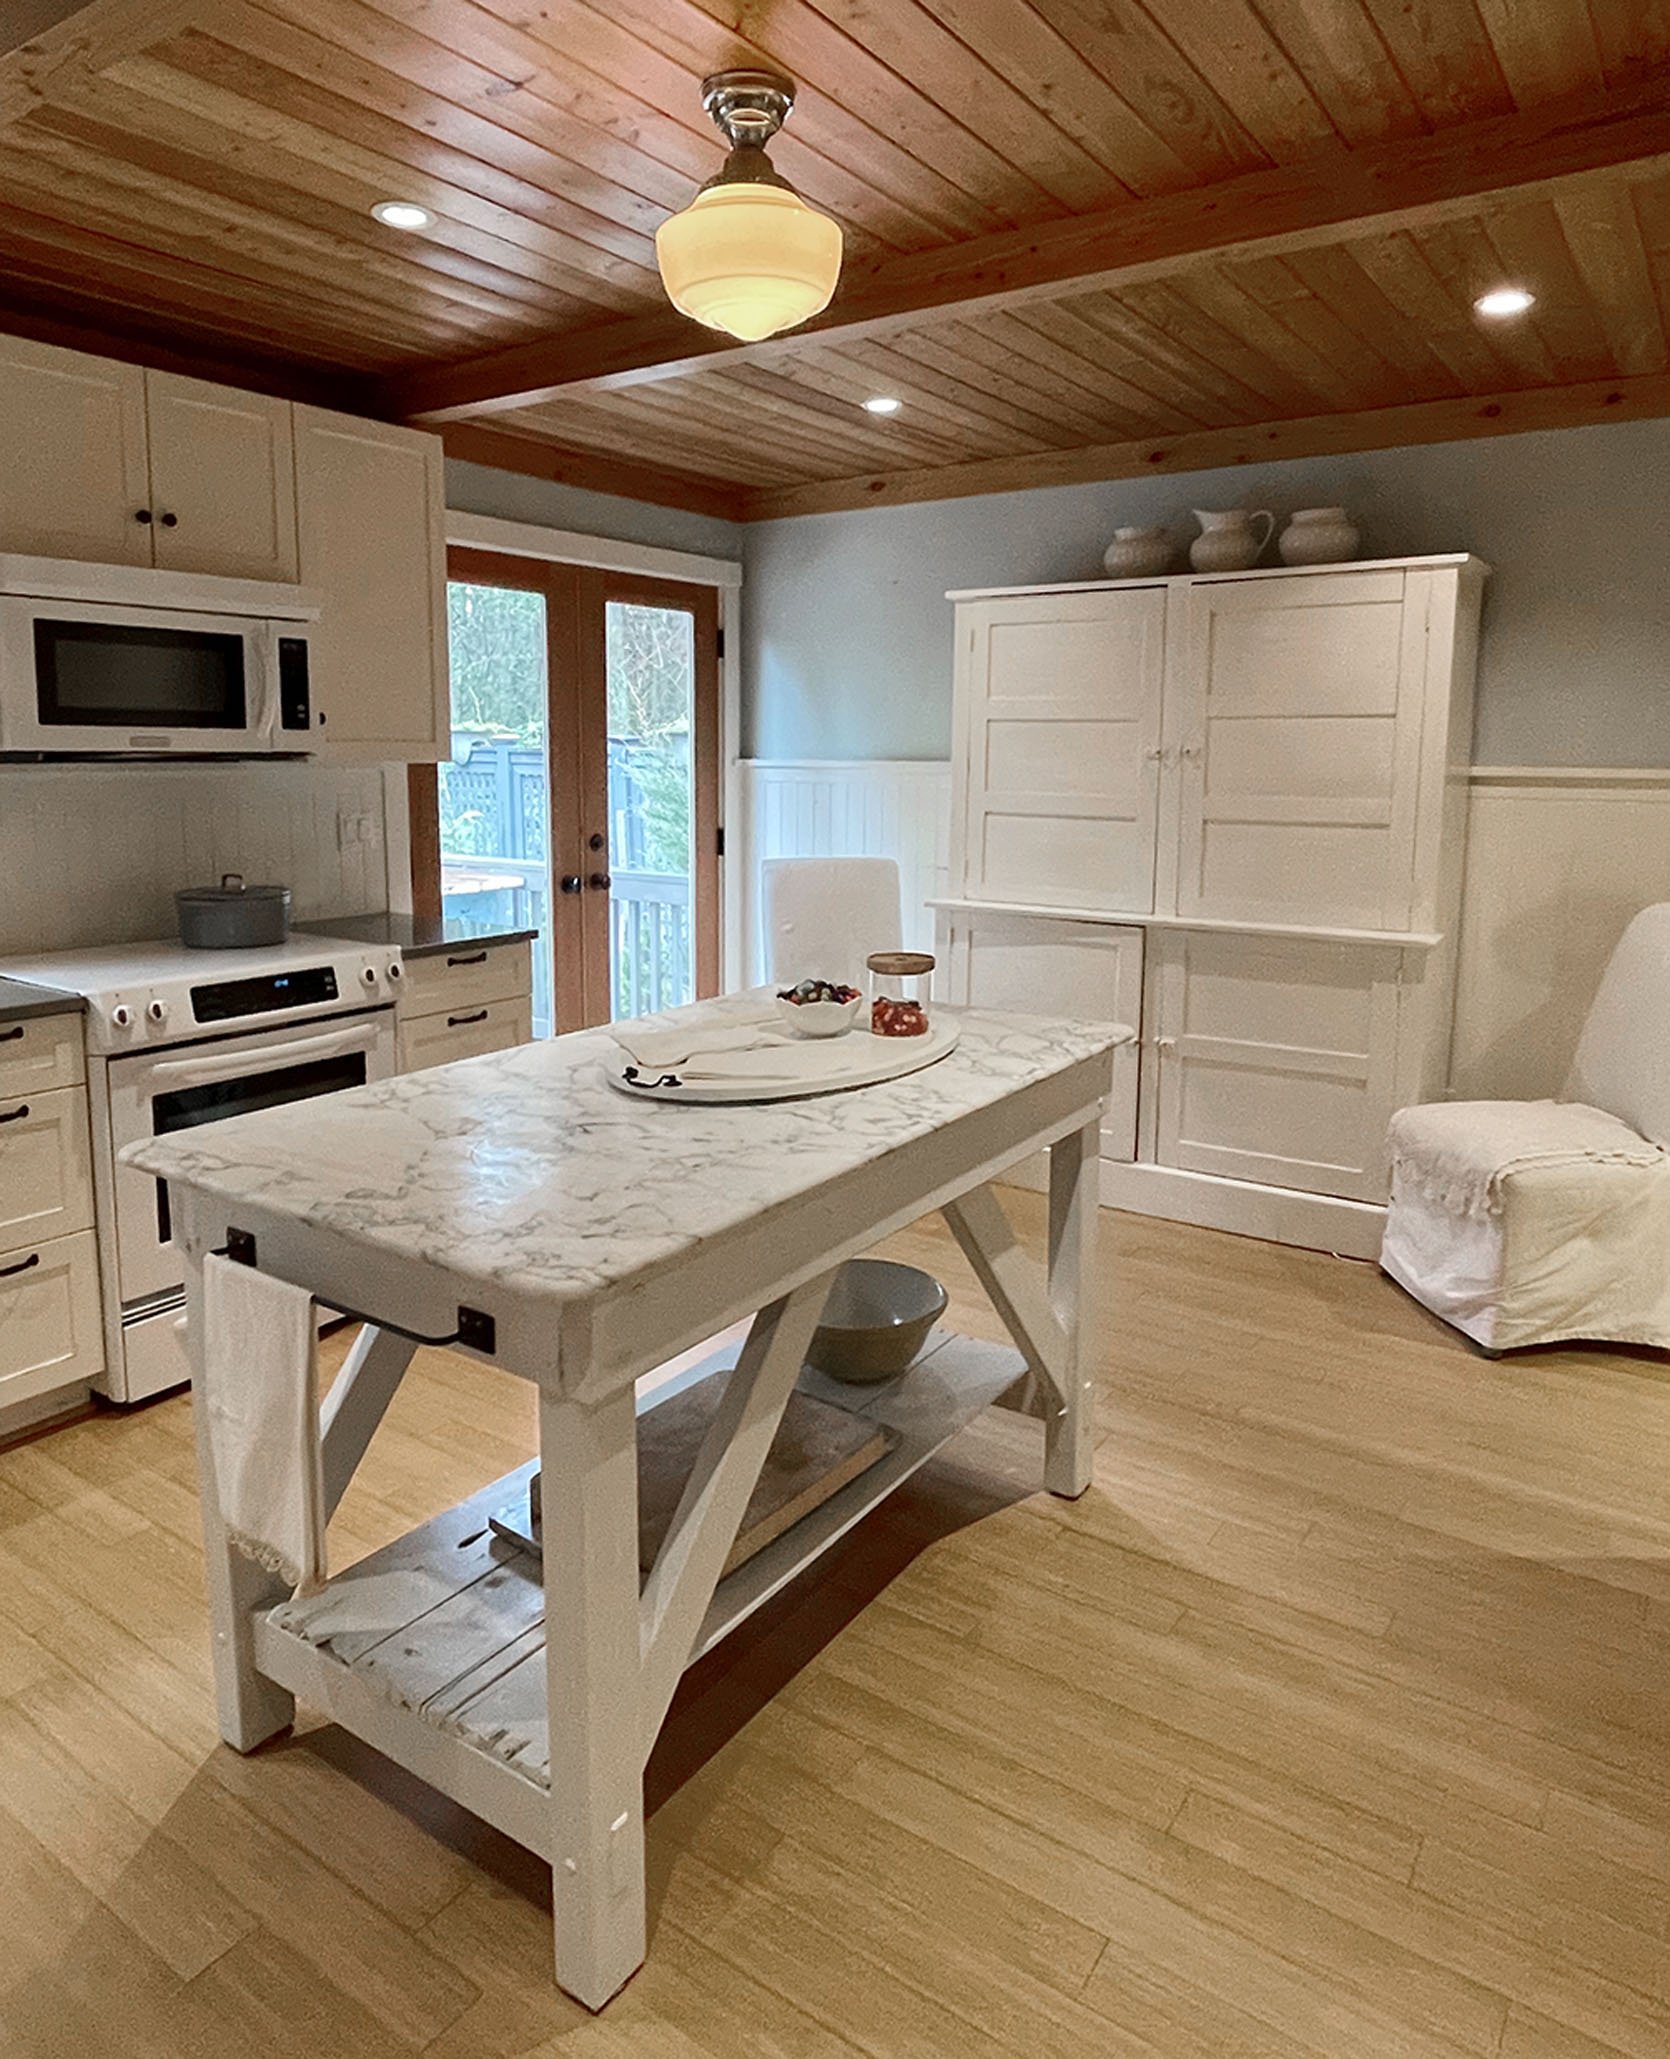
As a reminder, the kitchen before had a ton of potential and was ripe for a surface-level glow-up as it didn’t need any new electrical or plumbing, no walls moved, and no engineering—all cosmetic. Here was our to-do list again:
- Install new panel-ready appliances + functioning range
- Remove uppers and replace with open shelving and a new hood
- Refinish ceiling (check yesterday’s post for what we did)
- Add new hardware, faucet, and lighting
- Paint and wallpaper
We’d keep the following:
- Existing layout
- All the lower cabinets (and bank of drawers), as well as the sink
- Flooring
- Paneling (it would just need to be patched and painted)
- Countertops, cutting where needed (they are pretty good and replacing them is a real thing)
The whole project took almost two months, seven sub-contractors, and a lot of hard work by my team to get her done. While this is a faster and more budget-friendly kitchen remodel as compared to most, we wanted to be real about the amount of time and effort that went into it because it’s still a lot. My hope is that you can glean ideas and information from this makeover that you could implement in your own remodel.
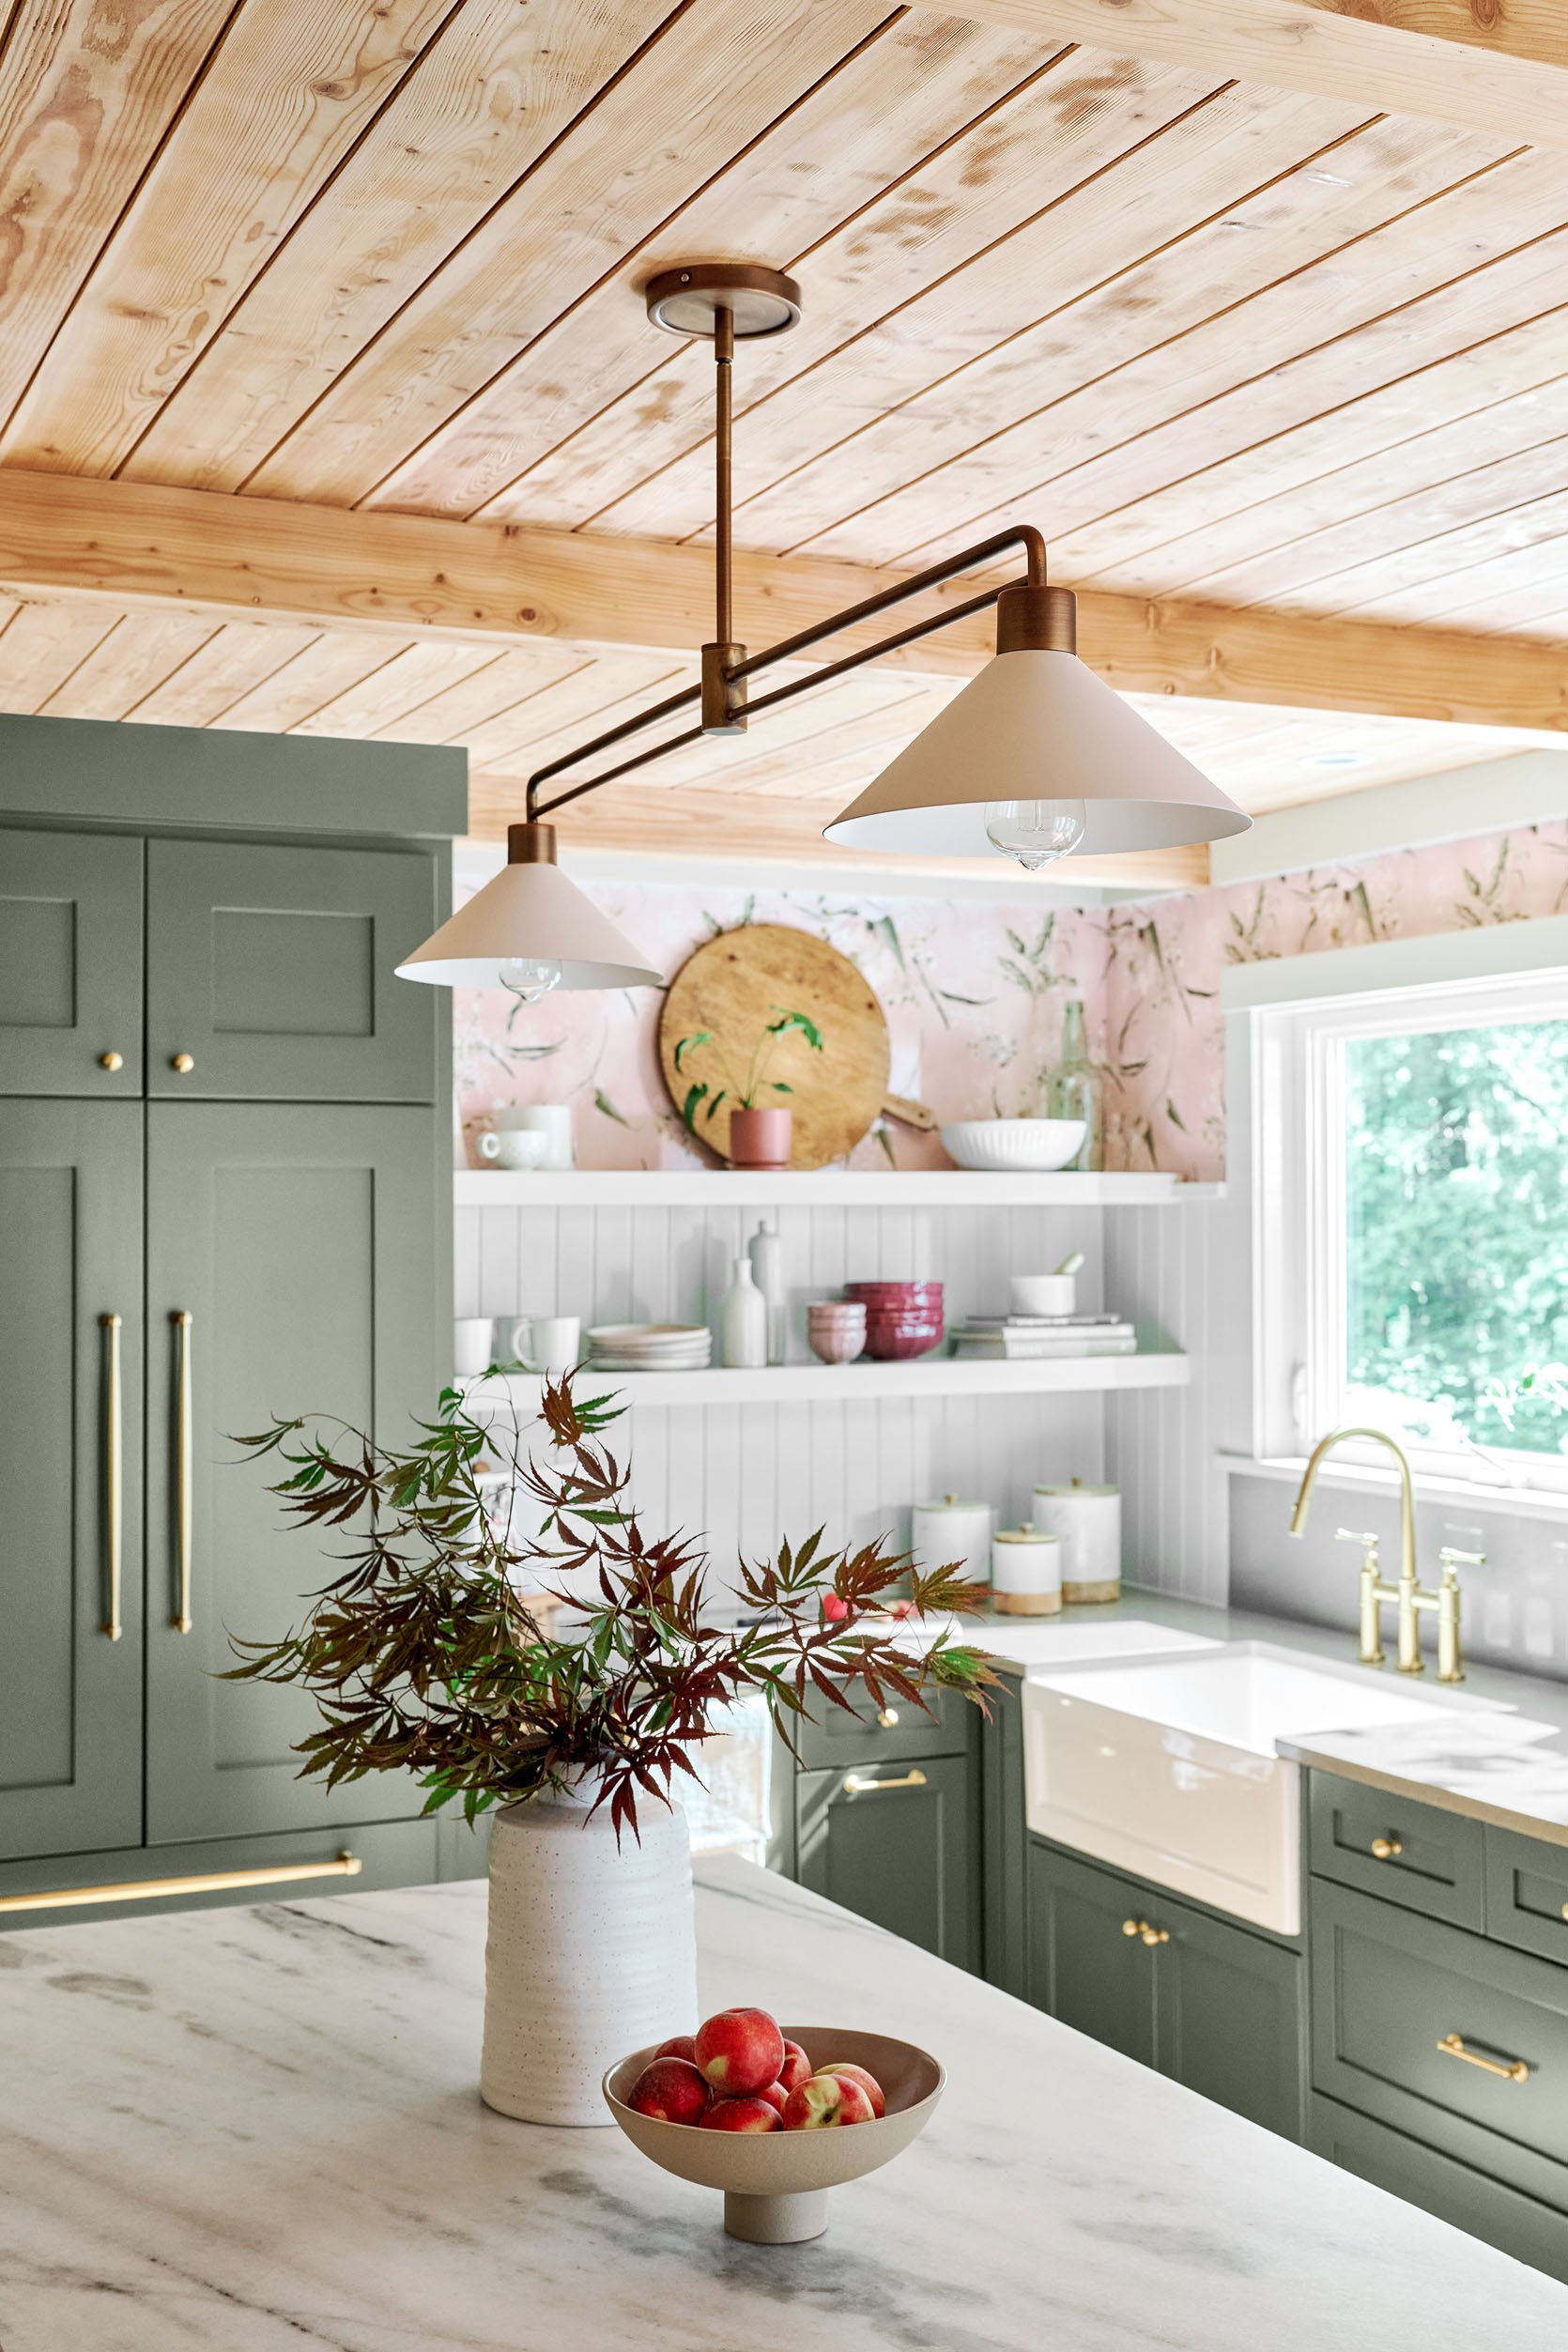
The Kitchen Now!!!
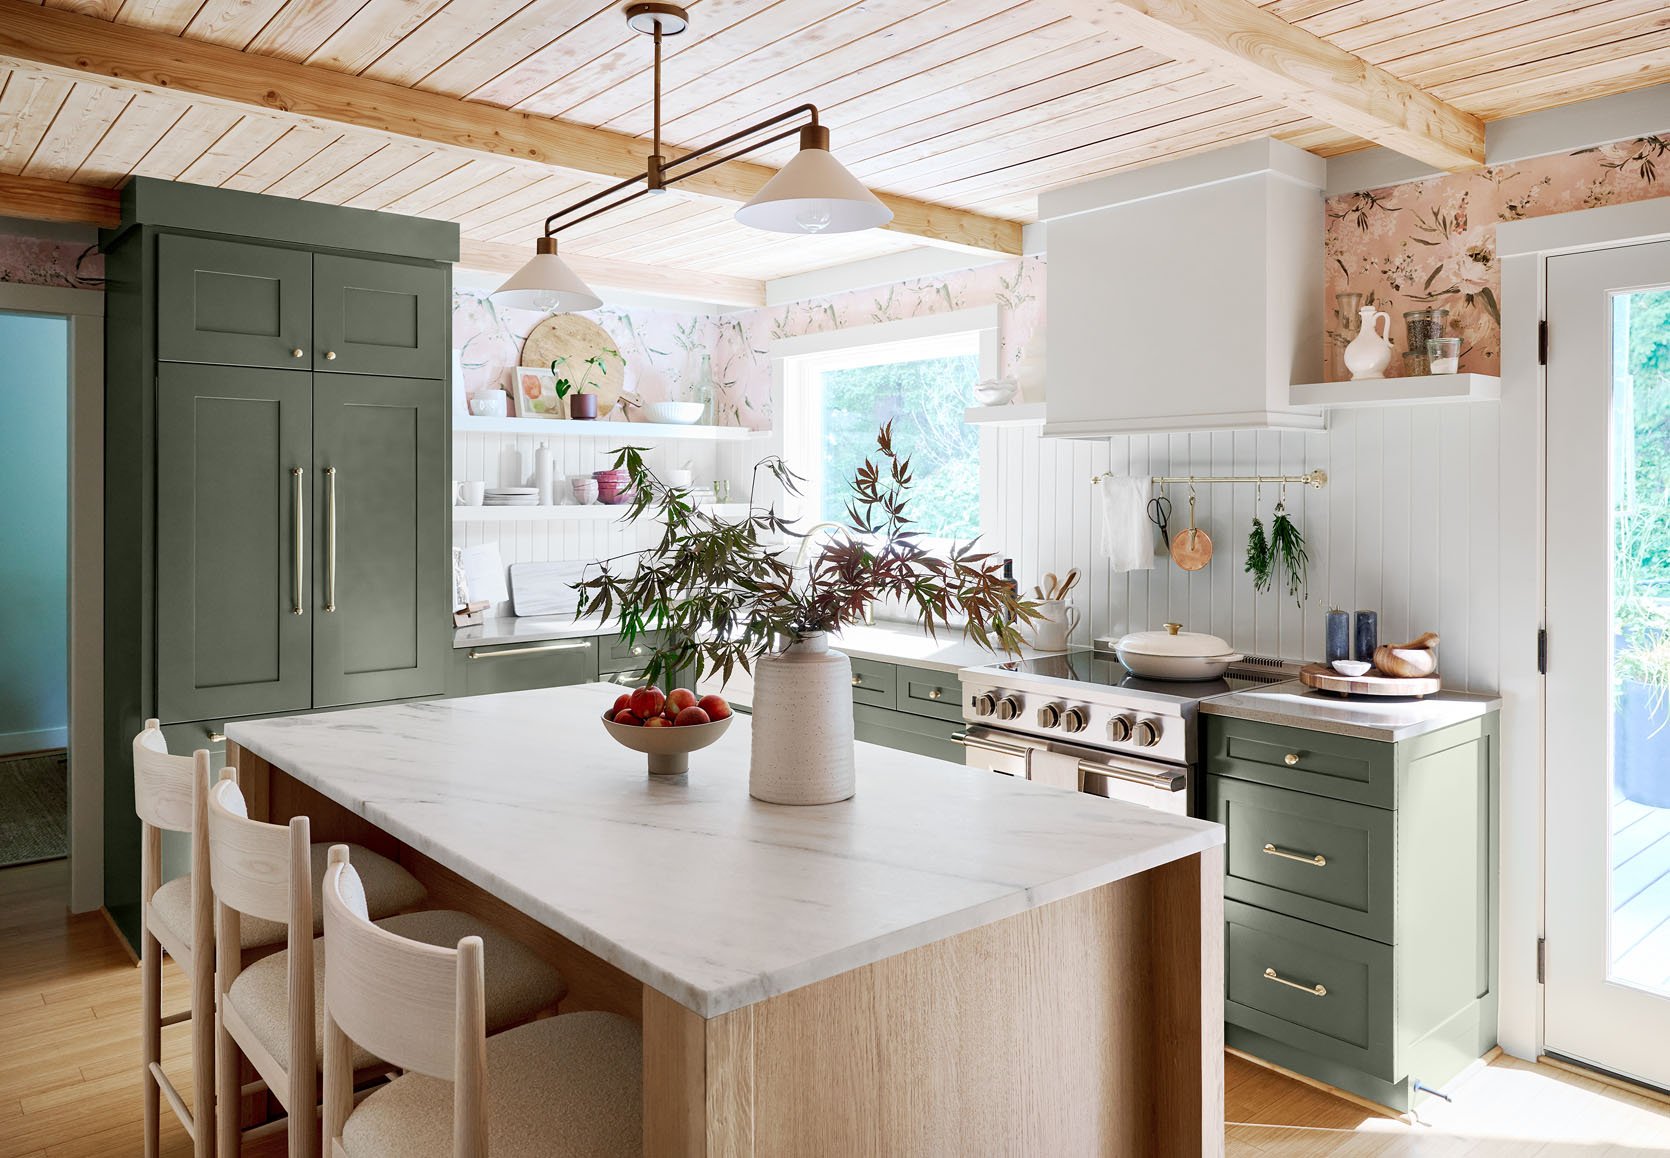
Cabinetry Paint Color | Wallpaper | Backsplash Paint Color | Ceiling Light | Island | Stools | Knobs | Pulls | Applicance Pulls
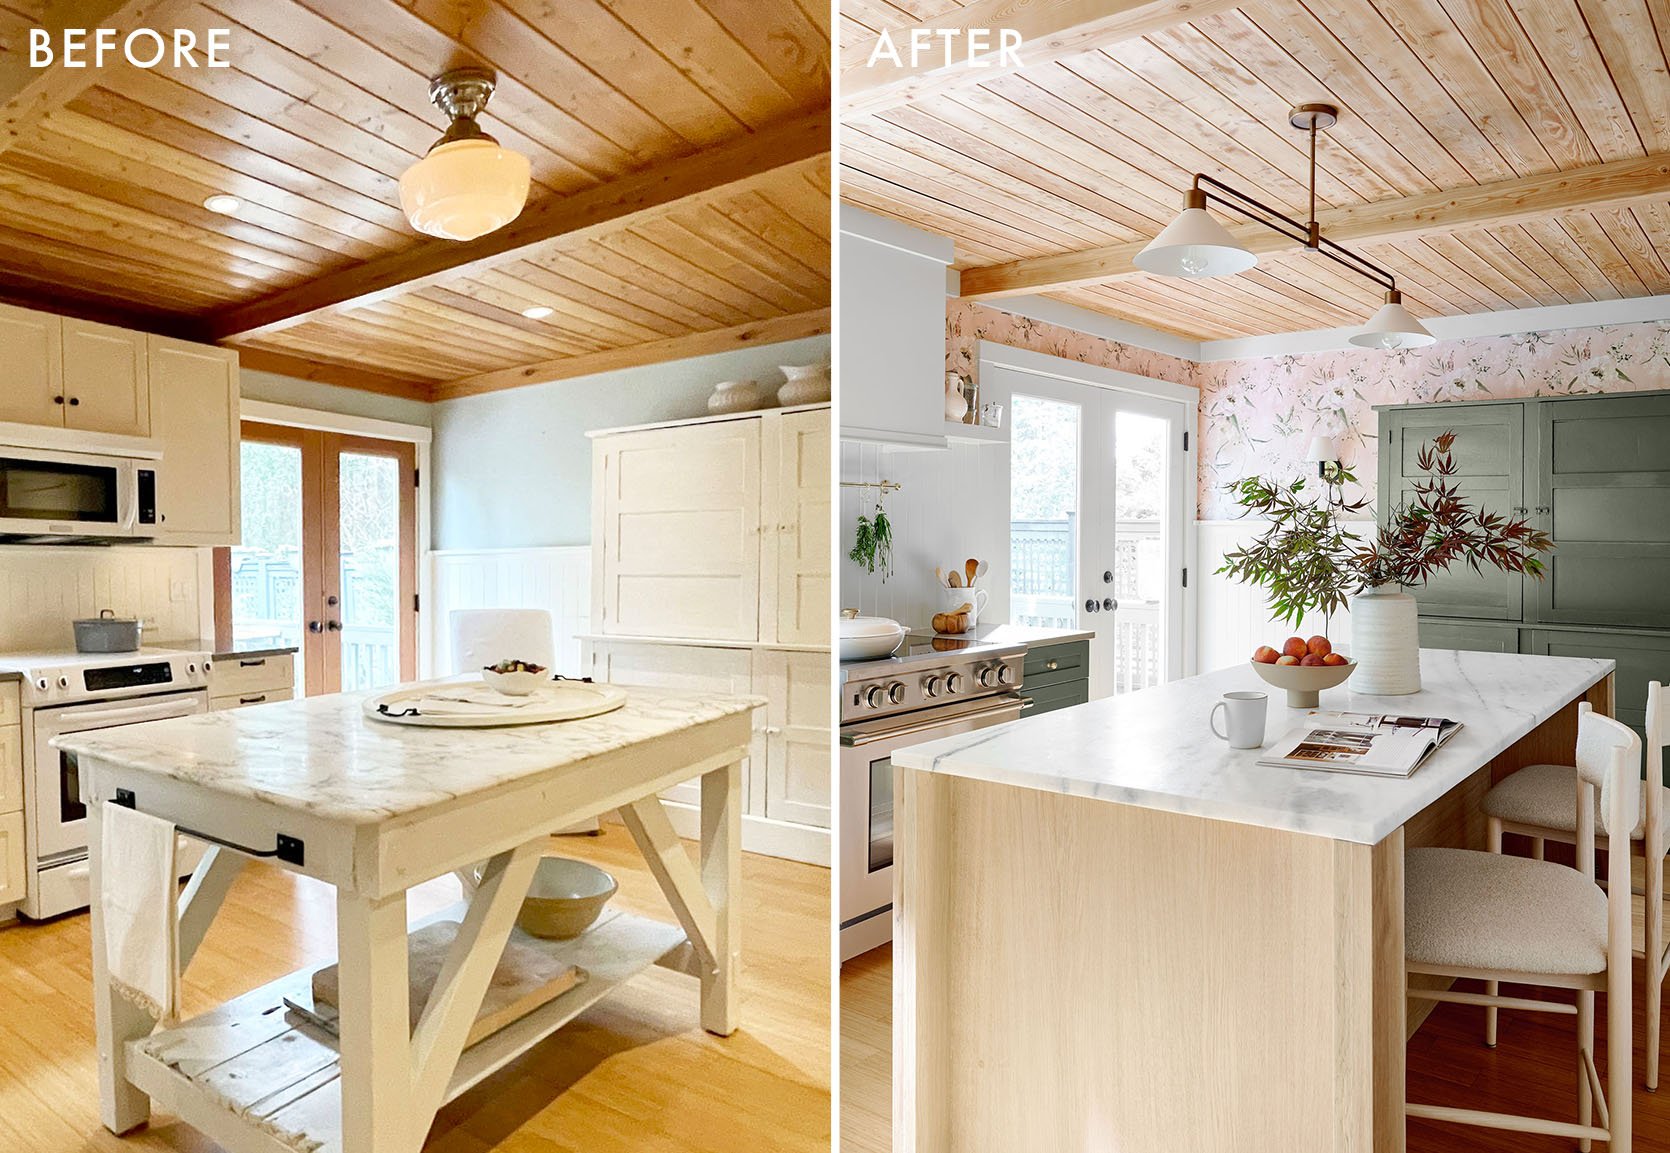
It’s hard for me not to scream HOW GOOD IS THIS but I guess I just did. We love it so very much, can you blame me? This kitchen now has so much personality, a real point of view, and a lot of whimsical touches rendered in a really fresh way. The colors all work so well together to give it depth and a real sense of space, while the island complements it all and adds so much function. Note how well the tones of the veining on the stone work with the green cabinetry. ::chef’s kiss::
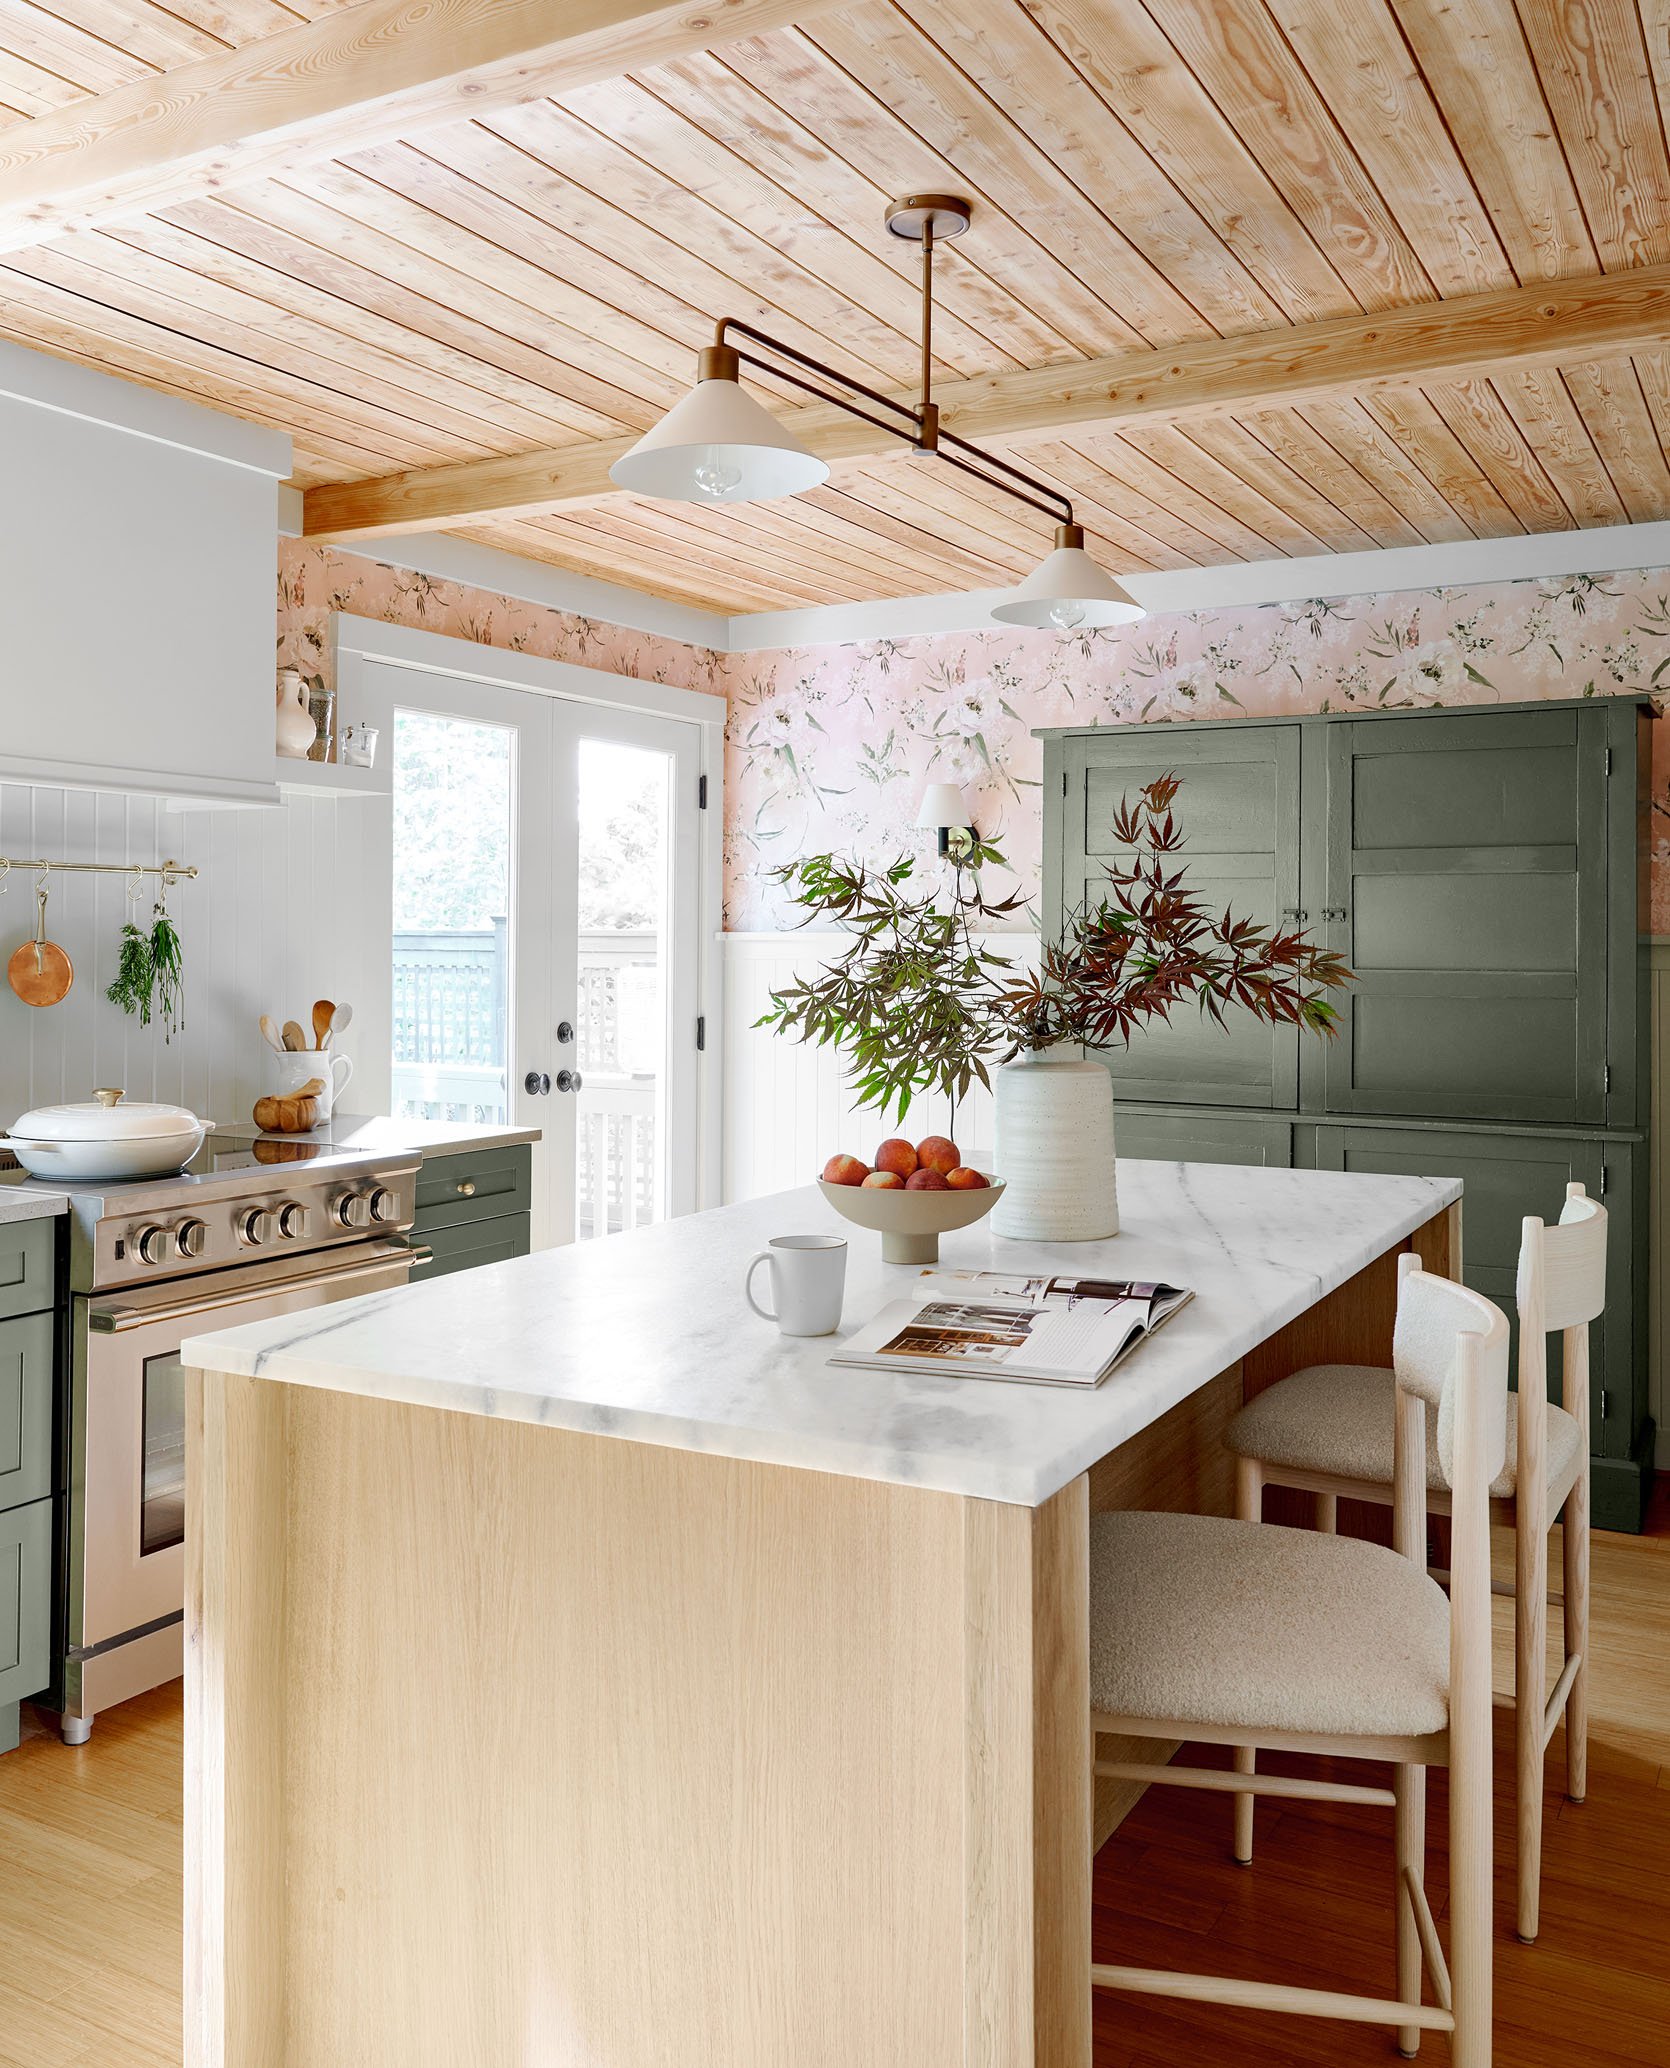
Sconce | Vase | Footed Bowl | Mug
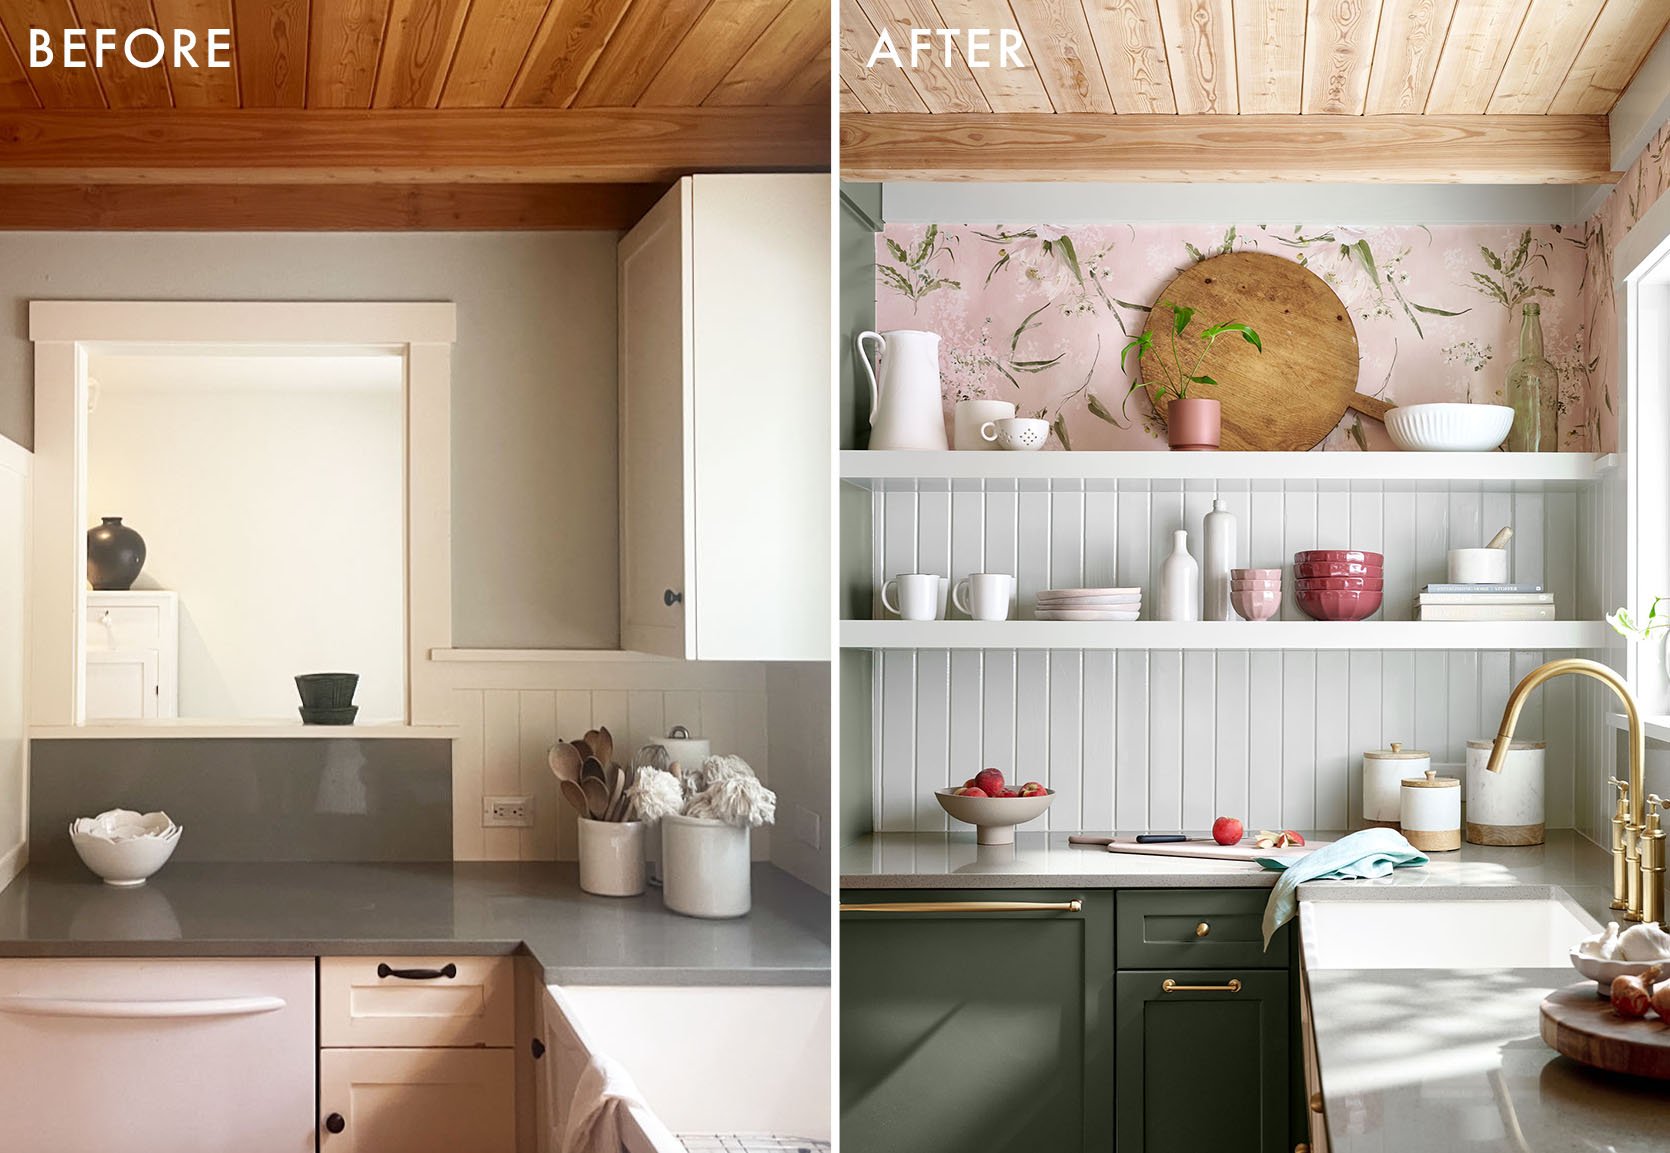
The floral wallpaper is by Kelly Ventura and was the real jumping-off point for the room’s color palette. We pulled the green (Rosemary by Sherwin-Williams) and the light blue/green of the backsplash (Conservative Gray by Sherwin-Williams) from the pattern and, frankly, I was ecstatic to do a pink and green kitchen. We weren’t able to see the stone in person for the island so we were very pleased to see so much green in the veining. Integrating the appliances went a long way to making the kitchen feel more streamlined and modern. It wasn’t a ton of cabinetry to begin with so eliminating the visual stop of an appliance front like, say, the dishwasher, goes a long way to streamline the design. If you’re curious to learn more about how to integrate your appliances without replacing all of your cabinetry, stay tuned because we’re working on that post. For this space, it was still a $4,000 investment, but far cheaper than gutting it all.
For the new hood, we bought a hood insert and integrated it into a simple boxed cabinet that we trimmed out with a little detail on the bottom. It’s painted the same color as the beadboard since there was enough going on between the green and the floral wallpaper. While I did mention we were keeping the existing beadboard, we ended up needing to replace what was behind the range since we extended it higher than it was prior when it met the upper cabinets that were removed. That was one of our unforeseen hiccups, but it was affordable and readymade so my brother was able to source the matching profile and get it up.
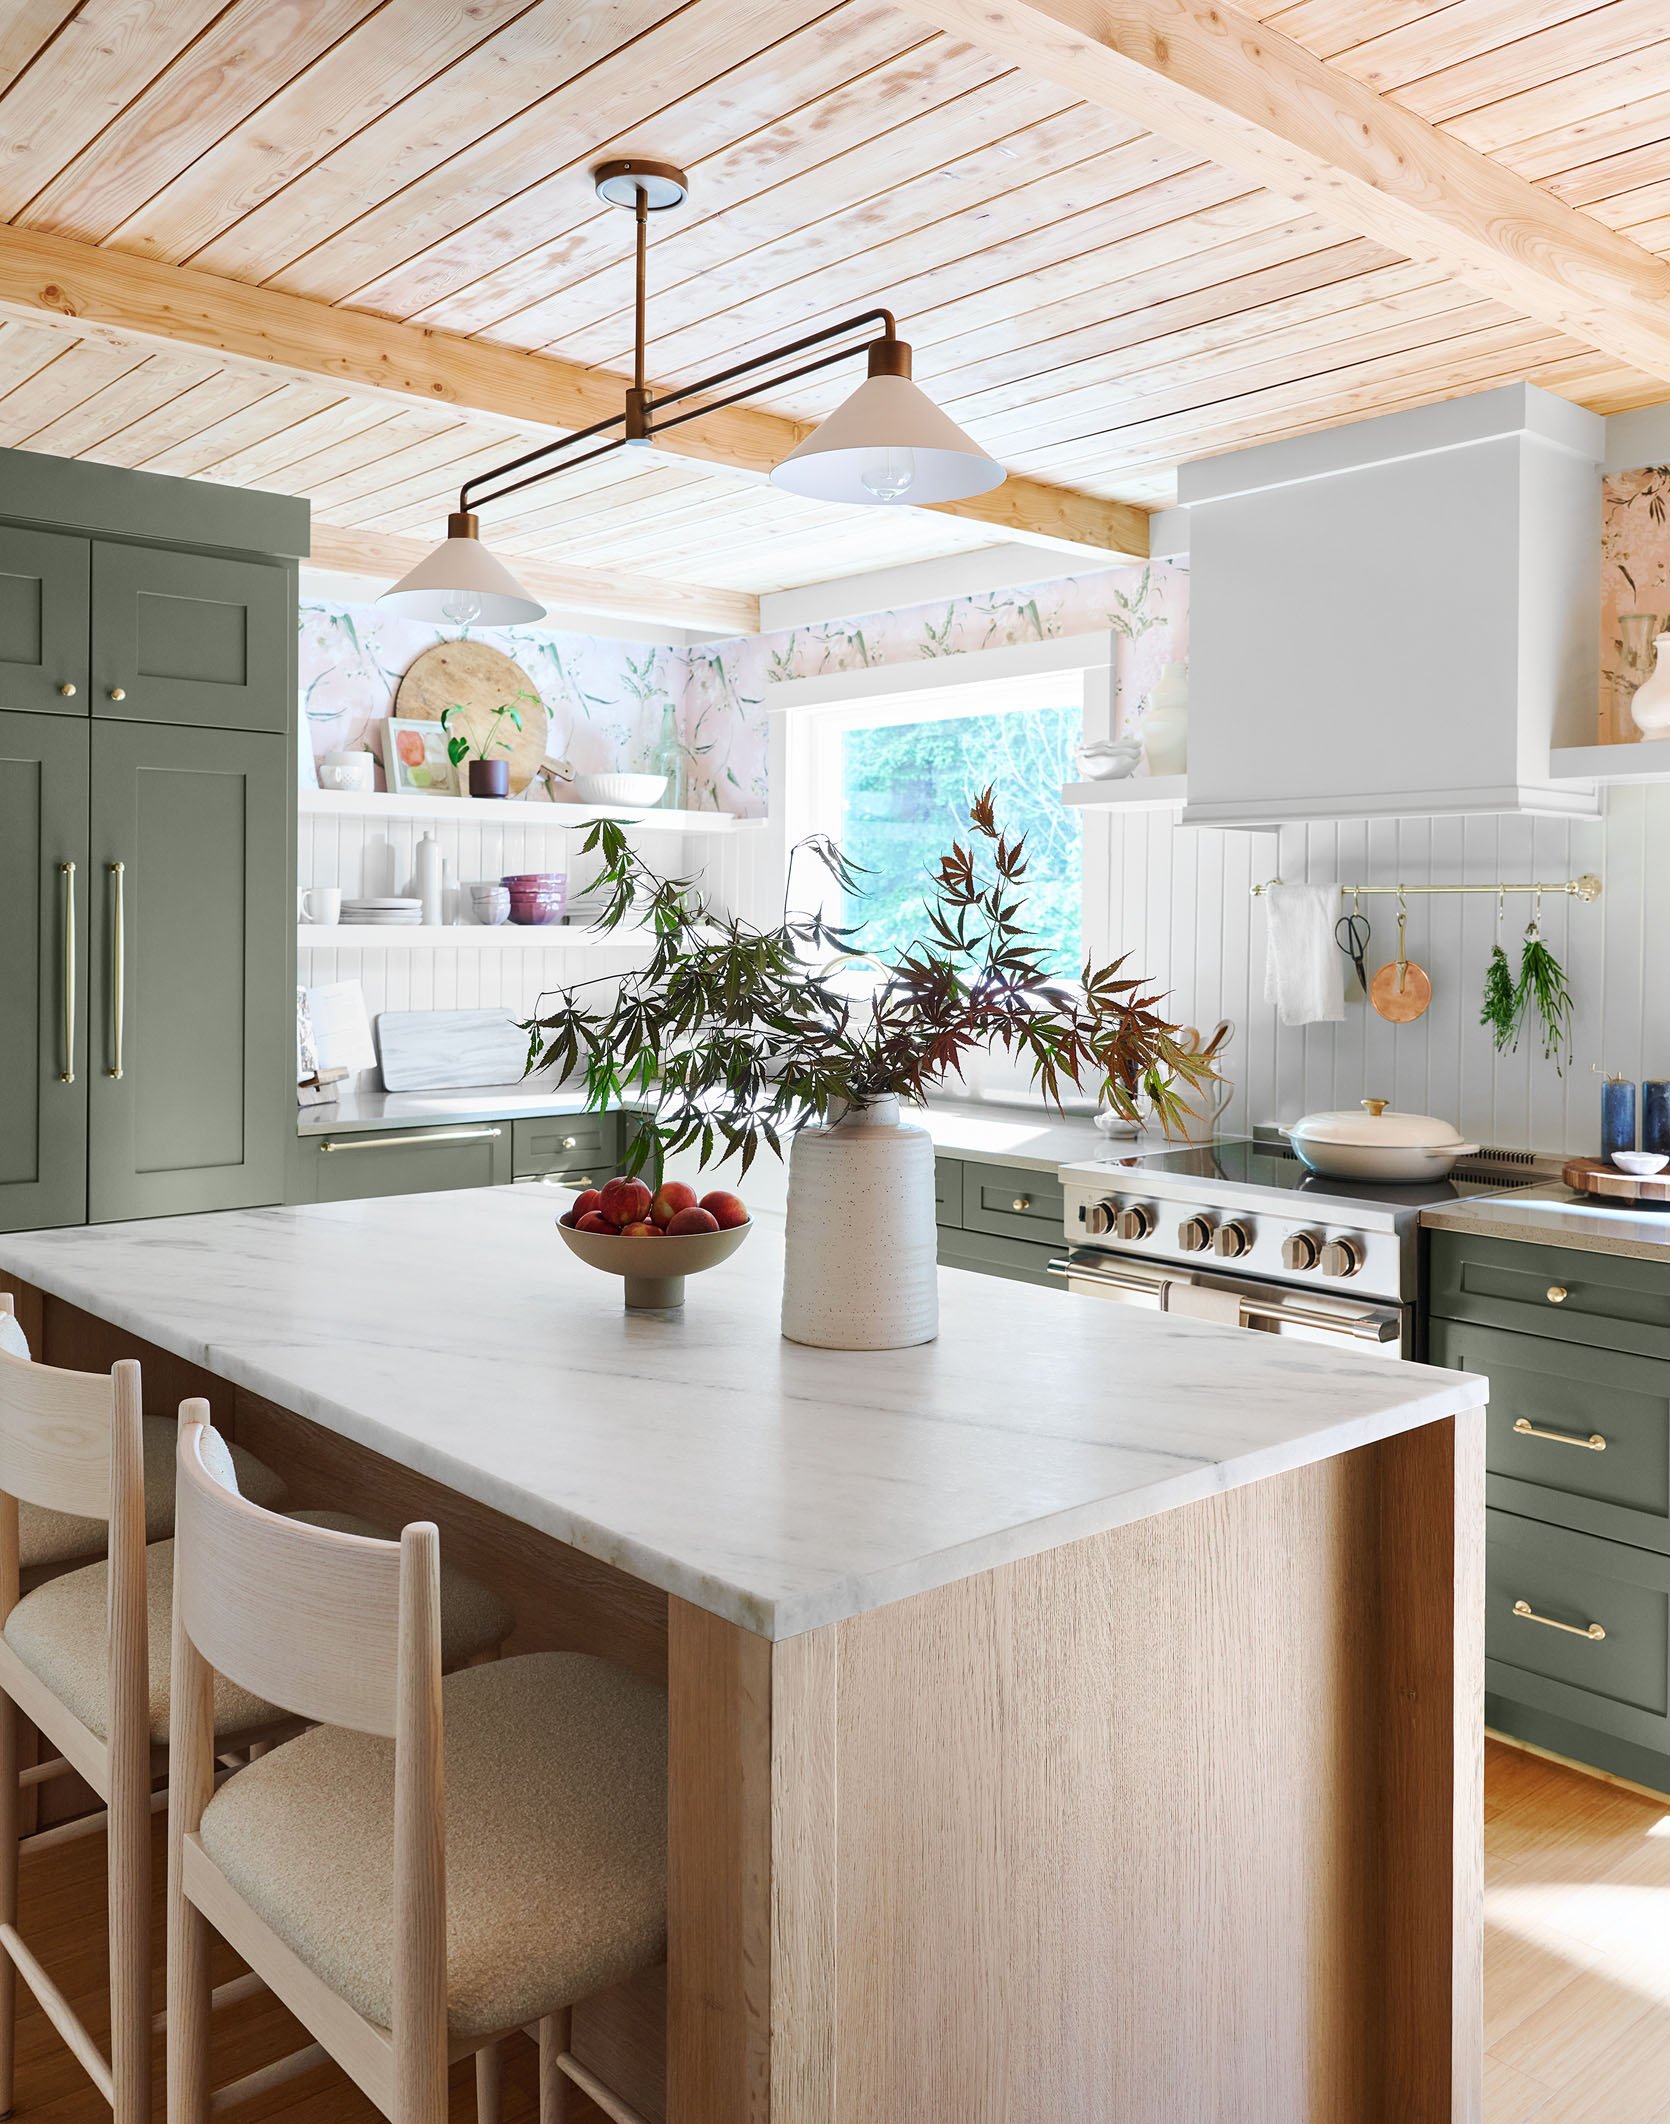
The Island


Now for the reason for the season. This whole kitchen partnership with Crate & Barrel was to feature this island which is one of the four that they just launched. Before we had even selected the kitchen we were going to makeover, I chose the Terra 78″ Marble Top and Natural Oak Wood Kitchen Island with Storage because I responded quickly to it, stylistically, and I knew it could work with so many different styles. In addition to this one, they have others that are more contemporary or more traditional. The Terra is so simple and high quality, the white oak and marble are timeless and classic, and it’s extremely functional in both prep, storage, and seating. It is priced really well for what you get and comes totally built with white glove service (extremely plug-and-play).
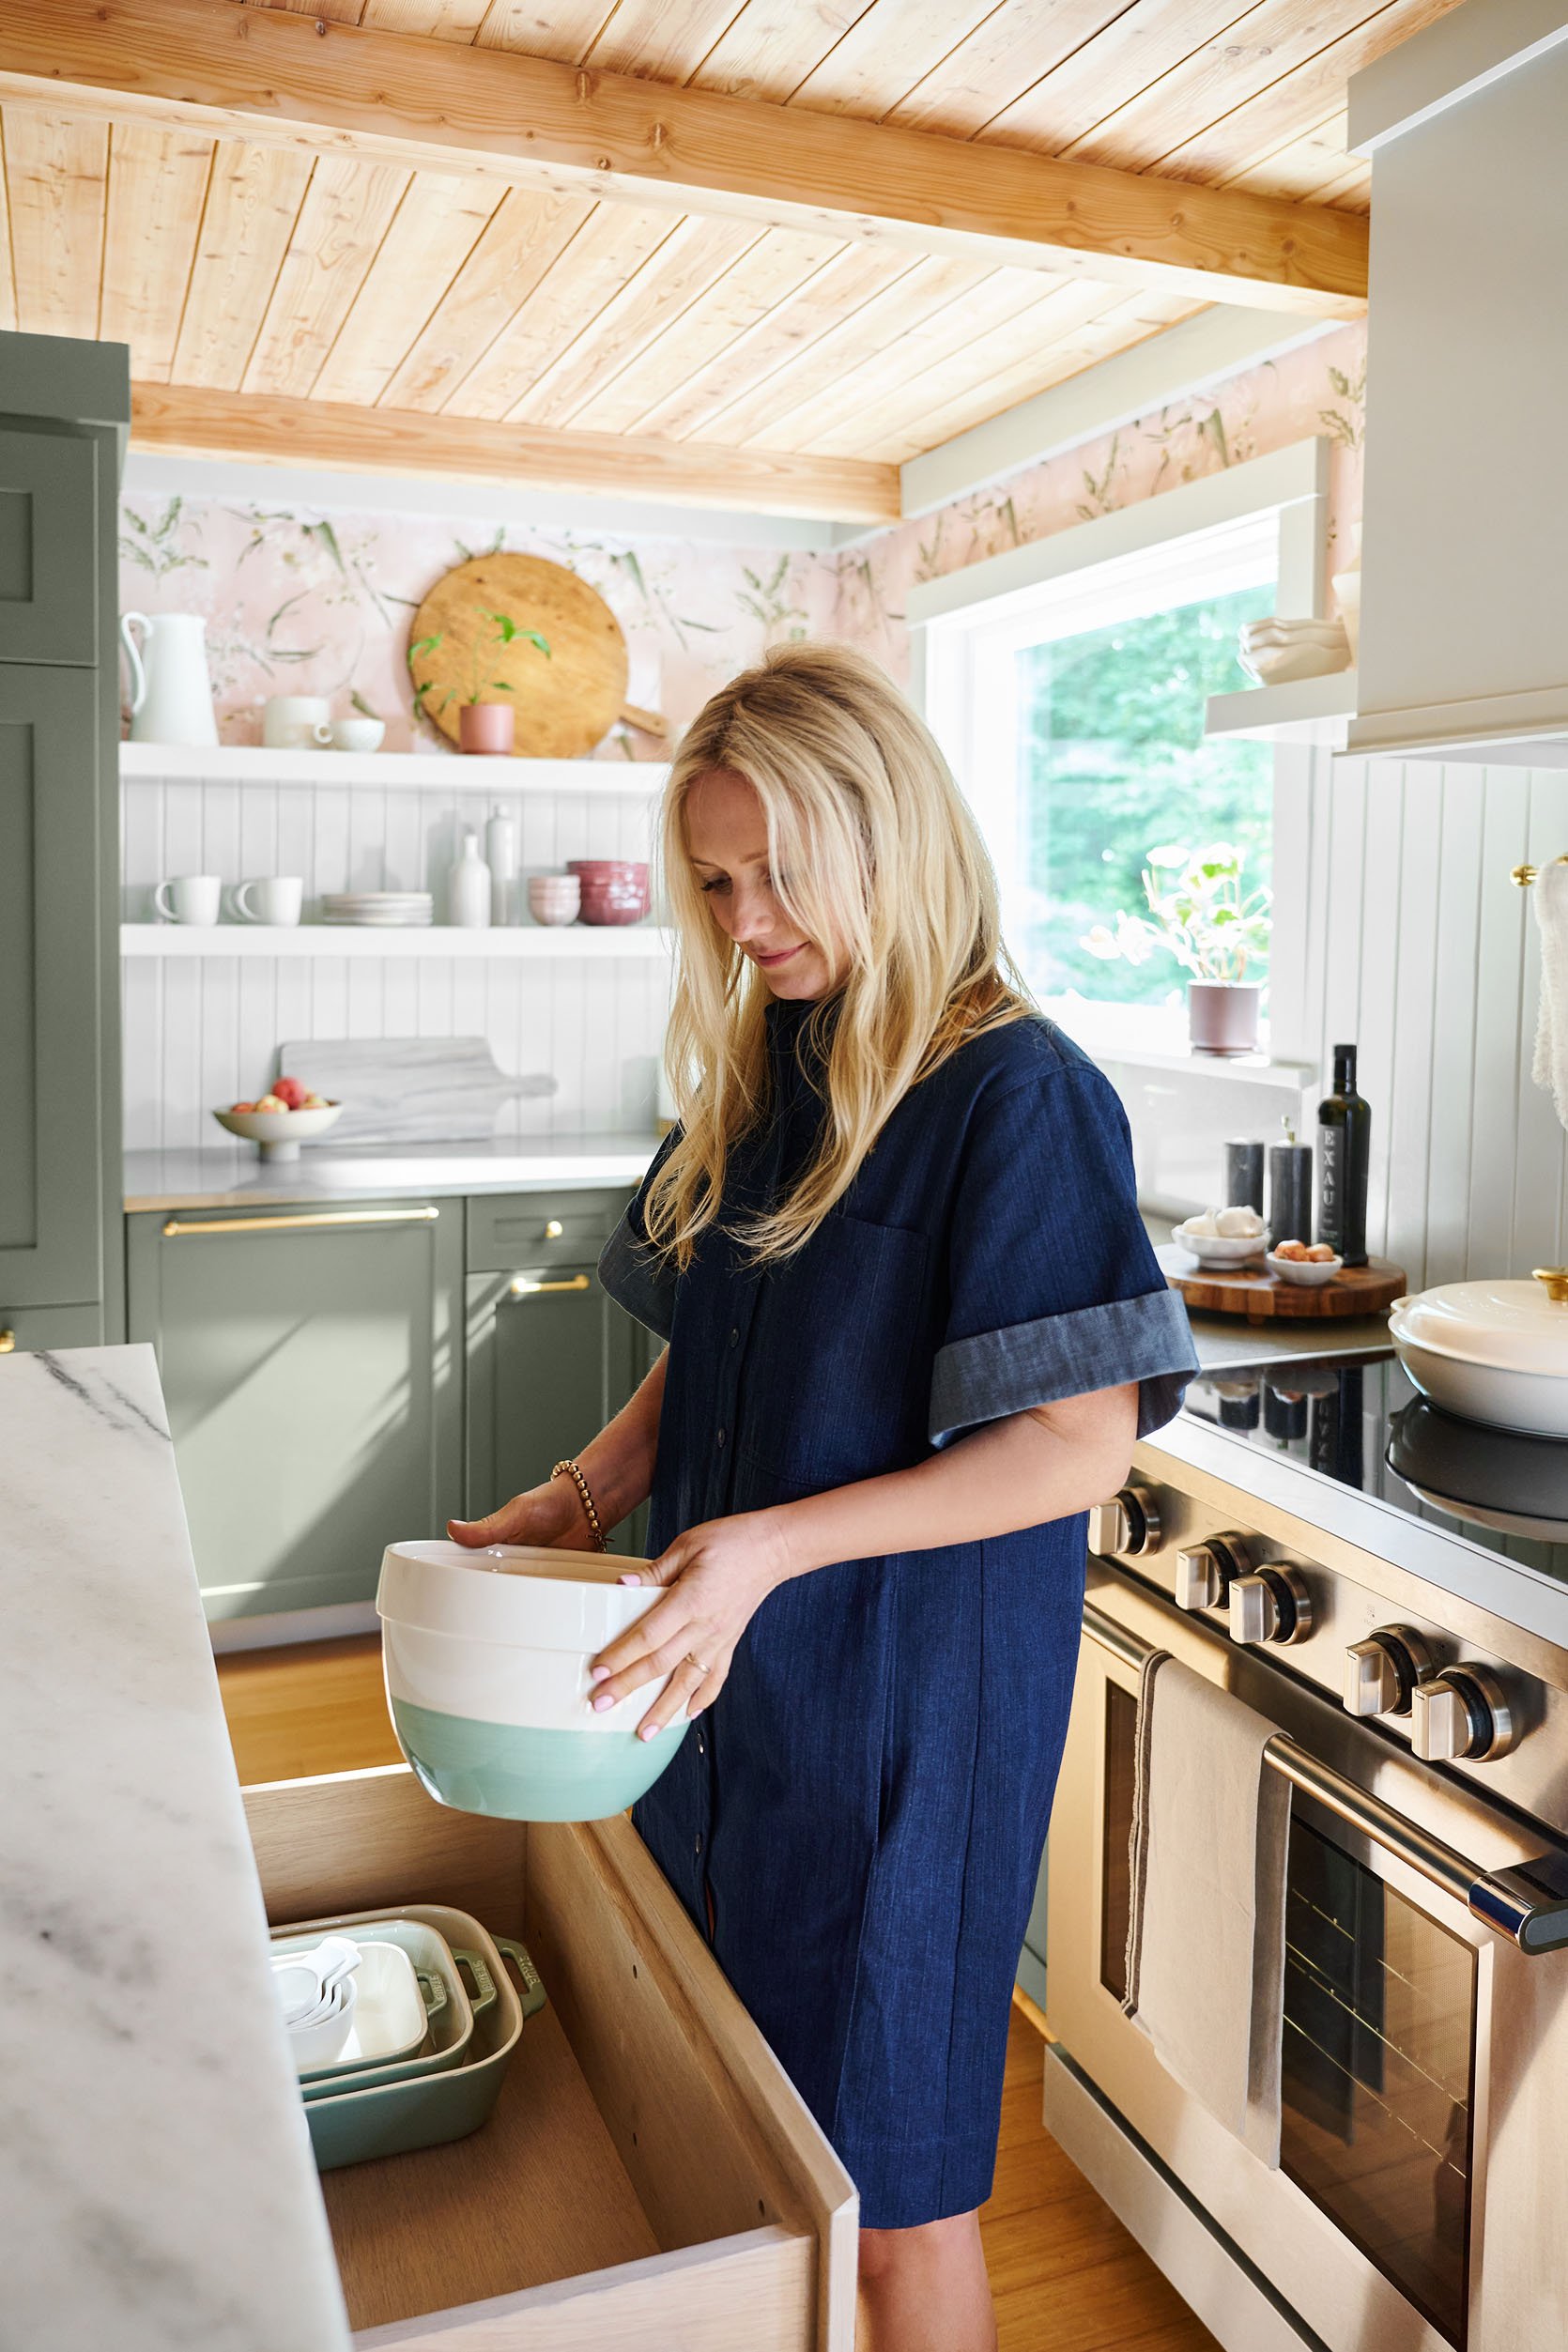
Mixing Bowls | Baking Dishing | Measuring Cups | Dish Towel
On top, you have three great drawers for flatware, utensils, and placemats. On the left side, you have really deep pull-out drawers which I’d use for trash and recycling. In the middle section, you have two deep drawers for larger items like mixing bowls, big pots/pans, and baking dishes. Then on the right is another pull-out drawer for a stand mixer or stock pot, as well as a shelf option should you want to put other larger pots or bowls. It’s HIGHLY functional and well thought out. Bonus points? The drawers soft close like a dream.
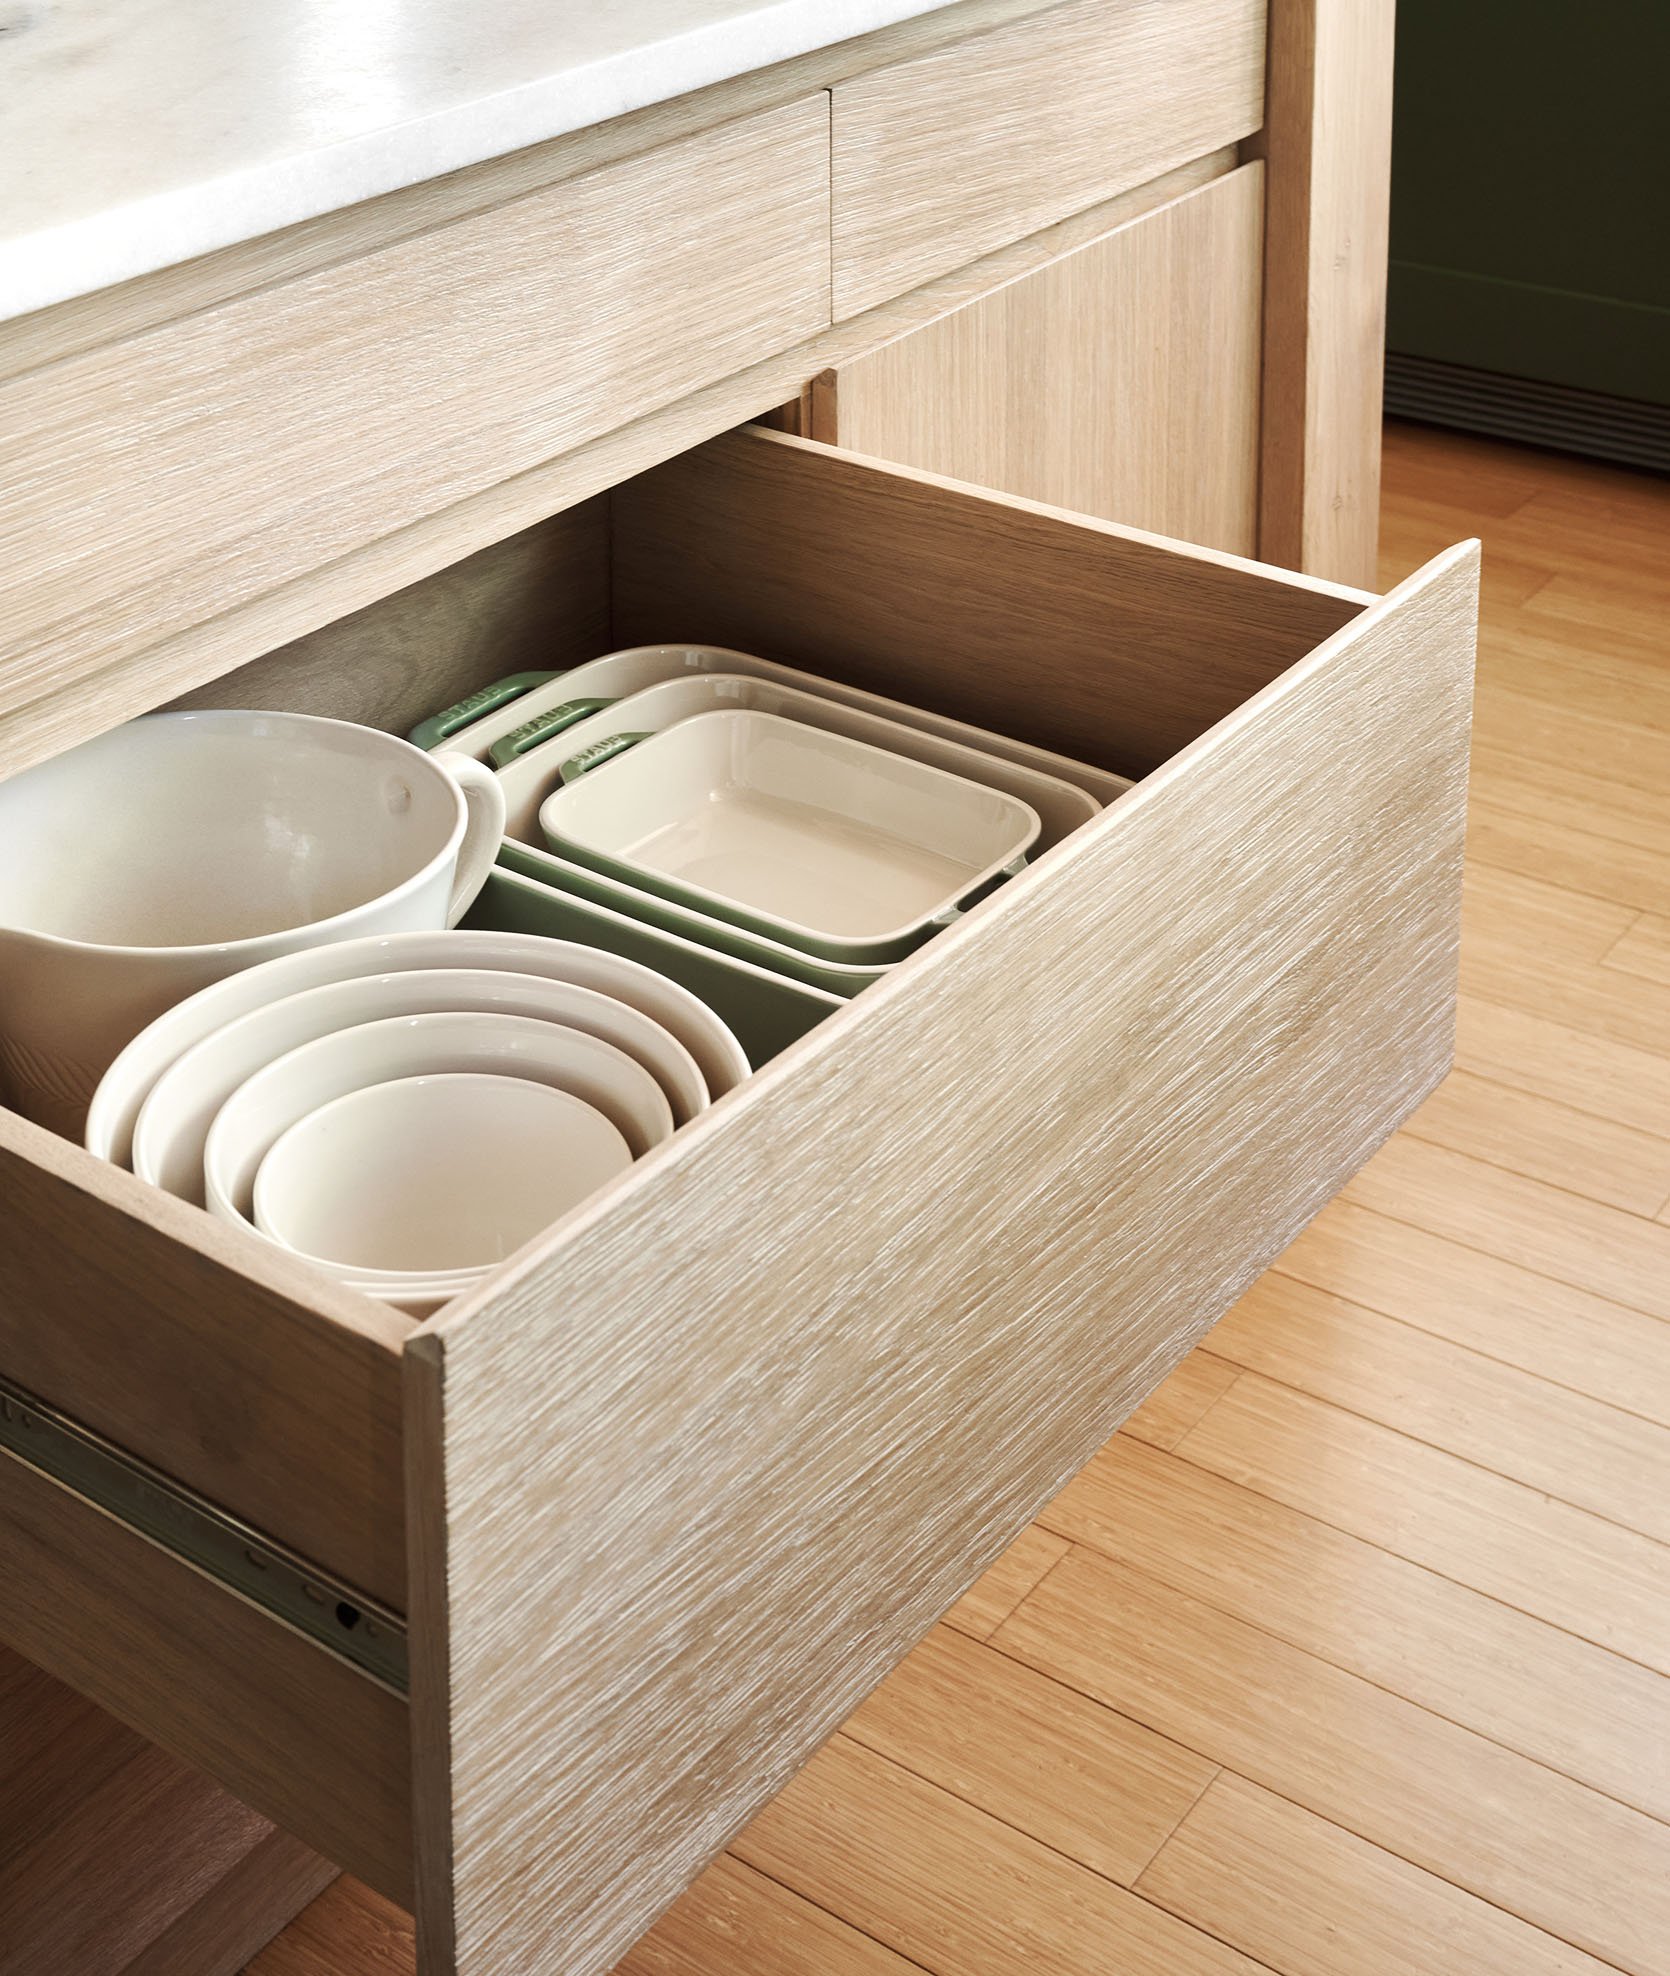
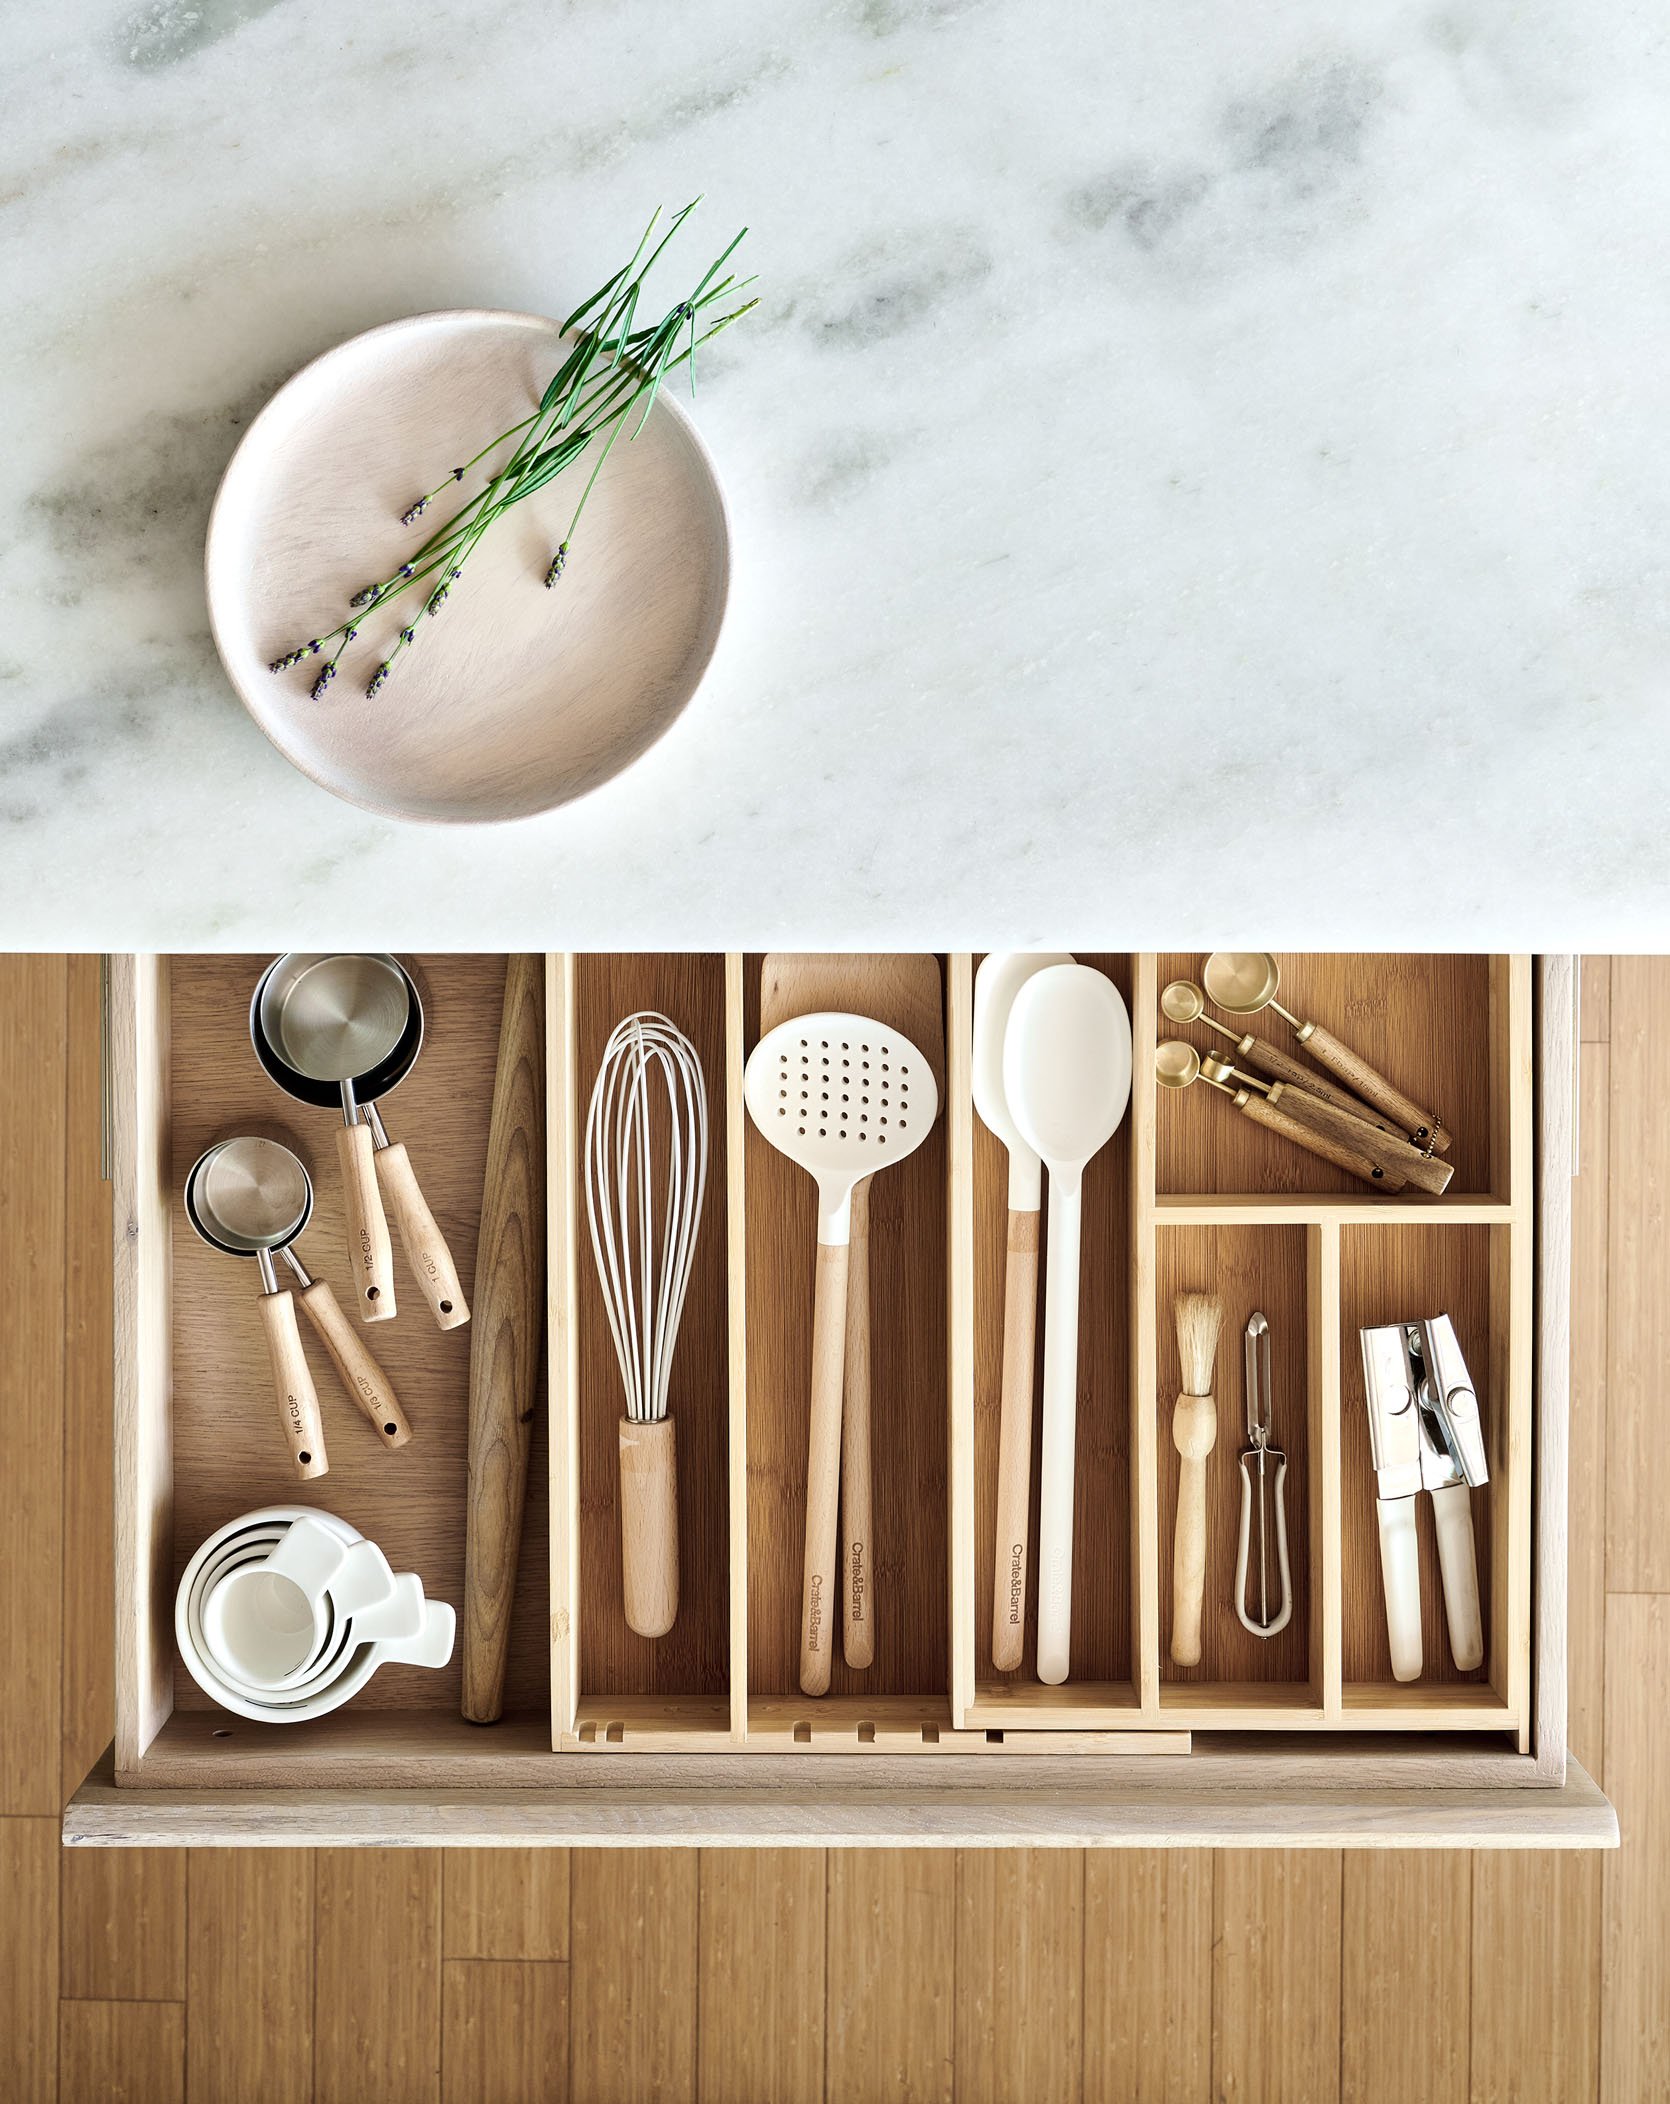
Left: Large Ceramic Batter Bowl | Right: Wood Plate | Drawer Organizer | Wood-Handled Measuring Cups | Rolling Pin | Whisk | Slotted Spoon | Wood Solid Turner | White and Wood Spoon | White Spoon | Measuring Spoons | Coffee Grinder Brush | VegetablePeeler | Can Opener
On the back side, you have a 14.5-inch overhang which is ample for sitting and with the opening being 68 inches, you can fit three large-sized stools perfectly.

Pot Rack | Cast Iron Oven | Ceramic Olive Oil Cruet
The marble top is a honed solid stone with a lot of subtle veining for forgiveness. We were so impressed with this particular stone; it had so many soft golden and green tones and the Crate & Barrel team pulled no stops in its quality. It absolutely does not look readymade. Something to note for anyone with a sink or cooktop/range in their existing island is that you’ll have to relocate those. This island is perfect for a kitchen like this that had a freestanding furniture piece that could be replaced with a more functional island. That, or a kitchen with no island at all that has the walk-around clearance for one.
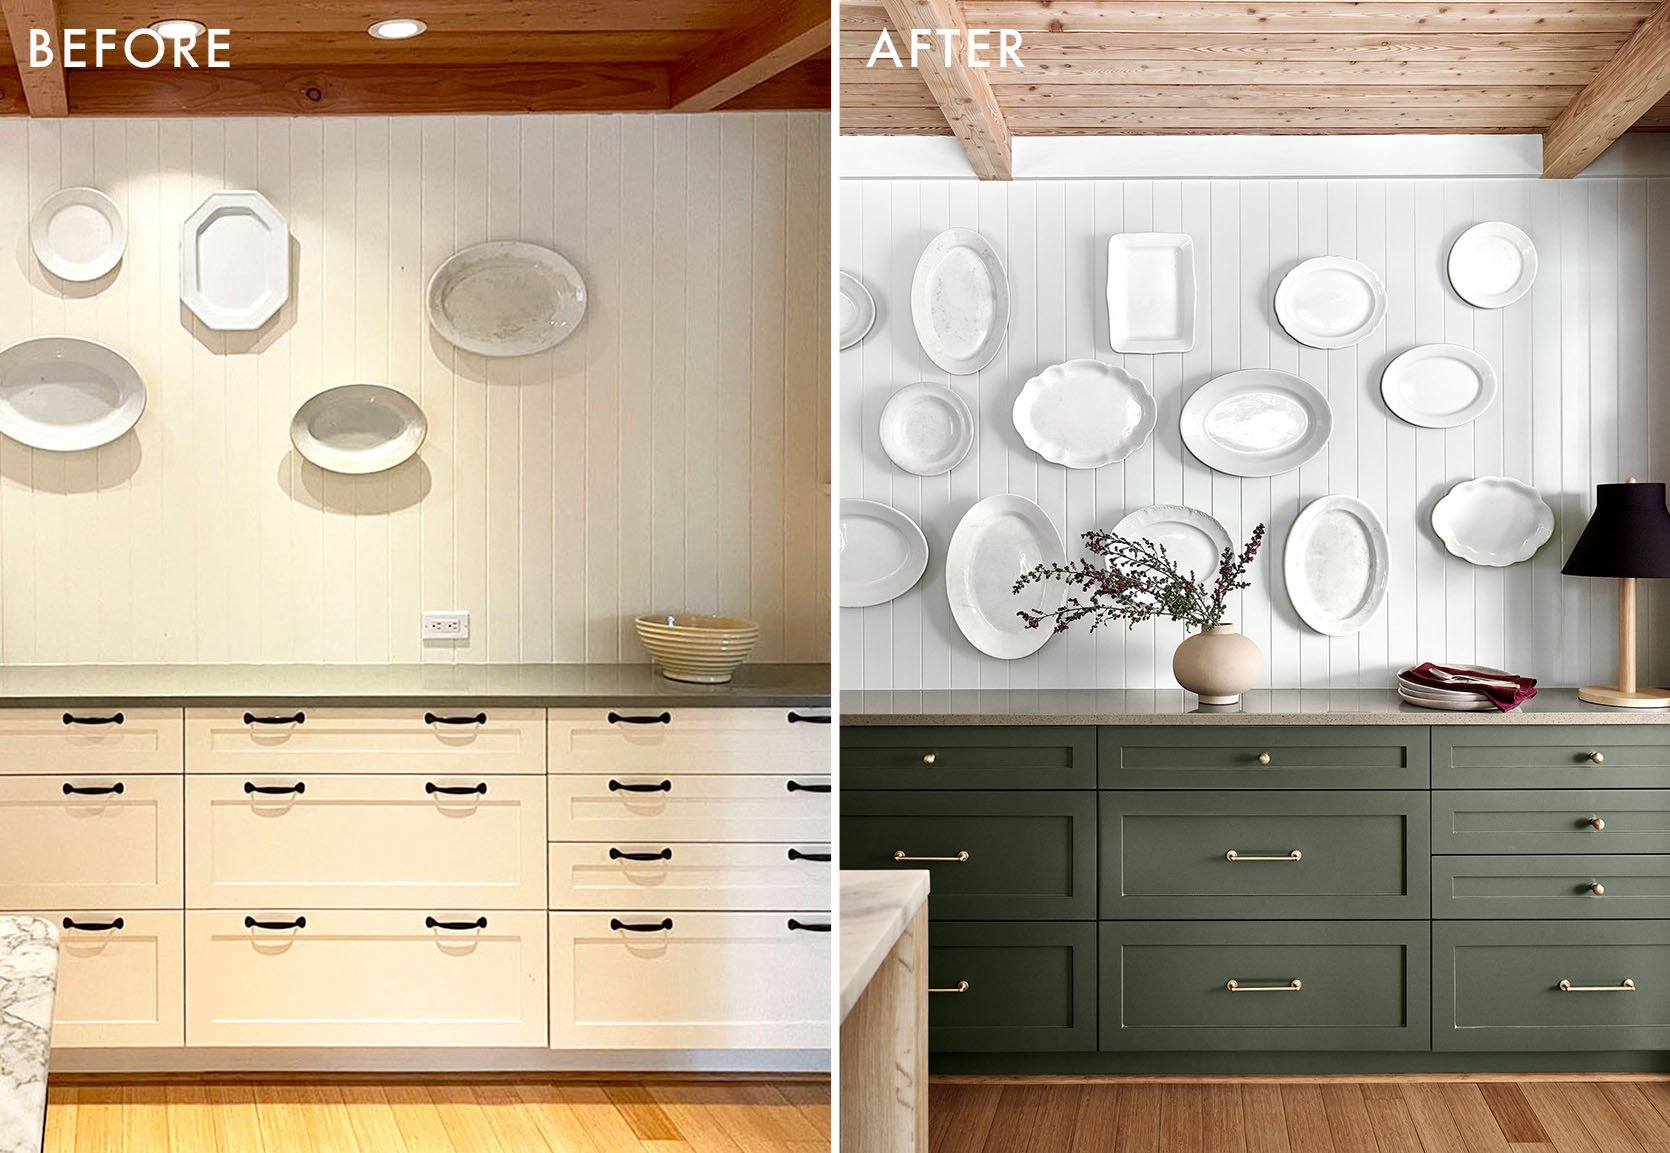
The Plate Wall
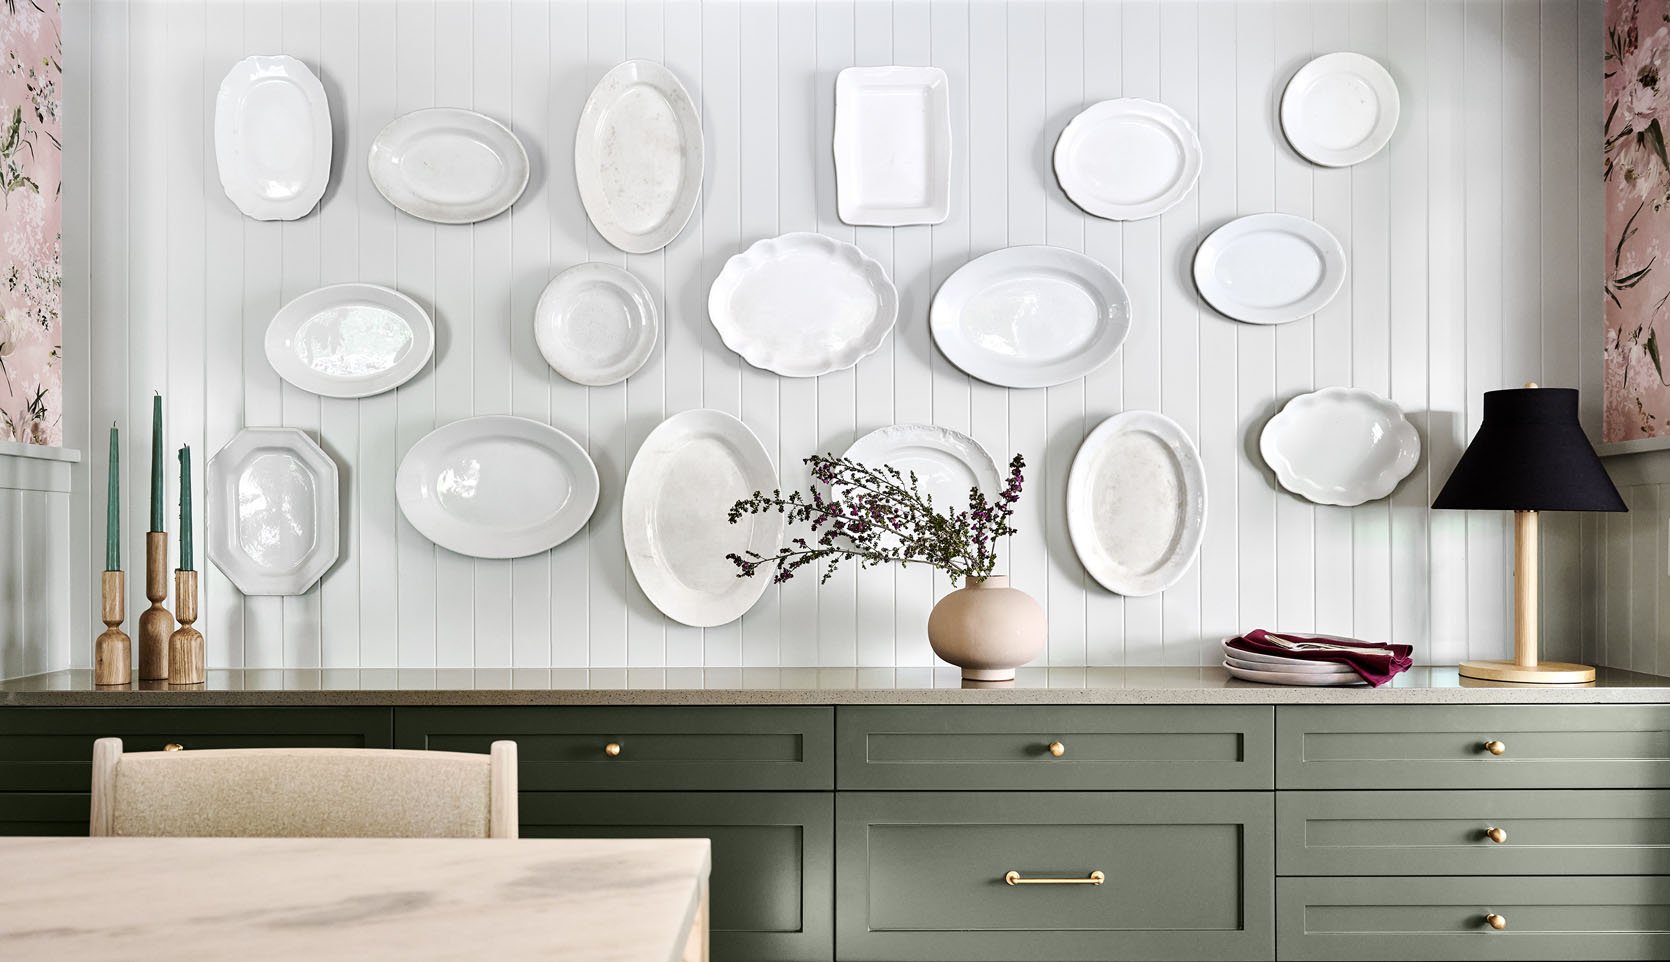
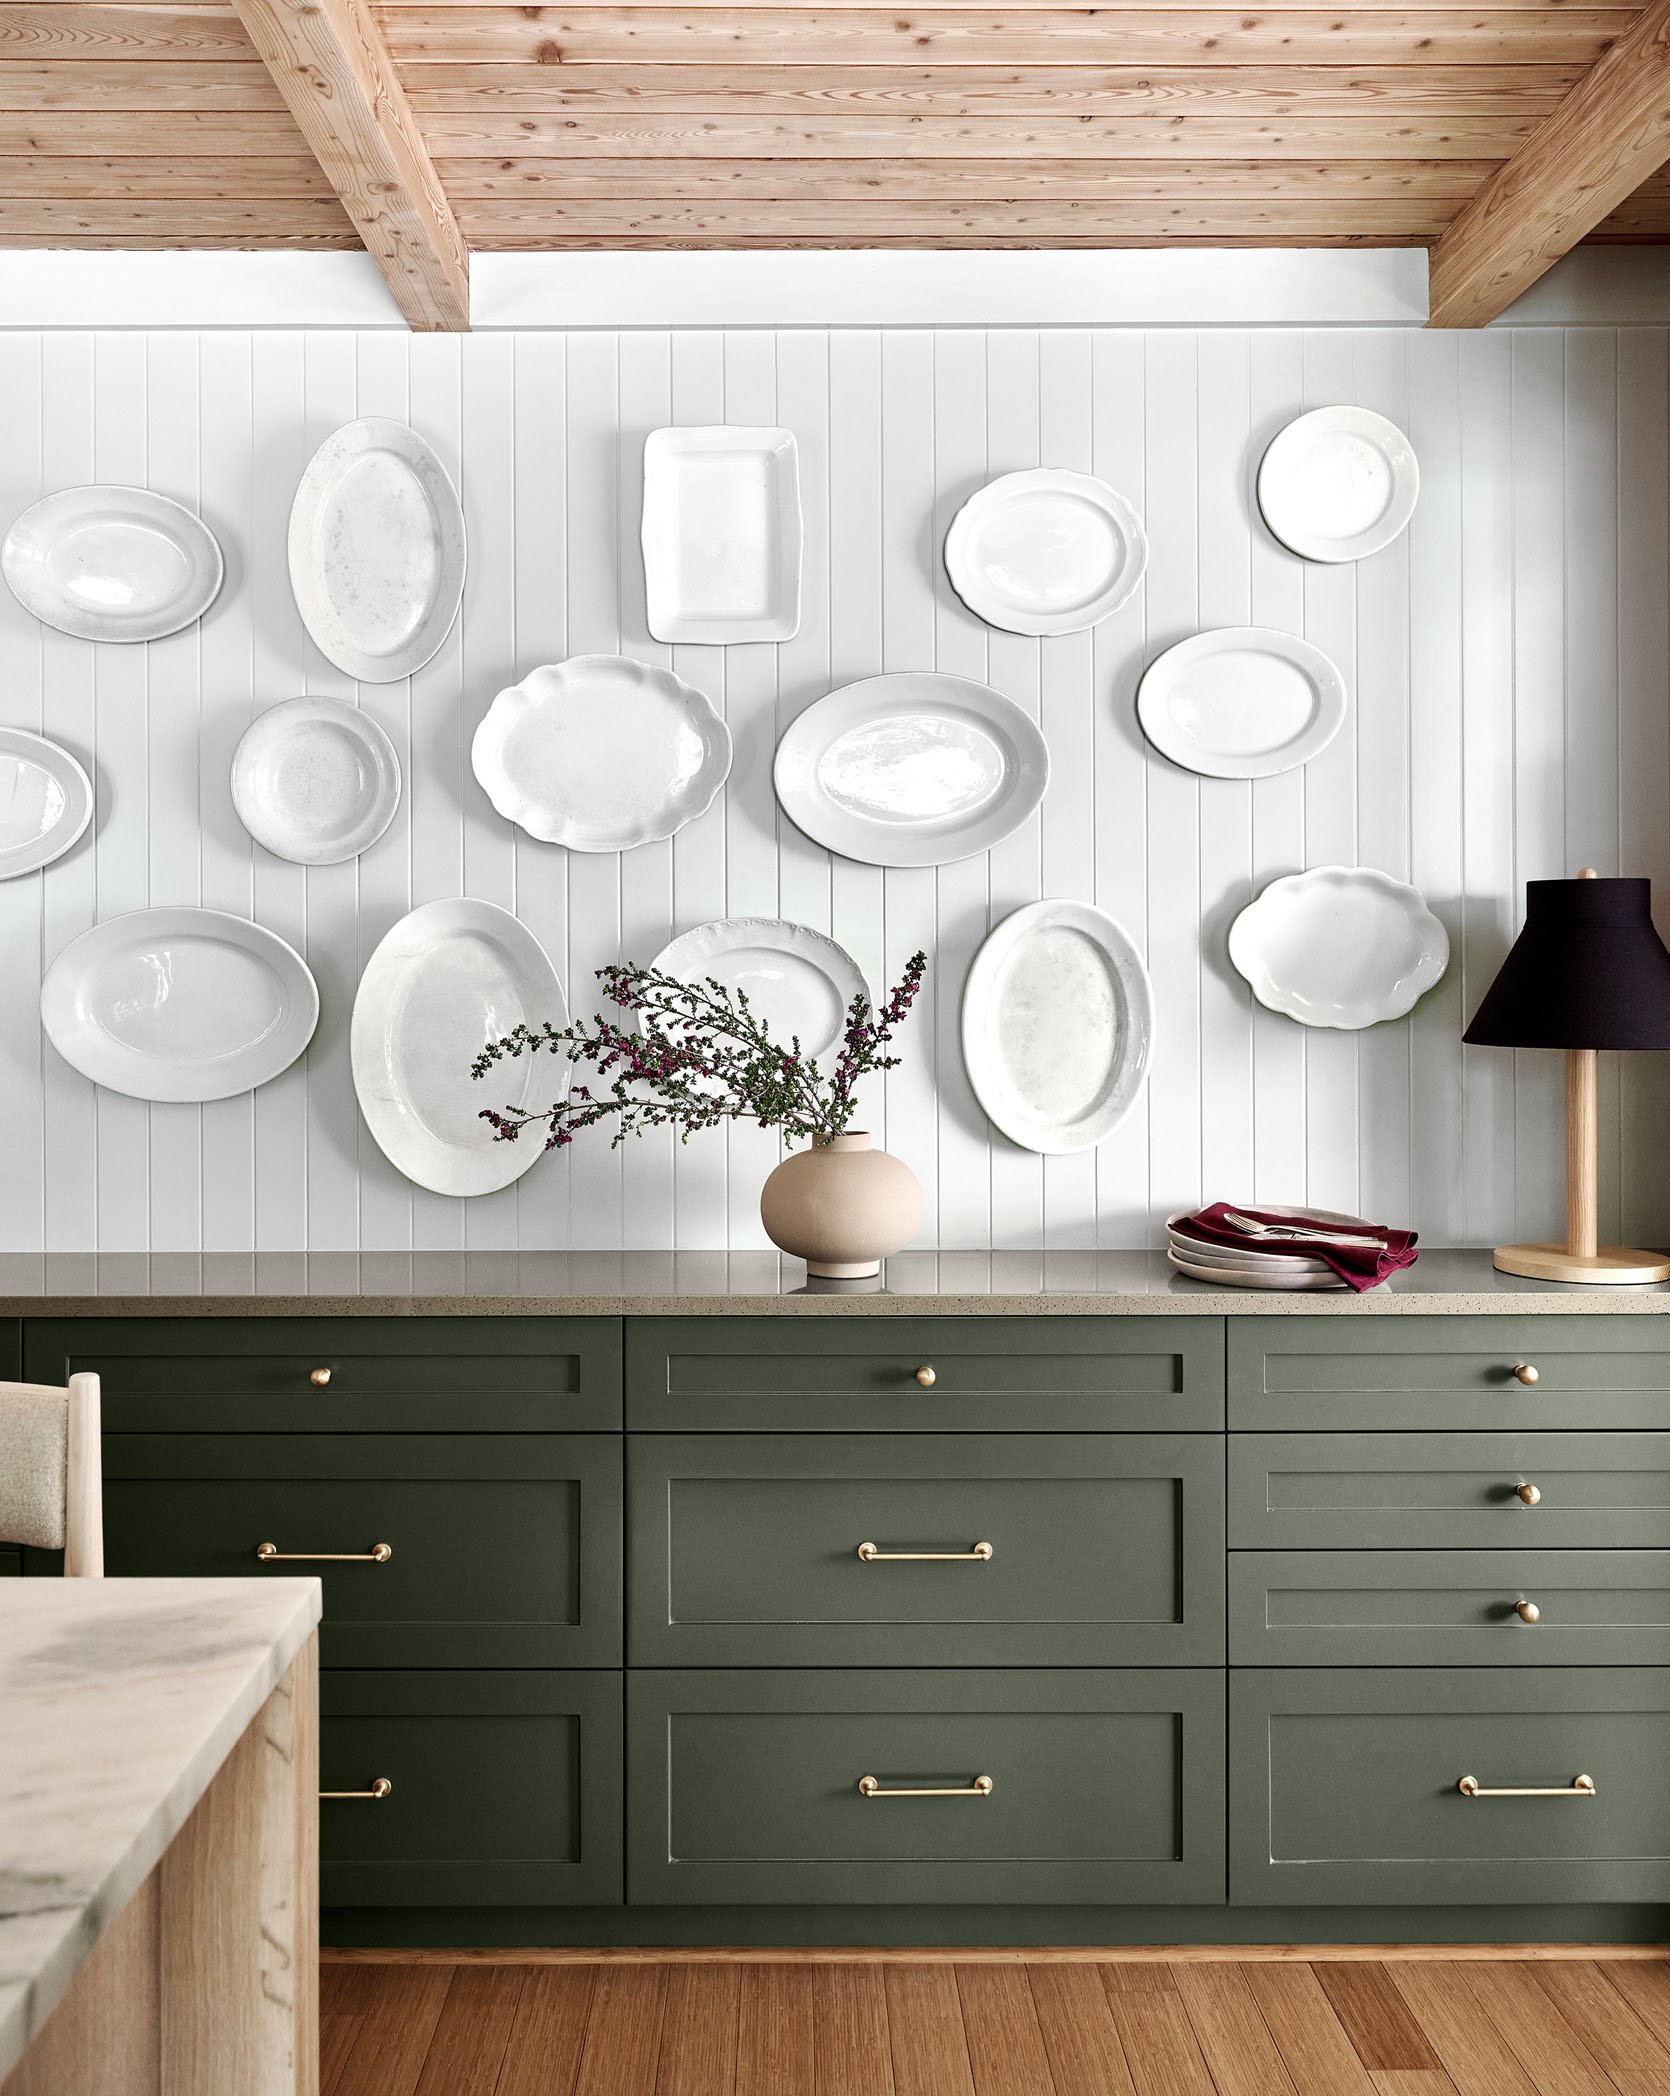
Wall Plates (vintage) | Candlestick Holders | Vase | Plates | Napkins | Flatware | Table Lamp
Our homeowner Julie (who understandably didn’t want to be on camera) is an antiques dealer and she had this incredible collection of ironstone platters. We happily leaned into this and, after arranging them outside on the floor of the deck (ha!), displayed them all on the wall. Julie assisted us and glued plate hangers to the back of each one and then we just went for it. I couldn’t love it more. You can see a lot of the age and different designs of the rims. This collection comes from years of scouring the markets and I’m so grateful that we got to display them for her (and us).
Hardware
In case you don’t remember the “before,” this bank of drawers had so much hardware with handles upon handles that made it look really busy. Sarah did a fantastic job of reconfiguring the new hardware in a way that was more modern and subdued. We combined one simple brass micro-knob on the tiny drawers and one pull on the larger ones which gives them more power and more presence, with less. This hardware is gorgeous with round backs and a sweet little round detail on the handle, too.
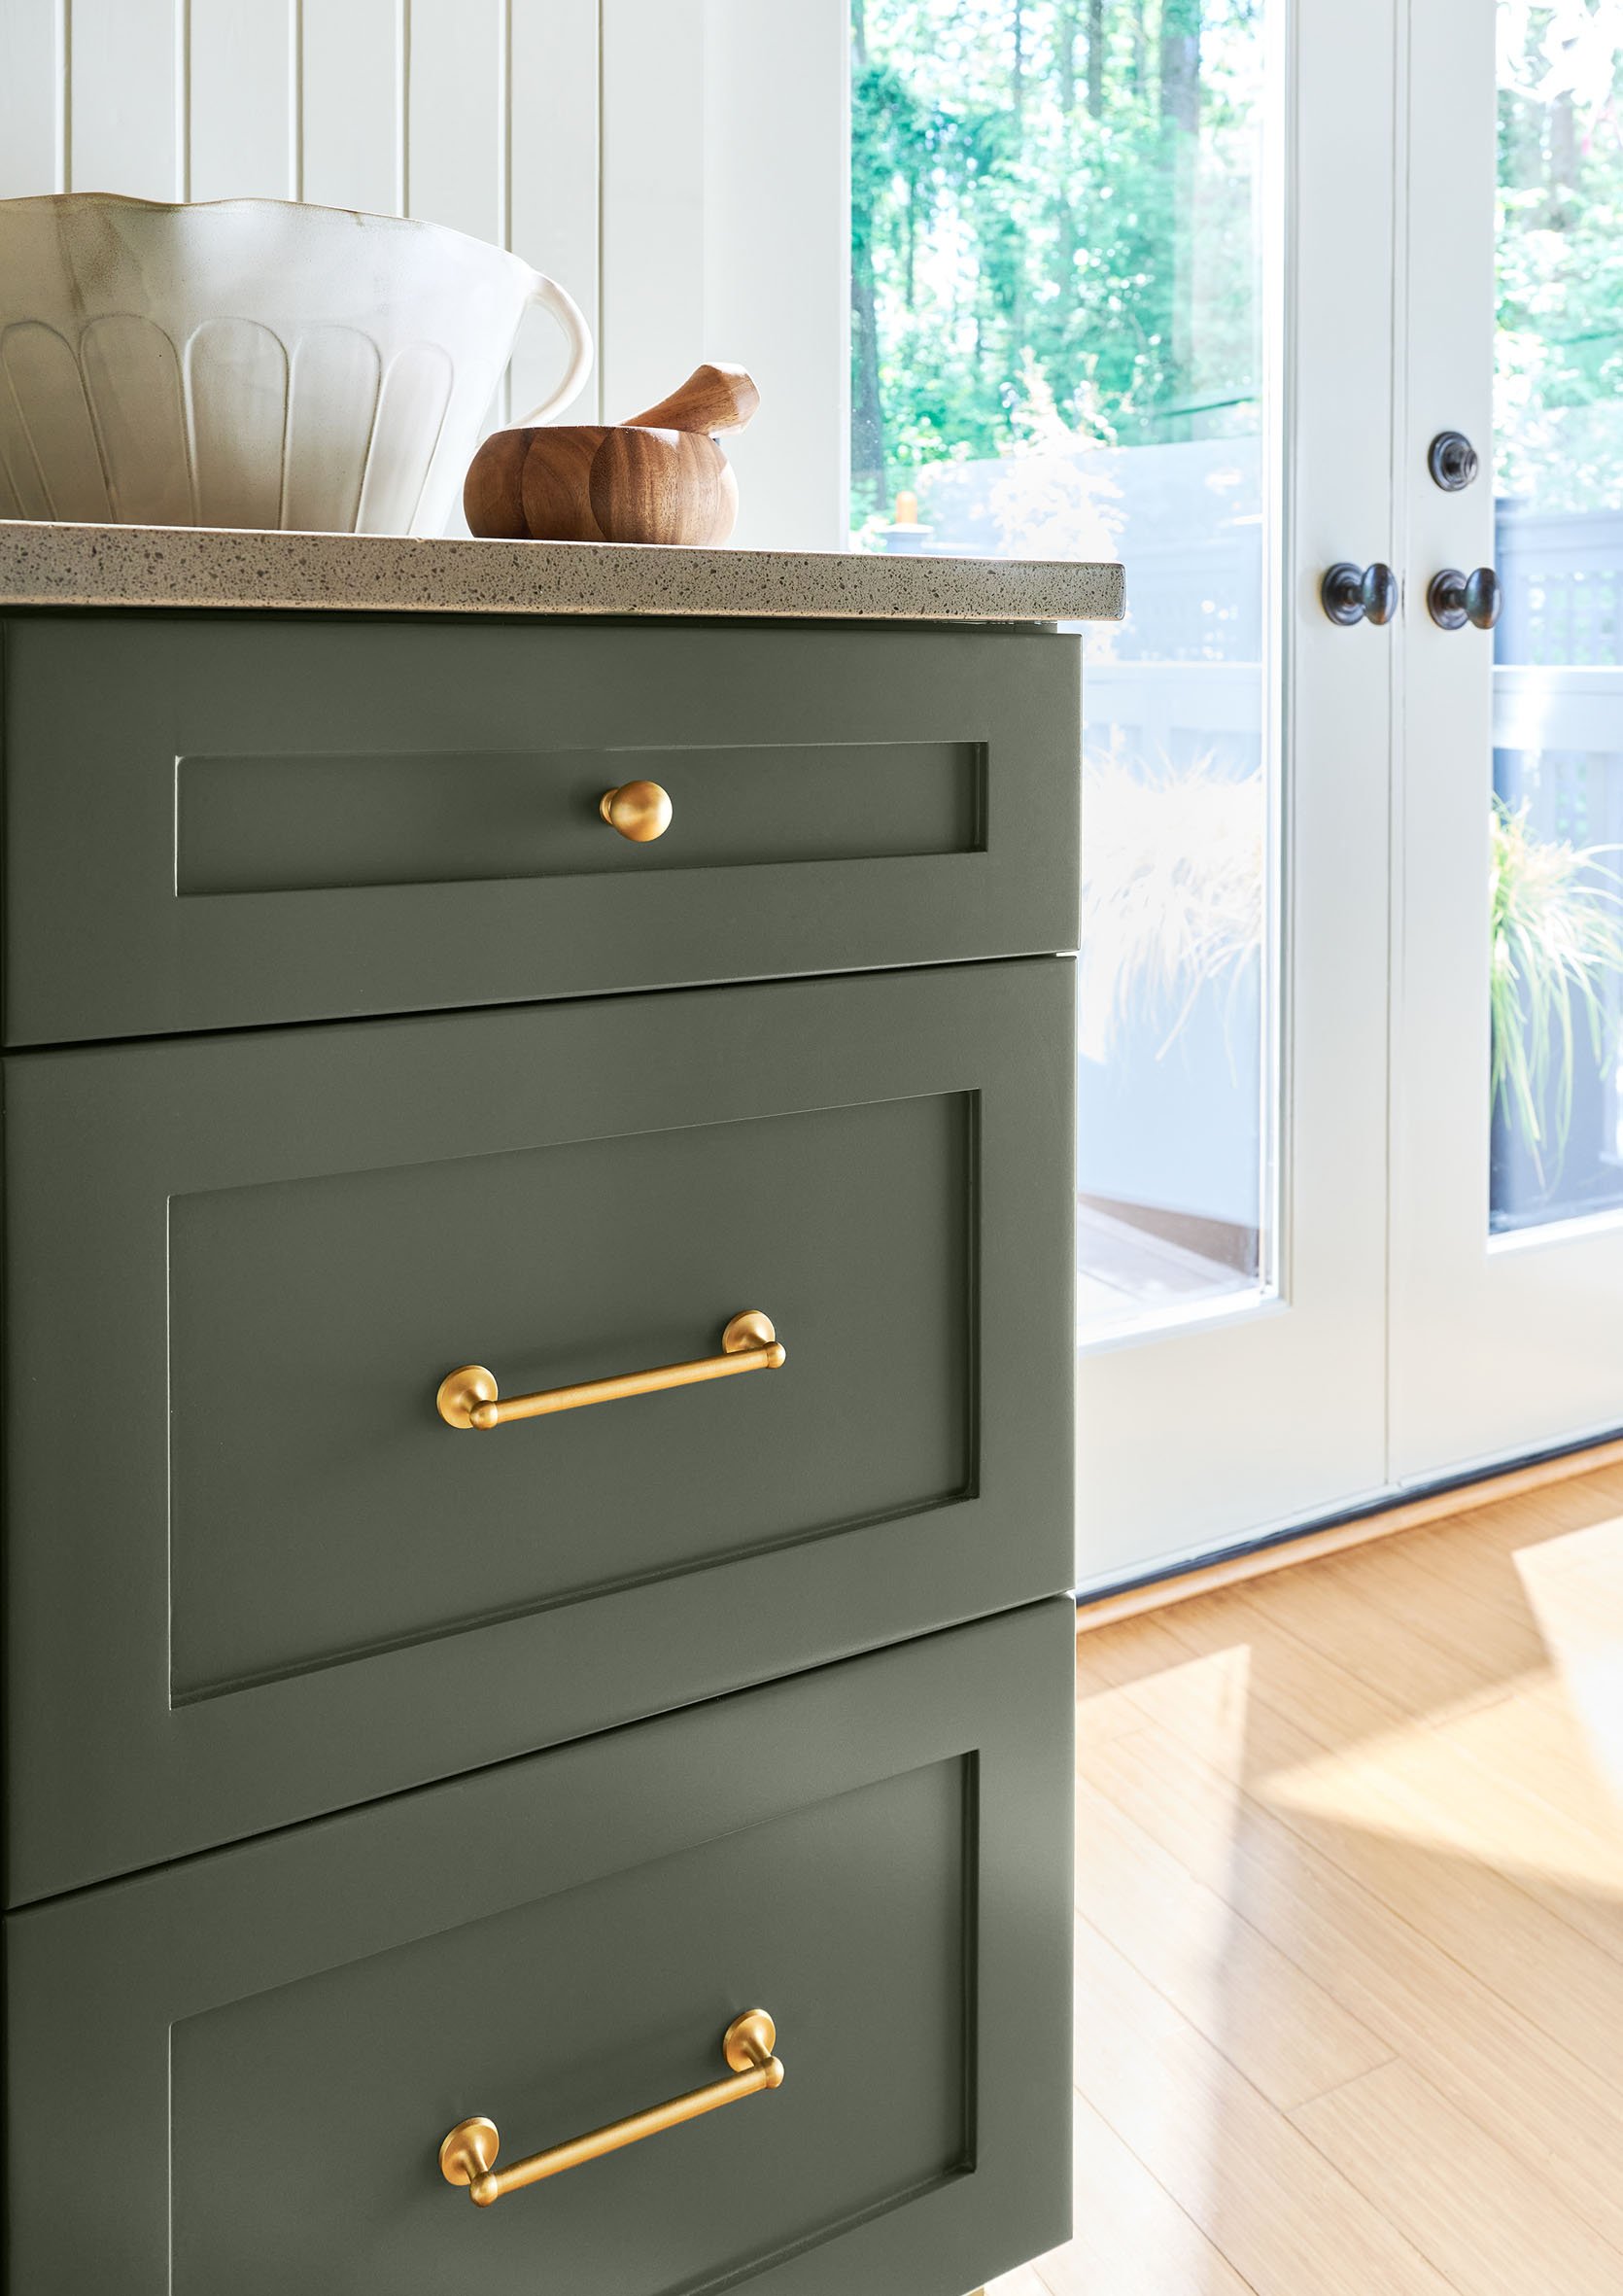
Bowl | Wooden Mortar and Pestle
I can’t stress enough the importance of mixing knobs and handles to make something feel truly custom and well-designed. They just complement each other so well and are scaled proportionally to the size of the drawers. We also loved that the island didn’t need hardware (it has finger pulls cut into the top of the drawers) so that it could be more of a standalone piece (think like the one in the farmhouse where we did the bank of cabinets in one color/hardware, but let the island be its own thing that still worked so well).
Lighting
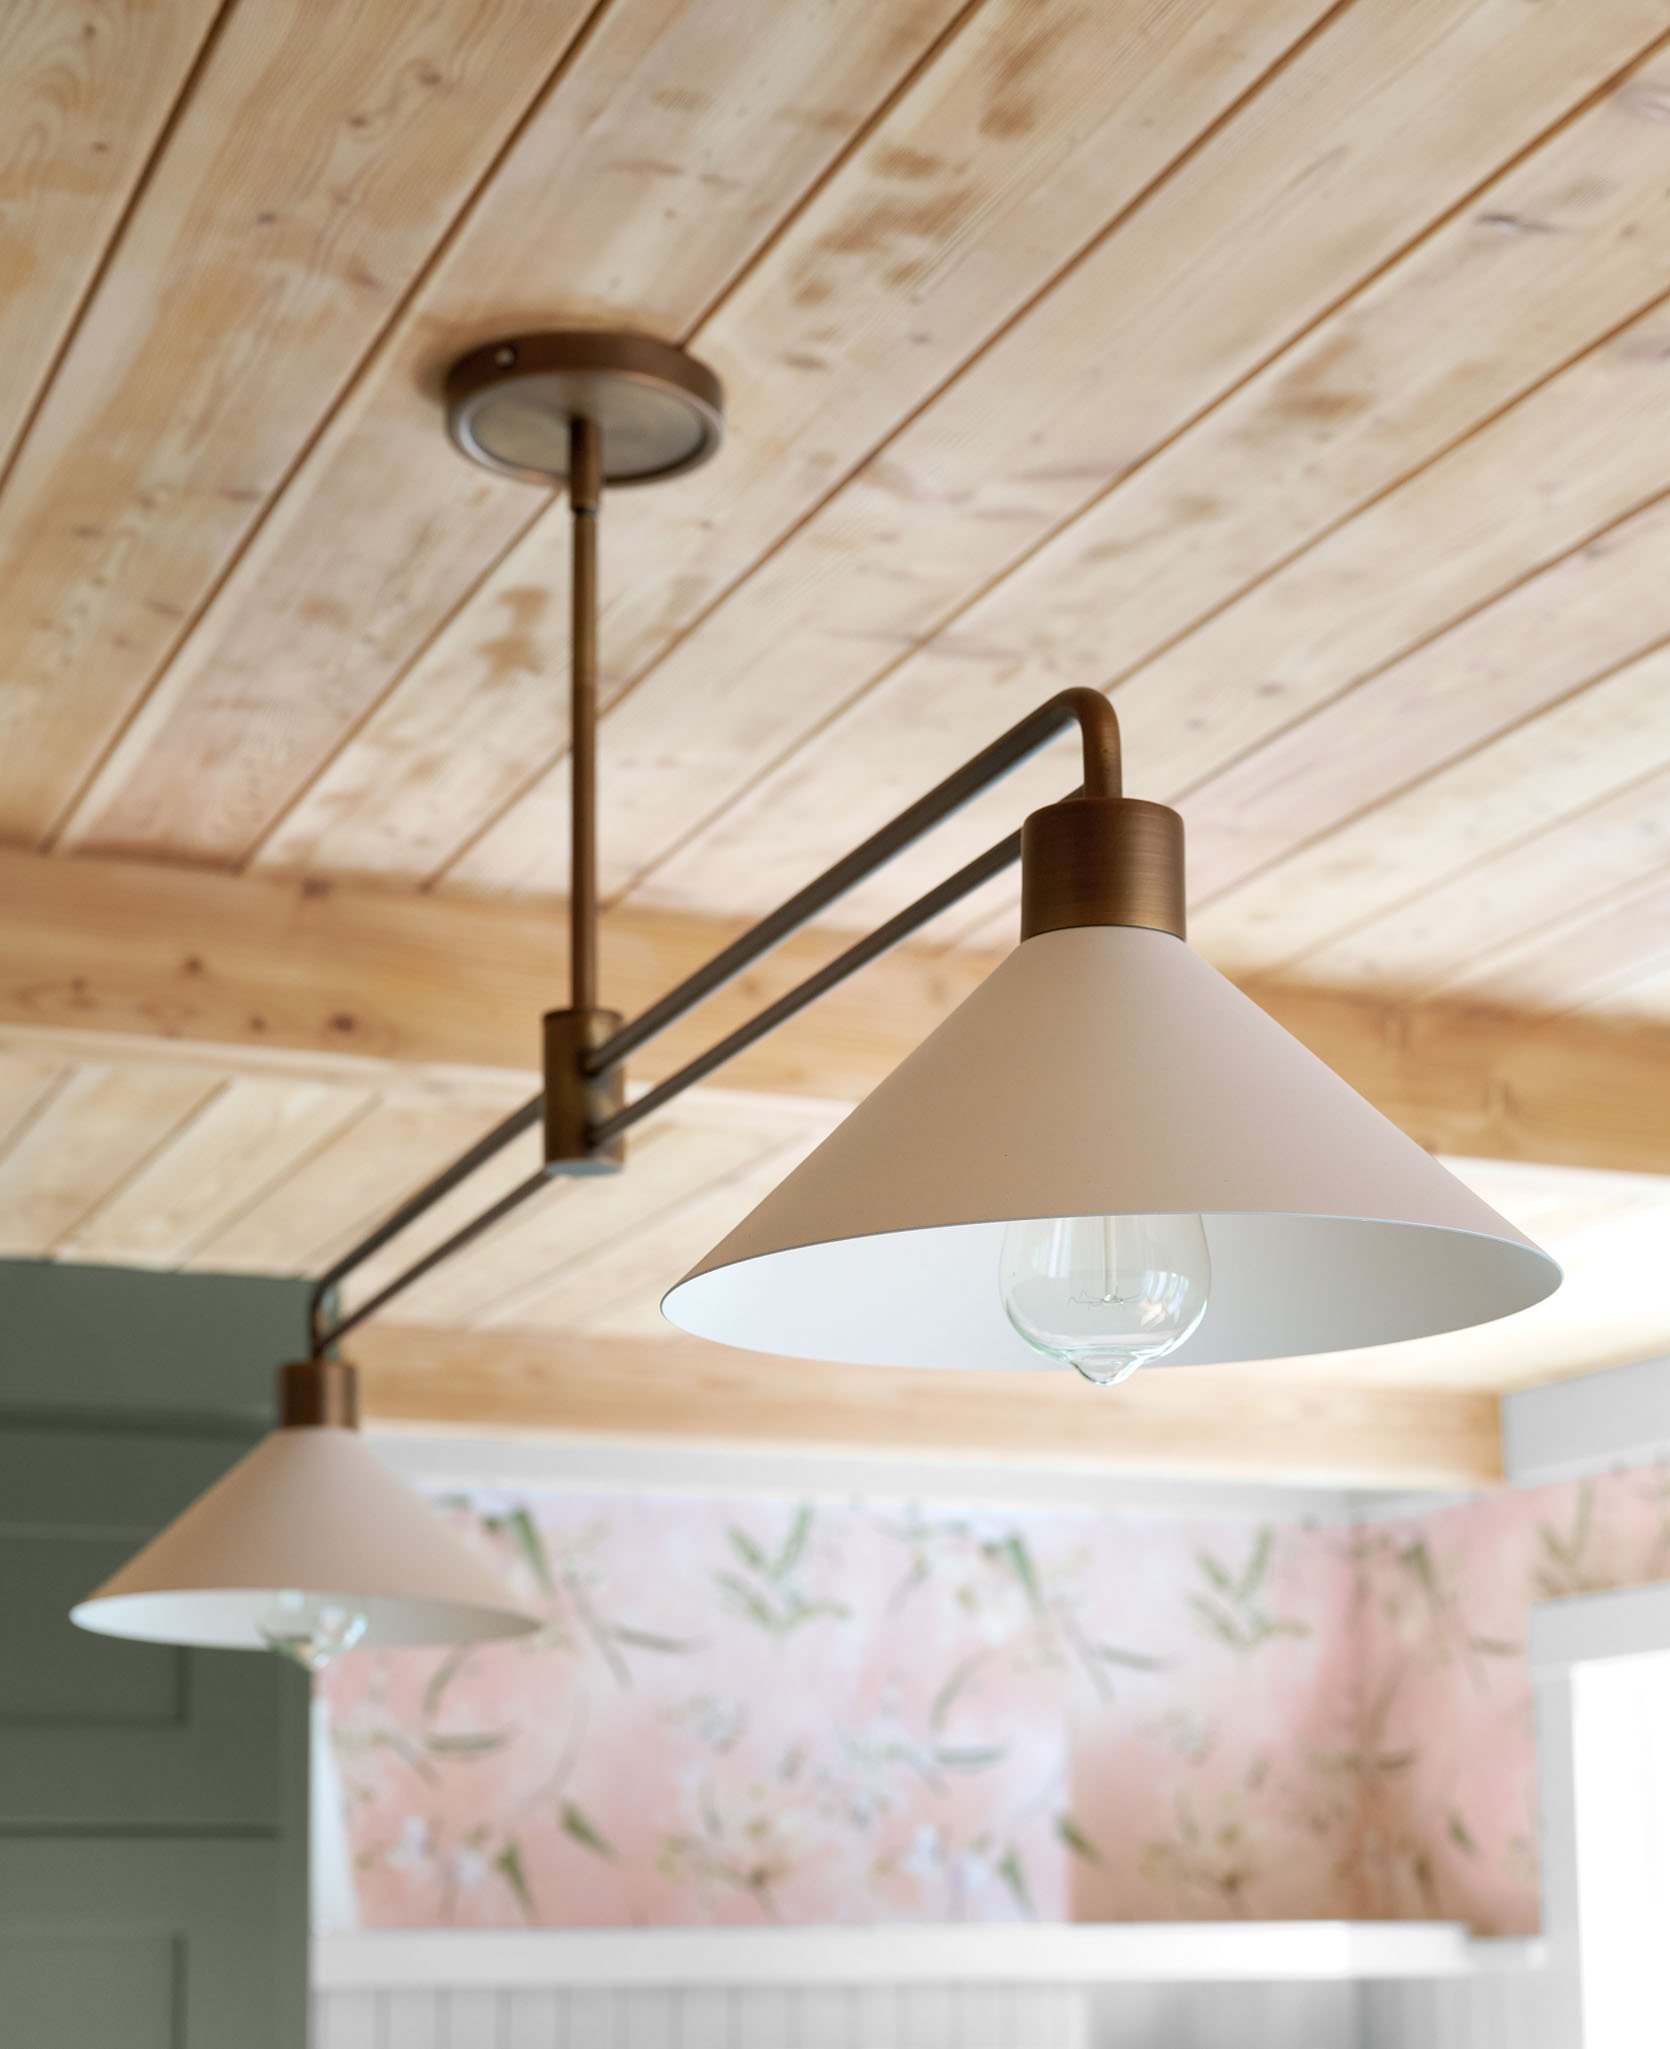
We needed to replace the lighting over the island to have more presence and be scaled better for the large island. We found this linear pendant with two shades that worked perfectly in our design plan. The white and warm brass was exactly what this needed to not be too distracting with the lower ceilings. This fixture also comes with drop options for the length and can be much higher if you have higher ceilings (the rods can screw together in certain increments to give you more length options). Because Julie has two sons that are really tall, we wanted to go above their eye-line and not be right in their face, so we dropped this pendant a foot down (plus the shades).
Open Shelving
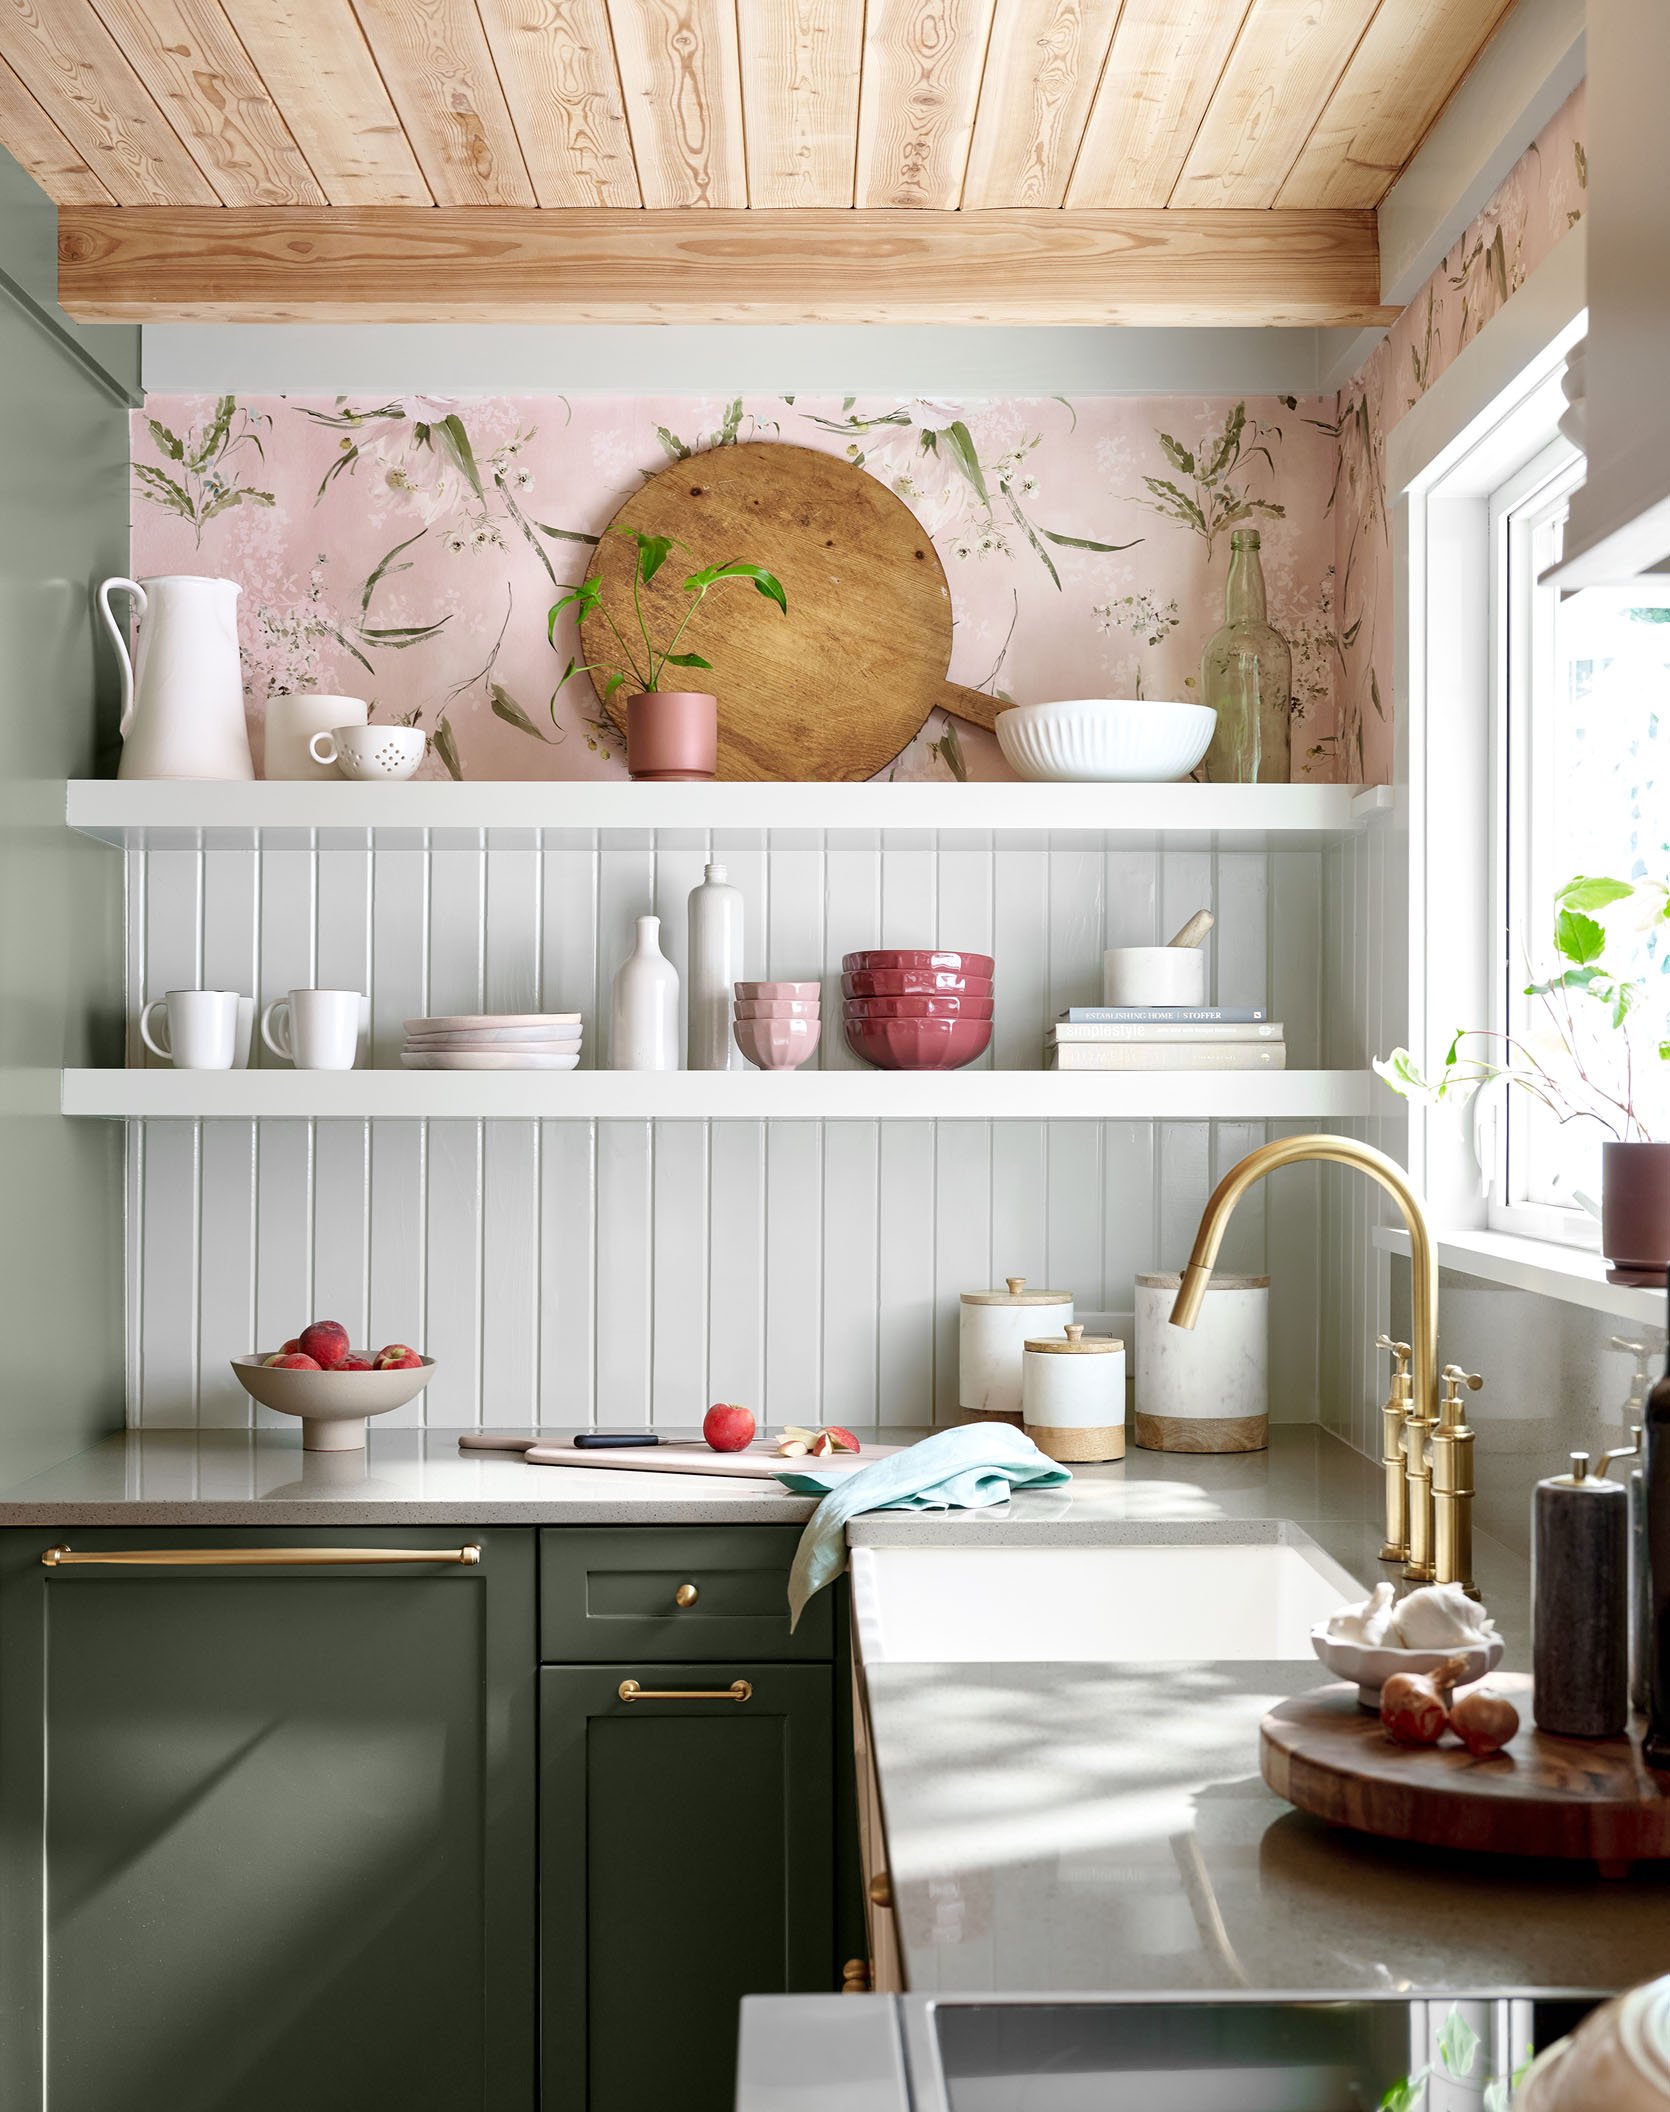
Top Shelf: Pitcher | Berry Colander Mug | Wood Board (similar) | Pink Planter (unavailable) | Serving Bowl
Bottom Shelf: Mugs | Wooden Plates | Ceramic Bottles (vintage) | Small Bowls | Large Bowls | Mortar and Pestle
Counter: Cutting Board | Canisters | Facuet | Wooden Lazy Susan | Garlic Bowl (similar) | Pepper Grinder
I get goosebumps every time I see this shot. The colors are so magical and you don’t even notice the simple stone that she already had because it works so well with the two green tones. One of our unpredicted costs was to get a stone cutter on site to take down the old backsplash that was there, drill an extra hole for our new faucet and remove part of the stone behind the range so we could slide it in further. We mixed both Julie’s pieces with a lot from Crate for the styling, keeping it warm, whimsical, and modern. Her two boys are grown (but still live with her at times) so her storage needs were far less than when they were little and she was excited to get the uppers gone and still be able to look at some pretty things. We offered to put all of her original plates and bowls up here when we left, but she didn’t want us to touch the styling so we left everything as-is (including the garlic). Julie, you were A DREAM to work with. I’ve never done a makeover with someone that was so legitimately helpful and so generous. She even gave me three of my favorite seascapes! Thank you, Julie!
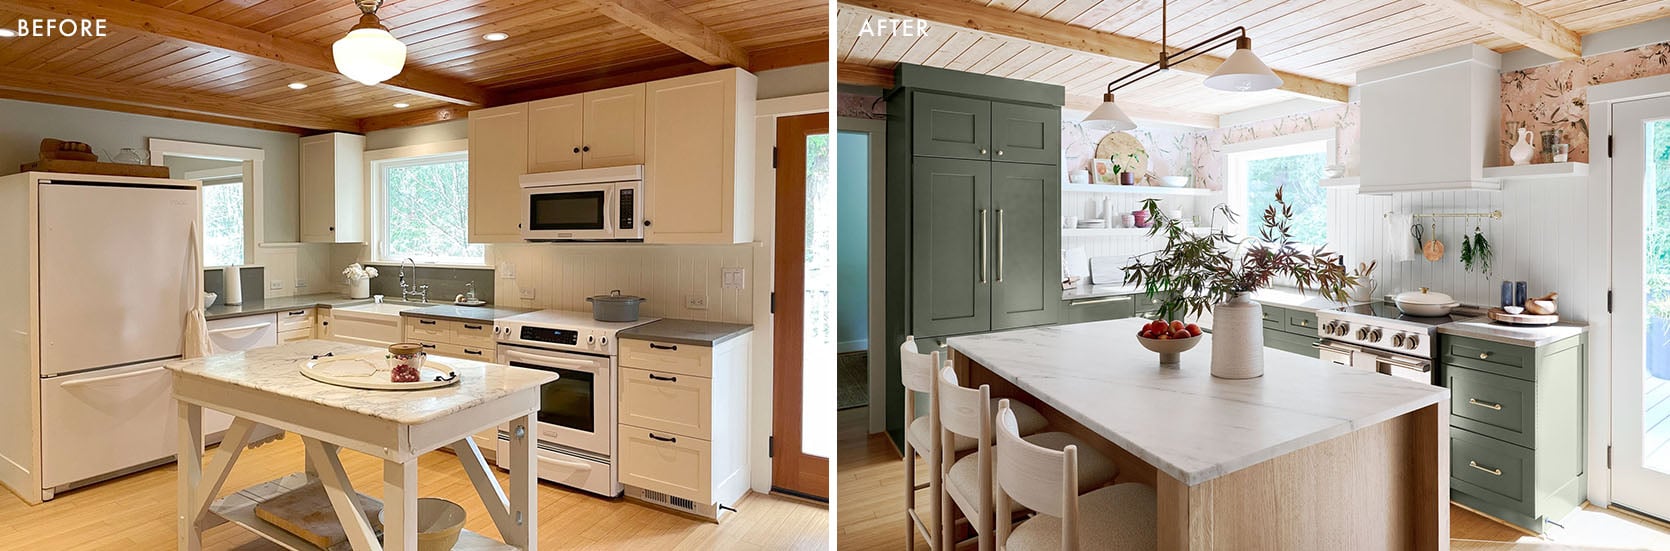
Before And Afters
And now for some dopamine-inducing before and afters in the ever-gratifying side-by-side format to see what was accomplished. I wish I could give you all an in-person tour because once you are in this kitchen, it just SINGS. The Crate & Barrel team took some video content and a lot of social so be sure to check them out on mine and Crate’s accounts so you can get a full circuit of the space (including the island).
What an incredibly fun and satisfying job this was. Crate & Barrel was so wonderful to work with, Julie was so lovely, my team killed it, and I get to stand here and give the glow of some serious collective hard work and pride. This project was such a great reminder that when you push things a bit with color and pattern, it all pays off in the end. Being in this kitchen is such a joy.

The whole room turned out just so dreamy, fresh, modern, and sweet, and with the help of the new Crate & Barrel kitchen island, also highly functional. A huge thanks to my team, Sarah Weldon for co-designing and project managing, Ken Starke as the general contractor, Emily M. and Gretchen on my team for social and production help. Crate even had Emily Bowser come up and help style to camera while I was in front of it on the day of the shoot. They all know that my favorite line is, “Many hands make light work” and in this case, I couldn’t have asked for better and more fun hands. 🙂
Thank you SO much to Crate & Barrel for sponsoring this project and post! These are the best kind of partnerships and getting to work with such a great team and brand makes it that much better.
This post was sponsored by Crate & Barrel but all words and opinions are all mine. 🙂
*Design by Emily Henderson and Sarah Weldon
**Styled by Emily Henderson and Emily Bowser
***Photos by Steven Mcdonald
THIS POST WAS ORIGINALLY PUBLISHED HERE.
