When we first found this property we reveled in the idea that there were so many outbuildings that I could experiment in, design-wise. But as our renovation of our home continued on and on, I got burnt out – the decision fatigue, the regrets, the financial drain, and the endless contractors onsite left me not wanting to touch the other buildings. These run-down buildings were the reason we wanted this property in the first place, but at times all I saw was stress and responsibility. Then this year, as I was doing my brother’s house, designing his kids’ rooms, spending his money (LOL), and decorating for their wants/needs/family, I got so excited to use some of my design energy towards myself and my kids again. It was a total juxtaposition – the river house project is high-end, heavily partnered up, more neutral, and frankly not mine. But this barn? This was a room where I could get wild and do whatever I wanted. It became what I always intended for the non-living outbuildings – a space for me to experiment creatively and flex a bit. To have fun. A design lab. We did it pretty fast, bare bones, and not necessarily budget-friendly, but the ideas hopefully are relatable and can spark some inspiration for you.
The Barn – BEFORE
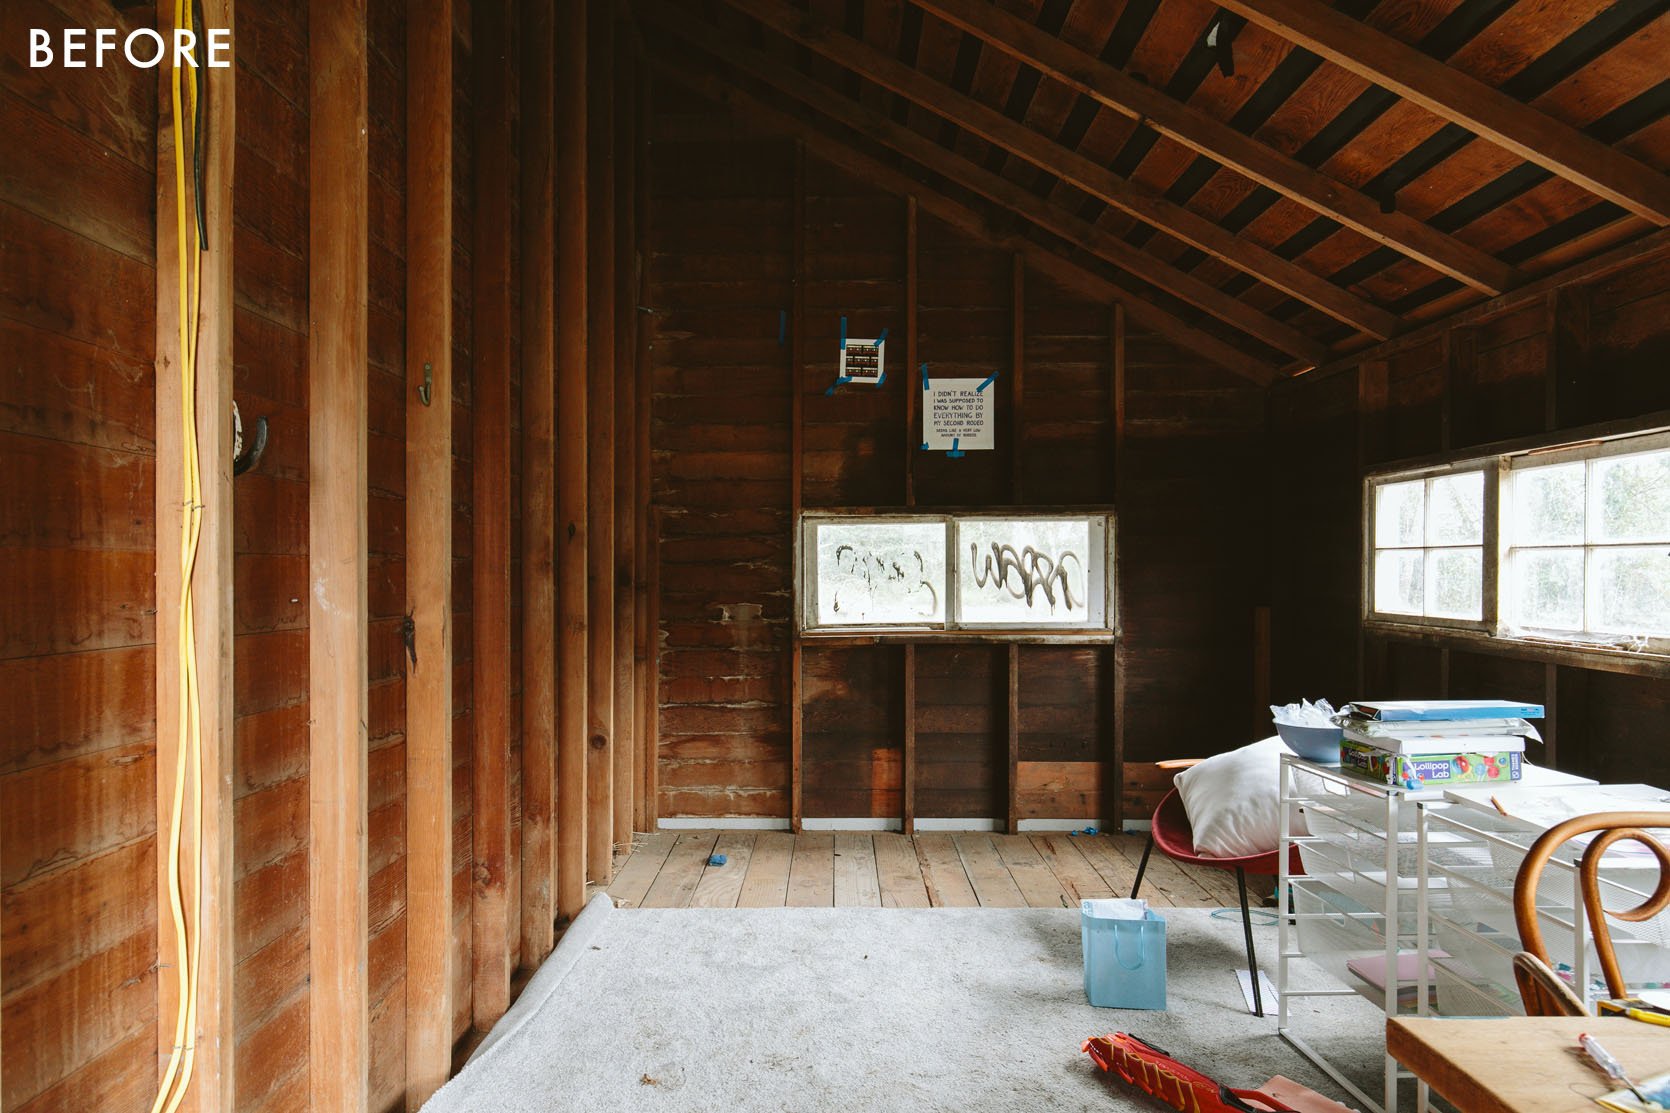
As a reminder, this had wood walls, no insulation, electricity that didn’t work, and wood floors. It was pretty filthy, had graffiti on the outside, and was full of spiders. But last summer we brought in a table and some art supplies you can see above and gave it a good cleaning so the kids could hang out in there with their friends (which they did).

But it was dark, gross, and cold. So in May, we hired JP (Sierra Custom Construction) to take it next level. We would do the bare minimum (no water or HVAC). We added basic electrical (outlets and two pendants), a little cadet heater, one bigger window, insulation, and clad the walls in pine. It was ready to go by mid-June when the kids were out of school and they spent hours out here this summer before it was fully finished. But now it is, and it’s time to show you. IF this is the first time here you can catch up on the process:
- The plan for the art barn
- How we stained a diamond pattern on the floor
- How we upholstered vintage quilts for the cushions and stools
The Art Table/Banquette

Benches | Cushions (custom) | Table | Stools (custom) | Vase | Floor Lamp
I laid it out to be as open as possible and to create two different zones (art/crafting and hang area). I wanted at least 6 kids to be able to sit around a table to work on projects so the only real way to maximize the space was to shove it at the end the way we have it. I found two sets of these L benches on Wayfair and while they added up, they fit almost perfectly. I loved that they had storage and were in pine so they just went away and matched the walls.

We reupholstered all the stools, bench seats, and back cushions in vintage quilts that I have been hoarding/collecting for years (read the post about it here). The tulip table was really the only one in existence that fit – we needed a pedestal as not to have to try to shimmy around a bunch of legs. We needed an oval to better navigate around the built-in and there were so many that were smaller or too big, but this one (from AllModern) was EXACTLY what I wanted. I also love the juxtaposition of the rustic pine with a mid-century Saarinen-style white tulip table. It fits PERFECTLY.

The light fixtures were both on the splurgier side – but perfect for the space. The white metal vintage farm pendants were purchased from Aurora Mills and the big red arch sconce from a lighting maker in Finland (that I found via 1stDibs). We intentionally placed the pendants to be centered in the room, left to right and lengthwise. I figured that for the longevity of the room that would make the most sense (instead of centering one at the end over the table just in case the whole function of the room changed). But I wanted a cool fixture over the table to draw your eye there (and provide light) so I spent HOURS on the internet looking for an arch sconce like this that could land in the center of the table. This was the only one 🙂 It’s pretty perfect (and splurgy… and came with the original Dutch wiring, despite me reminding them that I’m in America, so… I’m going to likely put a rechargeable bulb in it – yes, a huge emoji face slap on that one).


The benches have a ton of storage (and are FULL of fabric, paper, air dry clay – all our kid’s favorite stuff). Then I bought and put together that rolling pine storage drawer thing.

Wood Drawer Cart | Pine Shelf (similar) | Mason Jars | Wood Tray
Above it, I screwed to the wall a pine shelf with jars of pom poms and popsicle sticks, etc.

The kids are allowed to do any art project in here except slime (y’all I HATE SLIME) and if there are young kids (siblings of their friends) they can’t paint. Since our kids are 9 and 11 I feel ok with them doing watercolor and acrylic paints if we cover the table (or if it’s just Elliot, Charlie and I, we are just careful to clean up immediately). In a perfect world I let them do whatever they want for hours and not check on them, but I went ahead and designed this room to be so beautiful that I don’t want it to be trashed with paint. Besides, we are tackling the garage this coming year that will have a larger “shop” for all the super messy stuff. So this is for sewing, crafting, airdry clay, drawing, watercolor, decoupage, glue gunning anything, making charms or jewelry.


One of the best and weirdest perks is that our alpaca and pig pets come and visit all the time. Bert (above) will watch Birdie and I work on projects and we open the window and talk to them (and take a whiff of the pasture, lol). It’s HILARIOUS and terrifying if you aren’t prepped for it.
The Art Wall

I had the original intent to keep this room really simple EXCEPT the floor and quilts. Those were going to be my big moments, but I have so much incredible art that my kids have done or that I’ve collected over time that felt so appropriate to be in here. So I ended up turning a huge frame into a corkboard, and then I just kept going. Having pine walls iss THE BEST because I felt no guilt about nailing them up.


“Work Hard & Be Nice To People” Print | “Start With Yes” Print (unavailable) | Oversized Paint Brush
I’ve had the “Work Hard & Be Nice To People” forever (and is pretty much our family motto), and the “Start With Yes” which I love. But the new GIVE poster is a 100-year-old Red Cross antique poster from WWII. I found it in Oregon City at an antique mall and thought about it for months before I went back to buy it (it was $100 so not cheap). I love it as it is a reminder to me and the kids to, in fact, GIVE. It’s such a simple and powerful sentiment – just GIVE. Physically, financially, and through emotional support. I love it. The huge paintbrush was done by local artist Purl (who also made our coffee table and our huge pencil).

The bulletin board is full of art the kids have done (they have taken an after-school watercolor class for two years now). Elliot painted the portrait of Oscar and Buttercup when she was 5 (under the coaching of our nanny/incredible artist during Covid – shout out to Eel Costello). It’s one of my favorite things ever. The blue sun-prints on the right were also done with Eel – she did such incredible art with them during lockdown and I’m so grateful to have these pieces.

Along the top of the bulletin board are all the airdry clay creatures that my kids and their friends did this summer (Hey Clay, is our absolute favorite – it’s more expensive but it’s not sticky and just the best).

Floor Lamp | Sectional | Blanket | Bolster Pillow | White Pillow | Striped Pillow | Coffee Table (unavailable)
On the other side of the room, I hunted and hunted until I found the perfect hang time small-scale sectional (from AllModern). This came with an ottoman that I knew we couldn’t fit (so it’s in storage right now) but the scale, the size, the large corduroy fabric, the vibe (simple, 70s), and the comfort are ON POINT. It’s streamlined but so comfortable. Charlie and his friends all crowd on this and listen to Imagine Dragons and talk about how they wish they were playing Fortnight, LOL. I MIGHT even one day put a projector in here for movie nights, but for now it’s a great place for hanging, talking, and listening to music (and zero screens allowed in here). I bought that vintage IKEA table on FBMP a few years ago for $10 and it’s perfect because I don’t really care about it, but provides a place for snacks and overflow crafts (and works perfectly in the design).


I hung that vintage painting in the corner but I think it’s a bit big (and I really want to reframe it and hang it in my stairwell inside). But the colors work so well in here.

Elliot had a playdate the day that we were shooting so I asked the moms if they minded them being in the shoot and they didn’t. The girls were THRILLED to make charm keychains. TBH they spend more time in here than in the house which is what I wanted – them to have independence, free reign, and no parental supervision but in a really safe and creative environment (and out of earshot of me).


And for now, they even don’t mind if I hang out with them (TBH 9-year-old girls are awesome – so chatty, so fun, on the brink of being tweens but still such innocence).

Well, I hope you enjoyed this makeover. I really, really did. I needed an excuse to have some fun with unlimited creative freedom. I feel extremely grateful and lucky to be able to do this for my job and even luckier to have this extra space for our kids and me to be inspired in.


I look very satisfied up there, y’all. Probably because I am. This room reminded me of how much I love employing heavy doses of vintage and color, in a way that feels totally me (Scandinavian + mid-century + casual farm). Every project teaches me a lesson – some really painful. But the lesson in this one was to have more fun. Use more color. Take more risks. Easier to do that in a room that you don’t use all day every day (like a kitchen). Some risks can date spaces, or some risks don’t work and end up being a regret. It’s hard to know what will work (it does get more accurate with experience). However, I never felt nervous about this project. Zero stress. NONE. I love wood. I love white checkerboard floors with borders. I love vintage quilts and midcentury lines. I wish I could approach and execute all projects with this level of confidence and with this little fear. I wish I could feel this happy afterward:) Now… I can’t WAIT to show you the mural on the outside (I’m writing that post right now!). I might just move in:)
*Design by Emily Henderson (me!)
**Photos by Kaitlin Green
***Upholstery by ADF Upholstery
****JP Macy of Sierra Custom Construction
THIS POST WAS ORIGINALLY PUBLISHED HERE.
